ESP8266 + MQTT :如何实现 LED 灯的远程控制

MQTT 是轻量级的、灵活的物联网消息交换和数据传递协议,致力于为 IoT 开发人员实现灵活性与硬件/网络资源的平衡。
NodeMCU 是一个开源的物联网平台。它使用 Lua 语言编程。该平台基于eLua开源项目,底层使用ESP8266 sdk 0.9.5版本。
在此项目中我们将实现 NodeMCU(ESP8266) 与 EMQX Cloud 运营和维护的免费公共 MQTT 服务器远程控制 LED 灯,并使用 Arduino IDE 来对 NodeMCU ESP8266 进行编程。 EMQX Cloud 是由 EMQ 推出的安全的 MQTT 物联网云服务平台,它提供一站式运维代管、独有隔离环境的 MQTT 5.0 接入服务。
所需组件
- NodeMCU
- Arduino IDE
- LED * 1,330 Ω 电阻
- MQTTX: 优雅的跨平台 MQTT 5.0 客户端工具
- 免费的公共 MQTT 服务器
- Broker: broker.emqx.io
- TCP Port: 1883
- Websocket Port: 8083
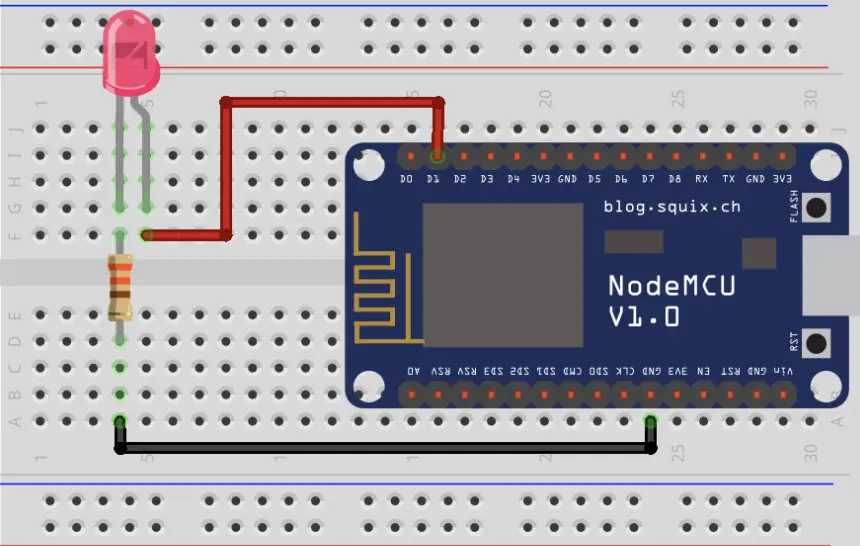
NodeMCU ESP8266 和 LED 连接图
代码编写
- 首先我们将导入 ESP8266WiFi 和 PubSubClient 库,ESP8266WiFi 库能够将 ESP8266 连接到 WiFi 网络,PubSubClient 库,使我们能够连接到 MQTT 代理并发布/订阅主题消息。
#include <ESP8266WiFi.h> #include <PubSubClient.h> - 我们将使用 NodeMCU ESP8266 的 D1 引脚来连接到 LED,实际上该引脚内部连接到 ESP8266 模块的 GPIO5。
// GPIO 5 D1 #define LED 5 - 设置 WIFI 名称和密码,以及 MQTT Broker 连接地址和端口
// WiFi const char *ssid = "mousse"; // Enter your WiFi name const char *password = "qweqweqwe"; // Enter WiFi password // MQTT Broker const char *mqtt_broker = "broker.emqx.io"; const char *topic = "esp8266/led"; const char *mqtt_username = "emqx"; const char *mqtt_password = "public"; const int mqtt_port = 1883; - 我们打开了一个串行连接,以便于输出程序的结果并且连接到WiFi网络
// Set software serial baud to 115200; Serial.begin(115200); // connecting to a WiFi network WiFi.begin(ssid, password); while (WiFi.status() != WL_CONNECTED) { delay(500); Serial.println("Connecting to WiFi.."); } - 我们将设置 MQTT Broker,同时将连接信息打印到串口监视器上
//connecting to a mqtt broker client.setServer(mqtt_broker, mqtt_port); client.setCallback(callback); while (!client.connected()) { String client_id = "esp8266-client-"; client_id += String(WiFi.macAddress()); Serial.printf("The client %s connects to the public mqtt broker\n", client_id.c_str()); if (client.connect(client_id.c_str(), mqtt_username, mqtt_password)) { Serial.println("Public emqx mqtt broker connected"); } else { Serial.print("failed with state "); Serial.print(client.state()); delay(2000); } } - MQTT Broker 连接成功后,ESP8266 将向 MQTT Broker 发布和订阅消息
// publish and subscribe client.publish(topic, "hello emqx"); client.subscribe(topic); - 编写回调函数,从串行监视器读取下发指令并且控制 LED 的开和关
void callback(char *topic, byte *payload, unsigned int length) { Serial.print("Message arrived in topic: "); Serial.println(topic); Serial.print("Message: "); String message; for (int i = 0; i < length; i++) { message += (char) payload[i]; // Convert *byte to string } Serial.print(message); if (message == "on" && !ledState) { digitalWrite(LED, HIGH); // Turn on the LED ledState = true; } if (message == "off" && ledState) { digitalWrite(LED, LOW); // Turn off the LED ledState = false; } Serial.println(); Serial.println("-----------------------"); } - 完整代码
#include <ESP8266WiFi.h>
#include <PubSubClient.h>

// GPIO 5 D1
#define LED 5

// WiFi
const char *ssid = "mousse"; // Enter your WiFi name
const char *password = "qweqweqwe";  // Enter WiFi password

// MQTT Broker
const char *mqtt_broker = "broker.emqx.io";
const char *topic = "esp8266/led";
const char *mqtt_username = "emqx";
const char *mqtt_password = "public";
const int mqtt_port = 1883;

bool ledState = false;

WiFiClient espClient;
PubSubClient client(espClient);

void setup() {
    // Set software serial baud to 115200;
    Serial.begin(115200);
    delay(1000); // Delay for stability

    // Connecting to a WiFi network
    WiFi.begin(ssid, password);
    while (WiFi.status() != WL_CONNECTED) {
        delay(500);
        Serial.println("Connecting to WiFi...");
    }
    Serial.println("Connected to the WiFi network");

    // Setting LED pin as output
    pinMode(LED, OUTPUT);
    digitalWrite(LED, LOW);  // Turn off the LED initially

    // Connecting to an MQTT broker
    client.setServer(mqtt_broker, mqtt_port);
    client.setCallback(callback);
    while (!client.connected()) {
        String client_id = "esp8266-client-";
        client_id += String(WiFi.macAddress());
        Serial.printf("The client %s connects to the public MQTT broker\n", client_id.c_str());
        if (client.connect(client_id.c_str(), mqtt_username, mqtt_password)) {
            Serial.println("Public EMQX MQTT broker connected");
        } else {
            Serial.print("Failed with state ");
            Serial.print(client.state());
            delay(2000);
        }
    }

    // Publish and subscribe
    client.publish(topic, "hello emqx");
    client.subscribe(topic);
}

void callback(char *topic, byte *payload, unsigned int length) {
    Serial.print("Message arrived in topic: ");
    Serial.println(topic);
    Serial.print("Message: ");
    String message;
    for (int i = 0; i < length; i++) {
        message += (char) payload[i];  // Convert *byte to string
    }
    Serial.print(message);
    if (message == "on" && !ledState) {
        digitalWrite(LED, HIGH);  // Turn on the LED
        ledState = true;
    }
    if (message == "off" && ledState) {
        digitalWrite(LED, LOW); // Turn off the LED
        ledState = false;
    }
    Serial.println();
    Serial.println("-----------------------");
}

void loop() {
    client.loop();
    delay(100); // Delay for a short period in each loop iteration
}
连接和测试
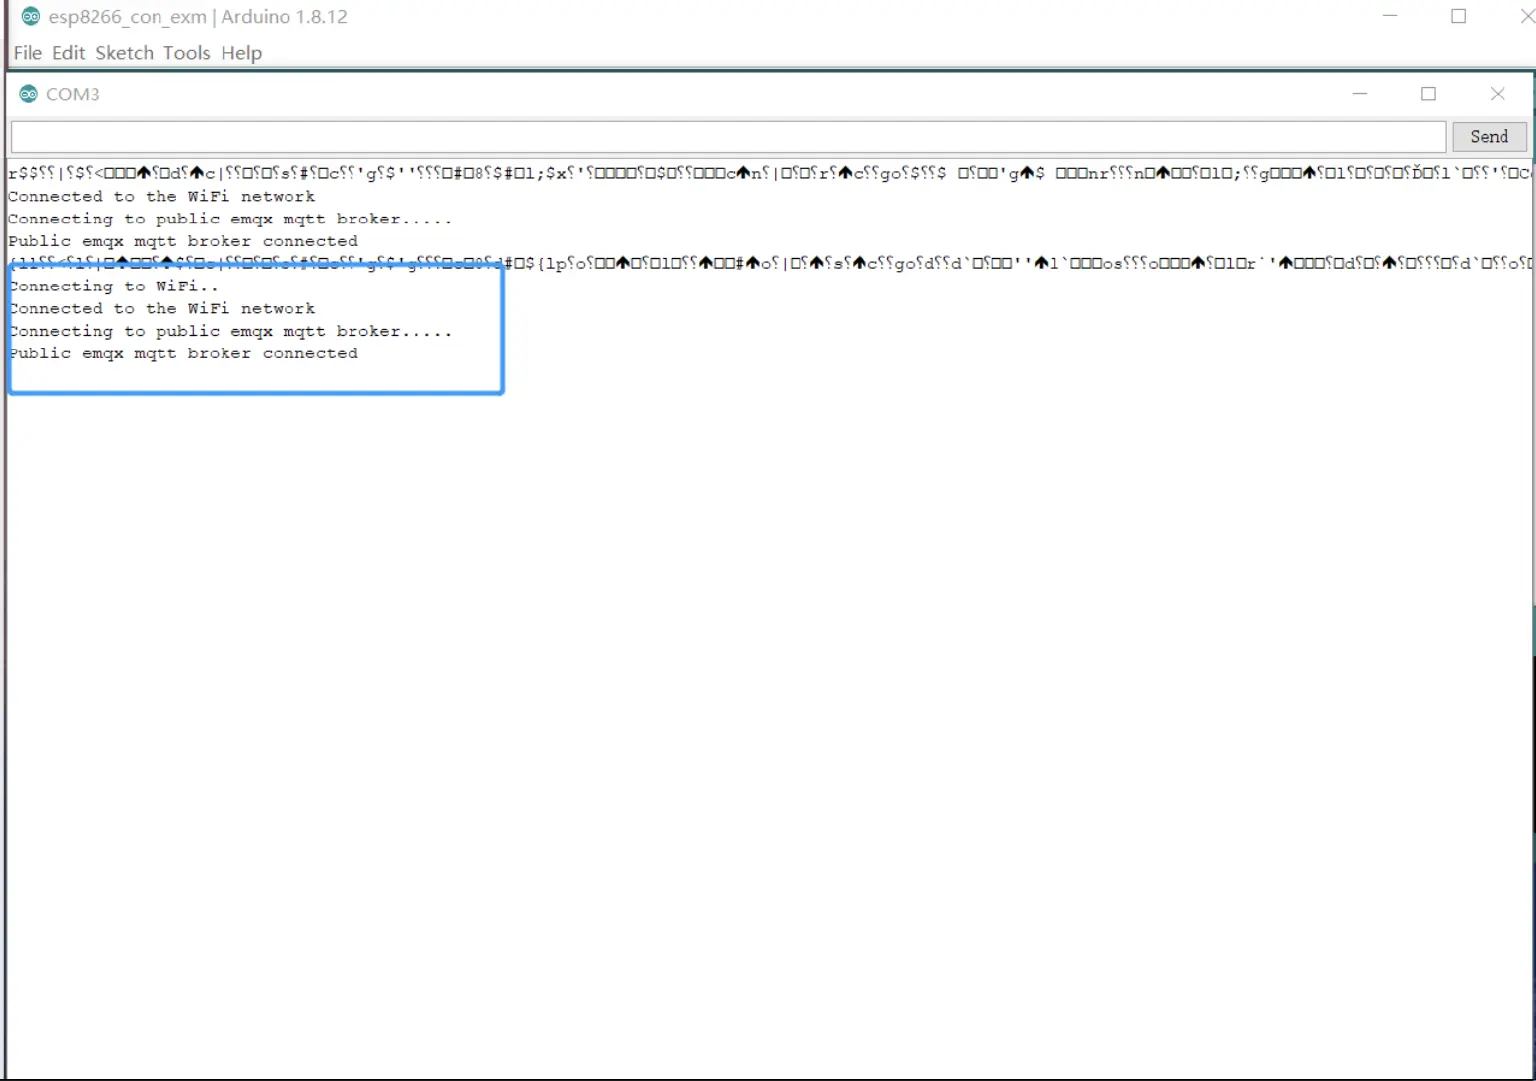
- 请使用 Arduino IDE 将完整代码上传 ESP8266,并打开串口监视器
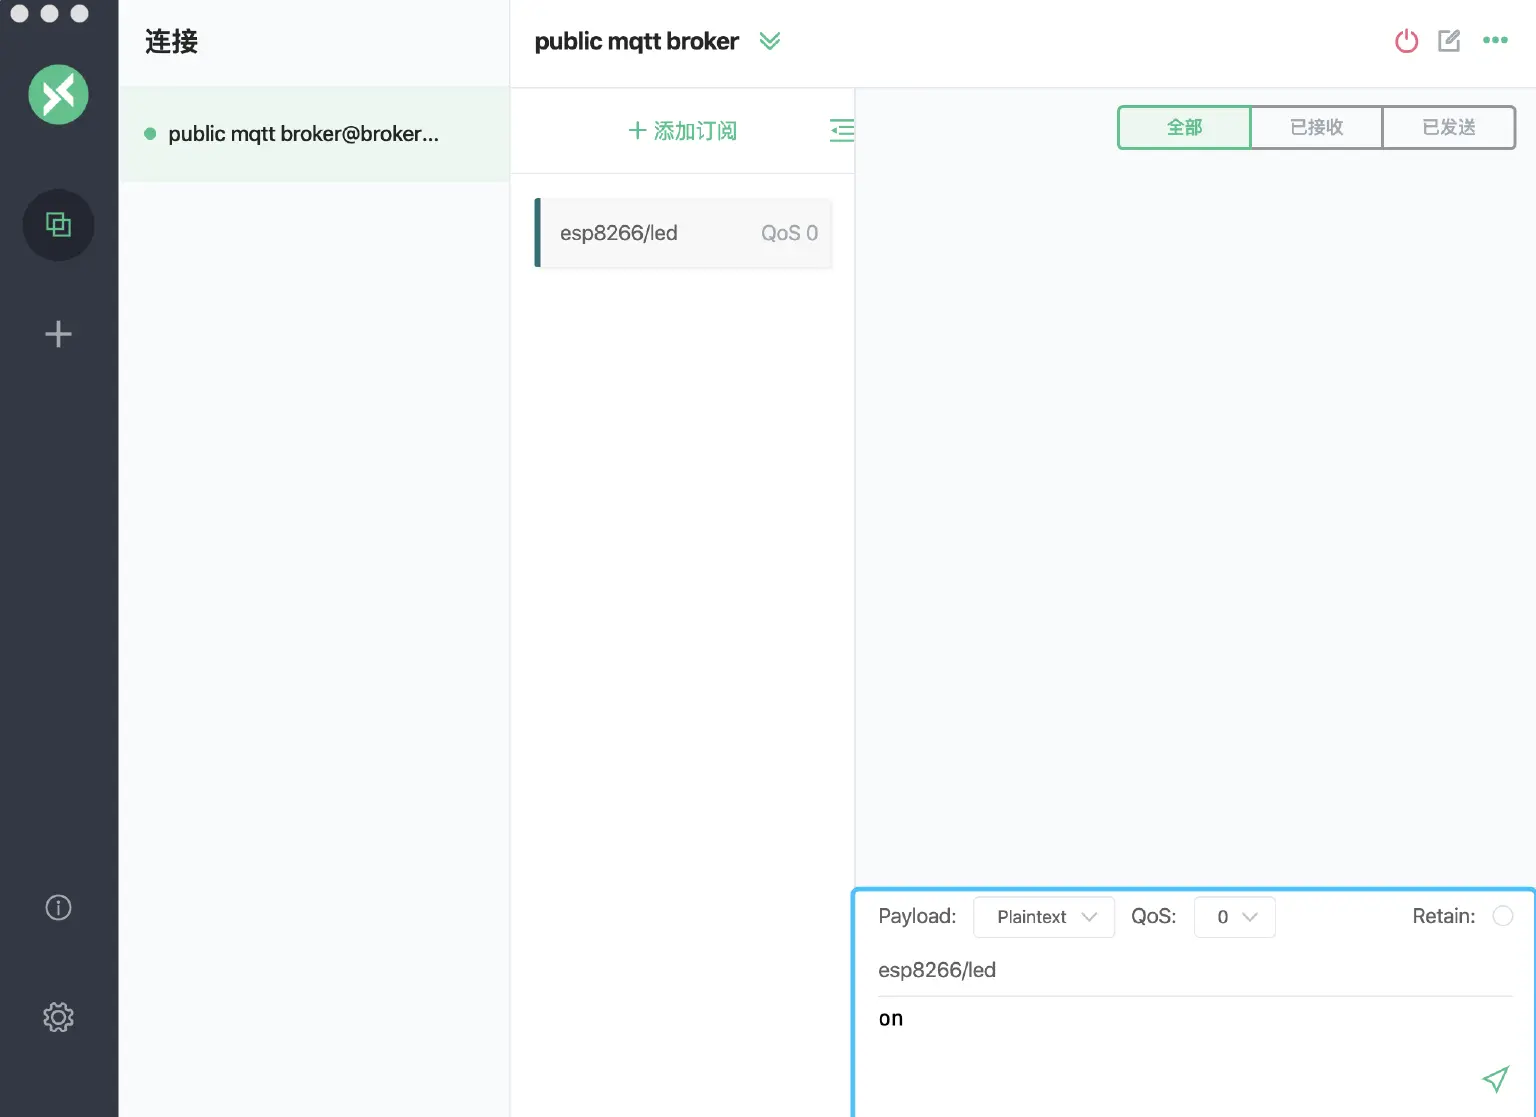
- 建立 MQTTX 客户端 与 MQTT Broker 连接, 并向 ESP8266 发送指令
总结
至此,我们成功实现 NodeMCU ESP8266 与免费公共 MQTT 服务器远程控制 LED 灯,该例子只是描述了一个简单的场景,在实际的项目中,需要更加安全的连接方式,以及对物联网数据进行持久化等功能。
更多物联网开发及 ESP8266 相关文章,敬请关注后续推送。
免费试用 EMQX Cloud
开始试用 →全托管的云原生 MQTT 消息服务