MQTT in Python with Paho Client: Beginner's Guide 2026
Introduction
MQTT (Message Queuing Telemetry Transport) is a lightweight messaging protocol designed for IoT (Internet of Things) applications using a publish/subscribe model. It ensures reliable, real-time communication with minimal code and bandwidth, making it ideal for resource-constrained devices and low-bandwidth networks. Industries like IoT, mobile internet, Internet of Vehicles (IoV), and power systems widely adopt MQTT for its efficiency.
Python, a versatile and easy-to-use programming language, is a top choice for IoT development thanks to its extensive libraries and ability to process large datasets. From smart home automation to environmental monitoring and industrial control, Python shines in IoT projects. Its compatibility with microcontrollers further enhances its value for building IoT solutions.
In this guide, we’ll explore how to use the Paho MQTT Python Client to connect an MQTT client to an MQTT broker, subscribe to topics, publish messages, and more in a Python project. Whether you're new to using MQTT in Python or looking to refine your skills, this tutorial has you covered.
Why Choose Paho MQTT Python Client?
The Paho MQTT Python Client supports MQTT versions 5.0, 3.1.1, and 3.1, and requires Python 3.7 or later (paho-mqtt 2.x). It offers a simple client class and helper functions to easily publish one-off messages to an MQTT server.
Here’s why it’s the top MQTT client library for Python users:
- Open-source and backed by a strong community.
- Simple API for connecting, publishing, and subscribing to MQTT messages.
- Supports multiple security options.
- Regularly updated to keep pace with IoT advancements.
Interested in other Python MQTT libraries? Check out our Python MQTT Clients: A 2026 Selection Guide for more details.
Real-World Use Cases for MQTT in Python
Python MQTT powers many IoT solutions. For instance, you can use it to:
- Monitor temperature in a smart home and send alerts via MQTT.
- Control industrial machines remotely with real-time data.
- Track vehicle locations in an IoV system using a Python MQTT client.
These examples show how lightweight and versatile MQTT can be with Python.
Python MQTT Project Preparation
Python Version
This project uses Python 3.12. To check your Python version, run this command:
$ python3 --version
Python 3.12.x
Install The Paho MQTT Client
paho-mqtt released version 2.0.0 in February 2024, which introduced a new callback API. This article uses paho-mqtt 2.x by default, since 1.x is no longer actively maintained and its CallbackAPIVersion.VERSION1 callbacks are scheduled to be removed in paho-mqtt 3.0.
Install the latest paho-mqtt (2.x) using Pip:
pip3 install paho-mqtt
If you have to stay on 1.x for legacy reasons, pin the version explicitly:
pip3 install "paho-mqtt<2.0.0"
For the full list of breaking changes in 2.0.0, see the migration guide: https://eclipse.dev/paho/files/paho.mqtt.python/html/migrations.html. Throughout this article, any callback or constructor that differs between 1.x and 2.x is annotated inline so 1.x users can follow along.
If you need help installing Pip, please refer to the official documentation at https://pip.pypa.io/en/stable/installation/. This resource provides detailed instructions for installing Pip on different operating systems and environments.
Set Up an MQTT Broker for Python MQTT
You'll need an MQTT broker to communicate and test your code. We suggest EMQX Serverless, a fully managed MQTT service. It connects millions of IoT devices, integrates with databases and systems, and deploys in minutes across 20+ regions on AWS, Google Cloud, or Azure for fast, global access.
For simplicity, this guide uses a free public MQTT broker:
- Server:
broker.emqx.io - TCP Port:
1883 - WebSocket Port:
8083 - SSL/TLS Port:
8883 - Secure WebSocket Port:
8084
Paho MQTT Python Client Usage
Import the Paho MQTT Client
from paho.mqtt import client as mqtt_client
Create an MQTT Connection
TCP Connection
To set up an MQTT connection, define the broker address, port, and topic. You can also create a random client ID using Python’s random.randint function:
broker = 'broker.emqx.io'
port = 1883
topic = "python/mqtt"
client_id = f'python-mqtt-{random.randint(0, 1000)}'
# username = 'emqx'
# password = 'public'
To learn more, please check out the blog How to Set Parameters When Establishing an MQTT Connection.
Next, we need to write the on_connect callback function for connecting the broker. This function is called after the client has successfully connected, and we can check the connection status using the reason_code parameter. Typically, we'll also create a client object that connects to broker.emqx.io at the same time.
def connect_mqtt():
    def on_connect(client, userdata, flags, reason_code, properties):
        # For paho-mqtt 1.x, the signature is: on_connect(client, userdata, flags, rc)
        if reason_code == 0:
            print("Connected to MQTT Broker!")
        else:
            print(f"Failed to connect, return code {reason_code}")

    client = mqtt_client.Client(
        client_id=client_id,
        callback_api_version=mqtt_client.CallbackAPIVersion.VERSION2,
    )
    # For paho-mqtt 1.x, instantiate without callback_api_version:
    # client = mqtt_client.Client(client_id)

    # client.username_pw_set(username, password)
    client.on_connect = on_connect
    client.connect(broker, port)
    return client
Migrating from 1.x? In paho-mqtt 2.x, the first positional argument of
Client()iscallback_api_version, notclient_id. The old 1.x idiomClient(client_id)will therefore raiseValueError: Unsupported callback API versionbecause the string gets bound to the wrong parameter. Either passclient_idas a keyword argument (as shown above) or setcallback_api_versionexplicitly. The default value isCallbackAPIVersion.VERSION1, which still works but emits aDeprecationWarningand will be removed in paho-mqtt 3.0.
Auto Reconnect
Automatic reconnection in MQTT client libraries ensures reliable communication between devices and brokers in unstable network conditions without human intervention. It allows clients to resume publishing or subscribing to topics when the network connection is interrupted, or the broker is temporarily unavailable, making it crucial for high-reliability applications such as automotive systems and medical equipment.
The good news is that Paho already handles this for you. With reconnect_on_failure=True (the default since 1.x), both loop_forever() and loop_start() will automatically reconnect using an exponential back-off whenever the connection drops unexpectedly. You only need to tune the back-off if the defaults don't fit your scenario:
# Tune the reconnect back-off (defaults are min=1s, max=120s).
client.reconnect_delay_set(min_delay=1, max_delay=60)

# Keep on_disconnect for observability only — do NOT call time.sleep()
# or client.reconnect() here. Callbacks run on the network thread, and
# blocking it would stall the very loop that performs the reconnect.
def on_disconnect(client, userdata, disconnect_flags, reason_code, properties):
    # For paho-mqtt 1.x, the signature is: on_disconnect(client, userdata, rc)
    logging.info("Disconnected with reason code: %s", reason_code)

client.on_disconnect = on_disconnect

# loop_forever() (foreground) or loop_start() (background thread) will
# drive both the I/O loop and the reconnect logic.
client.loop_forever()
If you really need fully custom reconnect logic (for example, escalating to an alert system after N failures), schedule it from a separate thread or async task rather than blocking inside on_disconnect. A reference implementation is available at GitHub.
TLS/SSL
Using TLS in MQTT can ensure the confidentiality and integrity of information, preventing information leakage and tampering. TLS authentication can be classified into one-way authentication and two-way authentication.
One-way authentication
The one-way authentication code for the Paho MQTT client is as follows:
def connect_mqtt():
    client = mqtt_client.Client(
        client_id=client_id,
        callback_api_version=mqtt_client.CallbackAPIVersion.VERSION2,
    )
    client.tls_set(ca_certs='./broker.emqx.io-ca.crt')
Two-way authentication
The two-way authentication code for the Paho MQTT client is as follows:
def connect_mqtt():
    client = mqtt_client.Client(
        client_id=client_id,
        callback_api_version=mqtt_client.CallbackAPIVersion.VERSION2,
    )
    client.tls_set(
        ca_certs='./server-ca.crt',
        certfile='./client.crt',
        keyfile='./client.key'
    )
Publish Messages
Create a while loop that sends a message every second to the topic /python/mqtt, and exits the loop after sending five messages.
def publish(client):
    msg_count = 1
    while True:
        time.sleep(1)
        msg = f"messages: {msg_count}"
        result = client.publish(topic, msg)
        # result: [0, 1]
        status = result[0]
        if status == 0:
            print(f"Sent `{msg}` to topic `{topic}`")
        else:
            print(f"Failed to send message to topic {topic}")
        msg_count += 1
        if msg_count > 5:
            break
Subscribe
Create the message callback function on_message, triggered once the client receives messages from the MQTT Broker. We will print the subscribed topic's name and the received messages within this function.
def subscribe(client: mqtt_client.Client):
    def on_message(client, userdata, msg):
        print(f"Received `{msg.payload.decode()}` from `{msg.topic}` topic")

    client.subscribe(topic)
    client.on_message = on_message
Complete Python MQTT Code Examples
Publishing MQTT Messages
# python 3.12

import random
import time

from paho.mqtt import client as mqtt_client


broker = 'broker.emqx.io'
port = 1883
topic = "python/mqtt"
# Generate a Client ID with the publish prefix.
client_id = f'publish-{random.randint(0, 1000)}'
# username = 'emqx'
# password = 'public'

def connect_mqtt():
    def on_connect(client, userdata, flags, reason_code, properties):
        if reason_code == 0:
            print("Connected to MQTT Broker!")
        else:
            print(f"Failed to connect, return code {reason_code}")

    client = mqtt_client.Client(
        client_id=client_id,
        callback_api_version=mqtt_client.CallbackAPIVersion.VERSION2,
    )
    # client.username_pw_set(username, password)
    client.on_connect = on_connect
    client.connect(broker, port)
    return client


def publish(client):
    msg_count = 1
    while True:
        time.sleep(1)
        msg = f"messages: {msg_count}"
        result = client.publish(topic, msg)
        # result: [0, 1]
        status = result[0]
        if status == 0:
            print(f"Sent `{msg}` to topic `{topic}`")
        else:
            print(f"Failed to send message to topic {topic}")
        msg_count += 1
        if msg_count > 5:
            break


def run():
    client = connect_mqtt()
    client.loop_start()
    publish(client)
    client.loop_stop()
    client.disconnect()


if __name__ == '__main__':
    run()
MQTT Subscription
# python 3.12

import random

from paho.mqtt import client as mqtt_client


broker = 'broker.emqx.io'
port = 1883
topic = "python/mqtt"
# Generate a Client ID with the subscribe prefix.
client_id = f'subscribe-{random.randint(0, 100)}'
# username = 'emqx'
# password = 'public'


def connect_mqtt() -> mqtt_client:
    def on_connect(client, userdata, flags, reason_code, properties):
        if reason_code == 0:
            print("Connected to MQTT Broker!")
        else:
            print(f"Failed to connect, return code {reason_code}")

    client = mqtt_client.Client(
        client_id=client_id,
        callback_api_version=mqtt_client.CallbackAPIVersion.VERSION2,
    )
    # client.username_pw_set(username, password)
    client.on_connect = on_connect
    client.connect(broker, port)
    return client


def subscribe(client: mqtt_client):
    def on_message(client, userdata, msg):
        print(f"Received `{msg.payload.decode()}` from `{msg.topic}` topic")

    client.subscribe(topic)
    client.on_message = on_message


def run():
    client = connect_mqtt()
    subscribe(client)
    client.loop_forever()


if __name__ == '__main__':
    run()
Testing Your Python MQTT Demo
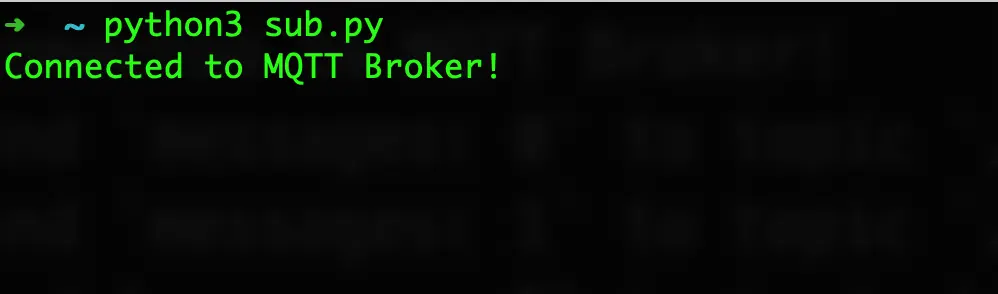
Subscribe
Running the MQTT subscription script sub.py, we will see the client successfully connected and started waiting for the publisher to publish messages.
python3 sub.py
Publish Messages
Running the MQTT message publishing script pub.py, we will see the client successfully connected and publish five messages. At the same time, sub.py will also successfully receive five messages.
python3 pub.py

Q&A About Paho MQTT Python Client
What happens if loop_stop() is not executed?
The loop_stop() method is used to halt the MQTT client's message loop and to mark it as stopped. This process ensures a graceful shutdown of the client, reducing the risk of issues such as message loss, connection leaks, and abnormal program behavior.
For instance, in the pub.py example provided in this article, deleting the client.loop_stop() method may result in the sub.py script receiving fewer than five messages.
Therefore, it is crucial to properly use the loop_stop() method to ensure the MQTT client's graceful shutdown and prevent any potential problems that may occur due to unclosed connections.
What is connect_async() used for?
While we used connect() in our basic examples, you might notice connect_async() in the Paho documentation. What is it used for? connect_async() is helpful in scenarios where an MQTT client application requires long-term MQTT connections or needs to keep the MQTT connection alive in the background without blocking the main thread. Its primary use cases are:
- Long-term MQTT connections:
connect_async()helps prevent stalling or unresponsiveness of an MQTT client application that requires long-term MQTT connections, such as in industrial applications. - Unstable Network Connectivity: Using
connect_async()in environments with uncertain or unstable network connectivity improves the application's reliability by establishing connections with retries and delays. - Frequent Connections and Parameter Changes: When connection parameters or other settings change frequently,
connect_async()helps improve application responsiveness and prevents stutters. - Background MQTT connections:
connect_async()allows establishing MQTT connections in the background while the application runs other processes, enhancing the user experience.
Best Practices for Python MQTT Applications
To build robust, efficient, and secure IoT applications using Python and MQTT, it's crucial to go beyond the basic functionalities and adhere to several best practices. These recommendations will help you avoid common pitfalls and ensure your IoT solutions remain stable and reliable.
1. Unique Client IDs Are Crucial
In the MQTT protocol, the Client ID (client_id) serves as the unique identifier for each device connecting to an MQTT Broker. Its uniqueness is paramount for proper session management and message delivery.
- Why Unique? If two clients connect with the same
client_idto the Broker, the newly connected client will force the older one to disconnect. This can lead to frequent disconnections for your devices or critical messages not being delivered correctly. - How to Generate Unique IDs: Avoid using hardcoded fixed IDs or simple random numbers. The best practice involves combining elements like device serial numbers, MAC addresses, or UUIDs (Universally Unique Identifiers). Python's
uuidmodule is excellent for generating globally unique IDs.import uuid # ... other imports and setup # Generate a unique client ID based on the MAC address client_id = f'python-mqtt-client-{uuid.getnode()}' # Or generate a random UUID # client_id = f'python-mqtt-client-{uuid.uuid4()}'
2. Resource Management and Graceful Shutdown
When your Python MQTT client no longer needs an active connection, it's vital to gracefully close the connection and release resources. This prevents resource leaks and ensures the Broker correctly manages client states.
- Use
client.disconnect(): When your application exits or no longer requires the MQTT connection, call this method to actively disconnect. This sends a DISCONNECT packet to the Broker, signaling a normal client exit. - Use
client.loop_stop(): If you're running the message loop in a background thread (e.g., usingclient.loop_start()), make sure to callclient.loop_stop()before your program exits. This stops the thread, preventing your program from hanging or resources from being unreleased.def run(): client = connect_mqtt() client.loop_start() publish(client) # When the program ends or the connection is no longer needed client.loop_stop() # Stop the message loop thread client.disconnect() # Disconnect from the Broker print("MQTT Client disconnected gracefully.") if __name__ == '__main__': run()
3. Robust Error Handling and Logging
In any production-ready application, error handling and logging are indispensable. They help you trace application behavior, diagnose issues, and monitor system health.
- Handle
on_connectreturn codes: Thereason_codeparameter in theon_connectcallback indicates the connection result. Always check this value to understand why a connection might have failed.def on_connect(client, userdata, flags, reason_code, properties): if reason_code == 0: print("Connected to MQTT Broker!") # Potentially subscribe to topics here after successful connection else: print(f"Failed to connect, return code {reason_code}. Please check connection parameters and network.") # Implement retry logic or exit if critical - Catch Exceptions: Network issues, authentication failures, or malformed messages can raise exceptions. Use
try-exceptblocks around network operations (likeclient.connect(),client.publish()) to gracefully handle these.try: client.connect(broker, port) except Exception as e: print(f"Connection attempt failed: {e}") # Log the error, perhaps retry after a delay - Utilize Python's
loggingmodule: Configure theloggingmodule to record the Paho MQTT client's activities, including connection status, publish/subscribe events, and any errors or warnings. This is crucial for debugging and monitoring in production environments.import logging # ... other imports # Configure logging (e.g., to console and/or file) logging.basicConfig(level=logging.INFO, format='%(asctime)s - %(levelname)s - %(message)s') # In your on_connect function: def on_connect(client, userdata, flags, reason_code, properties): if reason_code == 0: logging.info("Connected to MQTT Broker!") else: logging.error(f"Failed to connect, return code {reason_code}") # In your publish function: def publish(client): # ... status = result[0] if status == 0: logging.info(f"Sent `{msg}` to topic `{topic}`") else: logging.warning(f"Failed to send message to topic {topic}. Status: {status}") # ...
4. Understand and Use Quality of Service (QoS) Levels
QoS (Quality of Service) is a fundamental concept in MQTT, dictating the guarantee of message delivery. Understanding and correctly setting QoS levels is vital for message reliability.
- QoS 0 (At most once): Messages are delivered with no guarantee of arrival. It's fast and light but messages might be lost. Ideal for sensor readings where occasional loss is acceptable (e.g., temperature every few seconds).
client.publish(topic, msg, qos=0)
- QoS 1 (At least once): Messages are guaranteed to arrive, but duplicates are possible. The sender re-sends until an acknowledgment is received. Suitable for important data where duplicates can be handled (e.g., control commands).
client.publish(topic, msg, qos=1)
- QoS 2 (Exactly once): Messages are guaranteed to arrive exactly once. This is the slowest but most reliable. Use for critical operations where no loss or duplication is tolerated (e.g., financial transactions).
client.publish(topic, msg, qos=2)
Best Practice: Choose the lowest QoS level that meets your application's reliability requirements to optimize bandwidth and latency.
5. Leverage Retained Messages and Last Will and Testament (LWT)
These two MQTT features significantly enhance the robustness and user experience of your applications.
- Retained Messages:
- Purpose: A retained message is a regular MQTT message that the Broker stores for a specific topic. When a new subscriber subscribes to that topic, they immediately receive the last retained message. This is perfect for broadcasting the current state (e.g., "door is open/closed", "light is on/off").
- Usage: Publish a message with the
retain=Trueflag.client.publish("home/door/status", "open", qos=1, retain=True) # Any new subscriber to "home/door/status" will immediately get "open"
- Last Will and Testament (LWT):
- Purpose: LWT, also known as "Will Message," is a message the Broker automatically publishes on a predefined topic if a client disconnects unexpectedly (e.g., power loss, network failure) without sending a DISCONNECT packet. It's like a digital "last will" for your device's status.
- Usage: Set the LWT message when connecting.
# Set the Last Will message
client.will_set("device/status", "offline", qos=1, retain=True)
# Then connect as usual
client.connect(broker, port)
If this client disconnects unexpectedly, "offline" will be published to "device/status".
6. Data Serialization and Deserialization
When sending data over MQTT, it's typically sent as byte arrays. For complex data, you'll need to serialize it before publishing and deserialize it upon reception.
- JSON is King: JSON (JavaScript Object Notation) is a widely preferred format due to its human-readability and ease of parsing in Python.
- Example:
import json

# --- Publisher Side ---
data_to_send = {"sensor_id": "temp_001", "temperature": 25.5, "unit": "C"}
json_payload = json.dumps(data_to_send) # Serialize Python dict to JSON string
client.publish(topic, json_payload, qos=1)

# --- Subscriber Side ---
def on_message(client, userdata, msg):
    try:
        received_data = json.loads(msg.payload.decode('utf-8')) # Decode bytes, then deserialize JSON
        print(f"Received JSON data from `{msg.topic}`: {received_data}")
        print(f"Temperature: {received_data['temperature']} {received_data['unit']}")
    except json.JSONDecodeError:
        print(f"Received non-JSON message from `{msg.topic}`: {msg.payload.decode()}")
    except KeyError as e:
        print(f"Missing key in JSON payload: {e}")
7. Security (TLS/SSL and Authentication)
While the article touches on TLS/SSL, it's worth re-emphasizing its importance alongside authentication.
- Always Use TLS/SSL: For any sensitive data or production environment, always use TLS/SSL (
client.tls_set()) to encrypt communication between your client and the Broker. Unencrypted MQTT is vulnerable to eavesdropping. - Implement Authentication: Most public brokers (and all production brokers) require username and password authentication (
client.username_pw_set()). Never use default or empty credentials.# Ensure you uncomment and set these for real applications username = 'your_mqtt_username' password = 'your_mqtt_password' client.username_pw_set(username, password)
By integrating these best practices into your Python MQTT projects, you'll build more robust, maintainable, and secure IoT applications.
Summary
This guide walked you through using the Paho MQTT client to connect to a free public MQTT broker. You’ve set up a connection, sent messages with publish(), and received them with subscribe().
To dive deeper into MQTT protocol features and advanced application development, be sure to check out the MQTT Guide: Beginner to Advanced series provided by EMQ.
Related resources:
- Mastering MQTT: The Ultimate Beginner's Guide for 2026
- MQTT Broker: How It Works, Popular Options, and Quickstart
- Free MQTT Broker: Exploring Options and Choosing the Right Solution
- Python MQTT Clients: A 2026 Selection Guide
- How to Use MQTT in The Django Project
- How to use MQTT in Flask
- How to Use MQTT on Raspberry Pi with Paho Python Client