One-Click Deploying EMQX MQTT Broker on GCP Using Terraform

Introduction
MQTT is a lightweight messaging protocol commonly used in IoT (Internet of Things) applications to enable communication between devices. As a popular open-source MQTT broker, EMQX provides high scalability, reliability, and security for MQTT messaging.
By using Terraform, a widespread Infrastructure as Code (IaC) tool, you can automate the deployment of EMQX MQTT Broker on GCP, making it easy to set up and manage your MQTT infrastructure.
This blog will provide a step-by-step guide on how to set up a GCP project, create a service account, and write a Terraform configuration file to deploy EMQX MQTT Broker.
Prerequisites
Before you start, prepare the following:
- A Google Cloud Platform account
- The Google Cloud SDK installed on your local machine
- Terraform installed on your local machine
- A basic understanding of GCP, Terraform, and MQTT
Set Up the GCP Environment
Follow the steps below to set up the GCP environment:
- Create a new GCP project or use an existing one.
- Enable the required APIs (Compute Engine API) for your project.
- Create a service account for Terraform with the required permissions. A Compute Engine Admin role is recommended.
- Download the JSON key file
Deploy EMQX on GCP Using Terraform
Configure Terraform
Configure the GCP provider in your Terraform code and authenticate using the service account key file.
provider "google" {
  credentials = file("<PATH-TO-KEY-FILE>")
  project     = "<PROJECT-ID>"
  region      = "<REGION>"
  zone        = "<ZONE>"
}
Configure Network
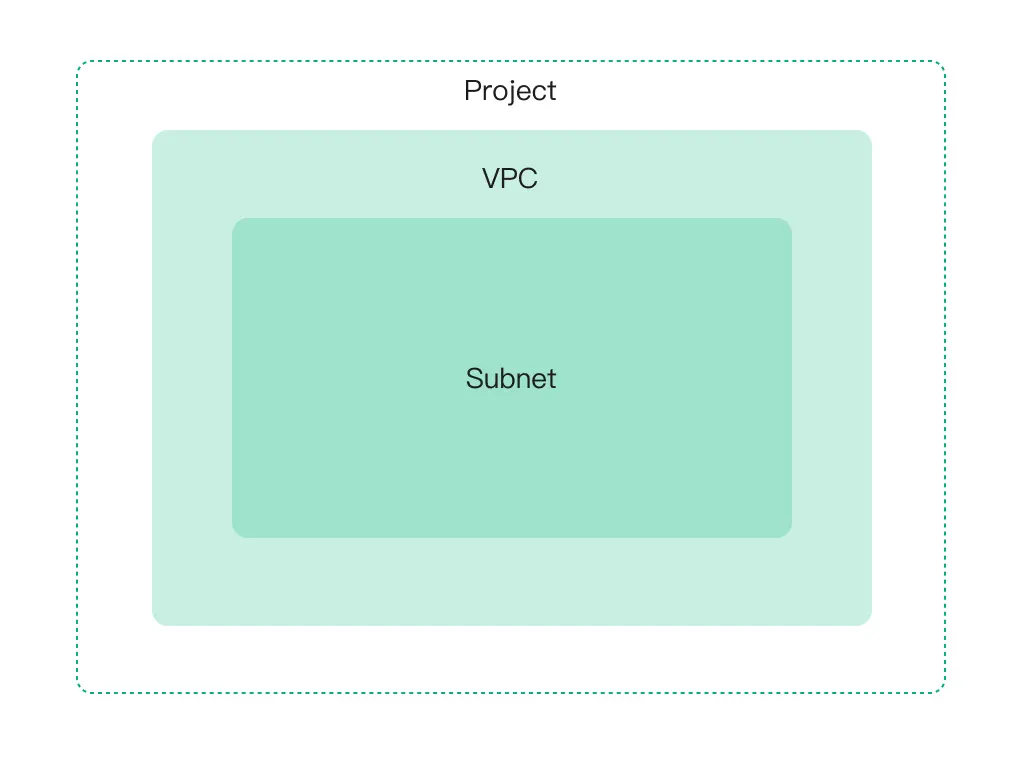
This step requires understanding of three essential terms related to GCP: project, VPC, and subnets. These terms are defined as follows:
- A project is a top-level organizational unit in GCP that contains all the resources.
- A VPC is a private network defined within a GCP project, allowing you to create and manage your IP addresses, subnets, and routing tables.
- Subnets are a way to divide a VPC network into smaller, more manageable parts. They can allocate IP addresses to specific resources and define different network segments.
The relationship between them can be illustrated as below:
Create a VPC Network
We need to create a VPC network to provide connectivity for your network-related resources, including:
- Compute Engine virtual machine (VM) instances
- Container Engine containers
- App Engine Flex services
- Other network-related resources
resource "google_compute_network" "vnet" {
  project                 = "<PROJECT>"
  name                    = "<NAME>"
  auto_create_subnetworks = false
}
Create a Subnet in VPC
Each VPC network is subdivided into subnets, and we need a subnet.
resource "google_compute_subnetwork" "sn" {
  name          = "<NAME>"
  ip_cidr_range = cidrsubnet(var.address_space, 8, 1)

  region  = var.region
  network = google_compute_network.vnet.id
}
Create a Firewall Rule
Each network has its firewall controlling access to and from the instances. All traffic to instances, even from other instances, is blocked by the firewall unless firewall rules are created to allow it.
The ports defines some ports related to MQTT, for example, "1883", "8883", "8083," and "8084”.
resource "google_compute_firewall" "fw" {
  name          = "<NAME>"
  network       = google_compute_network.vnet.name
  source_ranges = ["0.0.0.0/0"]

  allow {
    protocol = "icmp"
  }

  allow {
    protocol = "tcp"
    ports    = "<PORTS>"
  }
}
Configure EMQX Cluster
Provide a VM Instance for Each EMQX Node
Virtual machine instances can deploy applications, run services, or perform computing tasks.
In the following example, We create a google_compute_instance resource named example-instance, specifying the name, machine_type, boot_disk, and network_interface attributes.
resource "google_compute_instance" "example" {
  name         = "example-instance"
  machine_type = "n1-standard-1"

  boot_disk {
    initialize_params {
      image = ""ubuntu-os-cloud/ubuntu-2004-lts""
    }
  }

  network_interface {
    network = google_compute_network.example.name
    subnetwork = google_compute_subnetwork.example.name
    access_config {
      // Ephemeral external IP
    }
  }
}
Initiate EMQX Nodes
Initialize each EMQX node after the VM instance is created. First, you must initialize and copy the init.sh to each one. Then download the EMQX package and execute the init.sh you’ve copied at each node. Finally, start EMQX separately.
resource "null_resource" "init" {
  depends_on = [google_compute_instance.example]

  count = "<INSTANCE-COUNT>"
  connection {
    type        = "ssh"
    host        = "<HOST-LIST>"
    user        = "ubuntu"
    private_key = "<YOUR-PRIVATE-KEY>"
  }

  # config init script
  provisioner "file" {
    content = templatefile("${path.module}/scripts/init.sh", { local_ip = <PRIVATE-IPS>[count.index],
      emqx_lic = <EMQX-LICENSE>, emqx_ca = <EMQX-CA> emqx_cert = <EMQX-CERT>, emqx_key = <PRIVATE-KEY> })
    destination = "/tmp/init.sh"
  }

  # download EMQX package
  provisioner "remote-exec" {
    inline = [
      "curl -L --max-redirs -1 -o /tmp/emqx.zip <EMQX-PACKAGE-URL>"
    ]
  }

  # init system
  provisioner "remote-exec" {
    inline = [
      "chmod +x /tmp/init.sh",
      "/tmp/init.sh",
      "sudo mv /tmp/emqx <HOME>",
    ]
  }

  # start EMQX
  provisioner "remote-exec" {
    inline = [
      "sudo <HOME>/bin/emqx start"
    ]
  }
}
Join the EMQX Node to Make a Cluster
Randomly select a node from the EMQX cluster, and join the other nodes individually.
resource "null_resource" "emqx_cluster" {
  depends_on = [null_resource.init]

  count = "<INSTANCE-COUNT>-1"

  connection {
    type        = "ssh"
    host        = <OTHERS>[count.index % <OTHERS>]
    user        = "ubuntu"
    private_key = "<YOUR-PRIVATE-KEY>"
  }

  provisioner "remote-exec" {
    inline = [
      "/home/ubuntu/emqx/bin/emqx_ctl cluster join emqx@${local.another_emqx}"
    ]
  }
}
Configure Load Balance
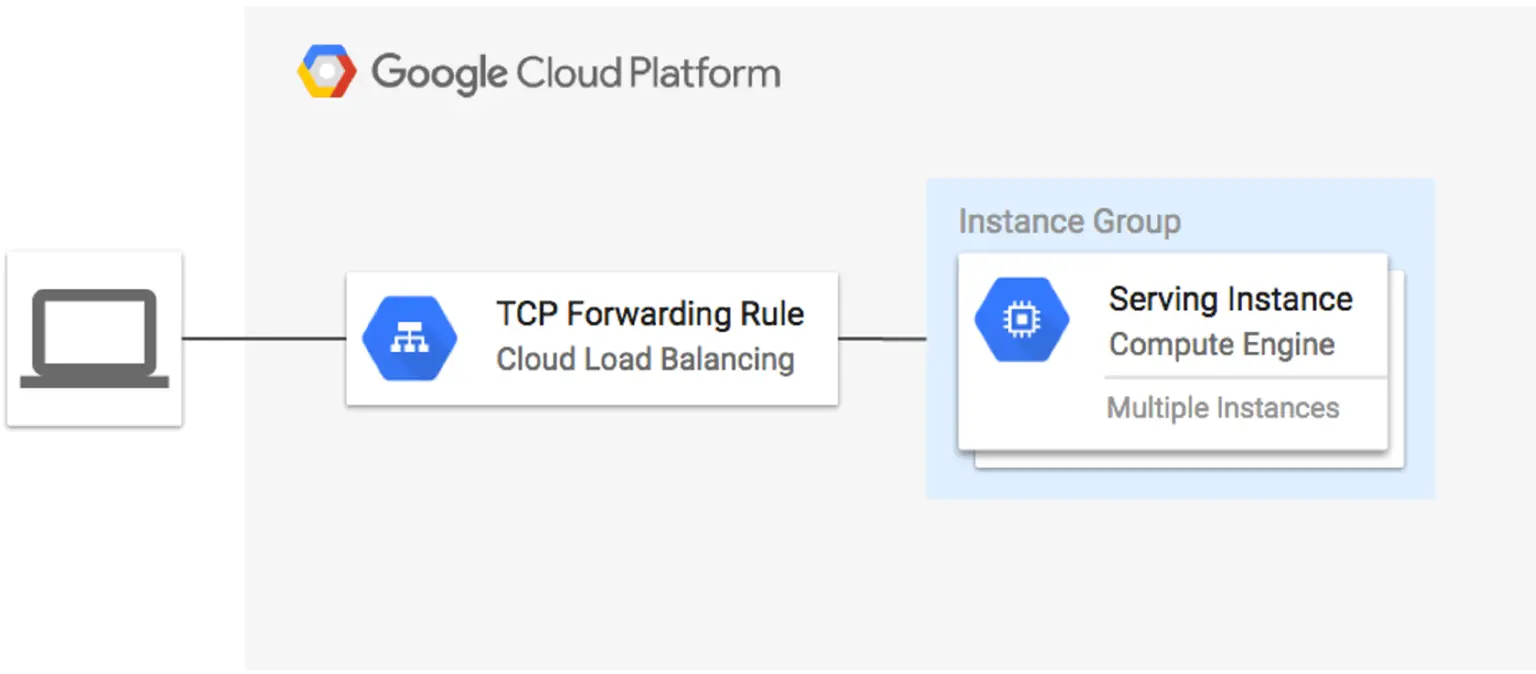
In this example:
- We create a google_compute_http_health_check resource to configure the health check settings.
- We create a google_compute_target_pool resource, which refers to the instance group and the health check.
- We create a google_compute_forwarding_rule resource, which sets the forwarding rule for incoming traffic on port 1883 to be routed to the target pool.
- We could add more google_compute_forwarding_rule` for ports "8883", "8083", "8084" and "18083"
resource "google_compute_http_health_check" "example" {
  name               = "example-health-check"
  check_interval_sec = 30
  timeout_sec        = 5
  port         = 8081
  request_path = "/status"
}

resource "google_compute_target_pool" "example" {
  name = "example-target-pool"

  instances = [
    google_compute_instance_group.example.self_link
  ]

  health_checks = [
    google_compute_http_health_check.example.name
  ]
}

resource "google_compute_forwarding_rule" "example-1883" {
  name       = "example-forwarding-rule"
  target     = google_compute_target_pool.example.self_link
  port_range = "1883"
  ip_protocol = "TCP"
}

resource "google_compute_forwarding_rule" "example-8883" {
  ...
}
Initialize and Apply Terraform
terraform init
terraform plan
terraform apply
After applying successfully, it will output the following:
Outputs:
loadbalancer_ip = ${loadbalancer_ip}
tls_ca = <sensitive>
tls_cert = <sensitive>
tls_key = <sensitive>
You can access different services over corresponding ports.
Dashboard: ${loadbalancer_ip}:18083
MQTT: ${loadbalancer_ip}:1883
MQTTS: ${loadbalancer_ip}:8883
WS: ${loadbalancer_public_ip}:8083
WSS: ${loadbalancer_public_ip}:8084
Conclusion
Deploying EMQX on GCP using Terraform streamlines the management of your IoT infrastructure, allowing you to focus on building applications that leverage the power of connected devices. Following the steps outlined in this blog post, you can easily set up a scalable and reliable MQTT broker on GCP to support your IoT projects.
Reference:
Github Repo: https://github.com/emqx/deploy-emqx-to-gcp-with-terraform/