Navigating Change: A Comprehensive Guide to Migrating from CloudMQTT to EMQX
CloudMQTT offers managed Mosquitto servers in the cloud, providing various MQTT plans suitable for hobbyists and small-scale production deployments. However, with CloudMQTT's impending closure, users are seeking a migration plan to ensure uninterrupted MQTT services through a managed solution. While CloudMQTT suggests CloudAMQP as an alternative, it may not be the best fit for MQTT users due to differences in protocol design.
In contrast, the EMQX Platform stands out by offering users flexible plans that cater to their evolving needs. Built specifically for IoT applications, the EMQX Platform provides a seamless migration path for CloudMQTT users, emphasizing its rich features and adaptable plans. With EMQX, users can expect a robust and reliable MQTT solution tailored to their IoT messaging requirements, ensuring a smooth transition and long-term assurance.
Pre-Migration Essentials: Getting Ready for EMQX
To smoothly transition your IoT deployment from CloudMQTT to the EMQX platform, please follow the migration plan outlined below:
- Evaluate Current Usage and Requirements: Begin by assessing your CloudMQTT specifications and settings to help in selecting the appropriate EMQX platform plan.
- Select the Right EMQX Platform Plan: The EMQX platform offers multiple plans:
- Serverless Plan: Provides a secure and scalable MQTT service billed based on usage, with complete freedom within the free quota. Supports up to 1000 sessions.
- Dedicated Plan: Deployed in an independent cloud environment, this MQTT cluster service supports advanced features such as real-time data processing, data persistence, message distribution, and VPC peering (private network). It is highly available and high-performance, making it the best choice for production environments.
- BYOC (Bring Your Own Cloud): Seamlessly integrates the EMQX MQTT server with your existing systems, keeping your data secure in your cloud and managed with EMQ's expertise.
For more details, please refer to our Product Plan documentation.
- Register and Configure Your EMQX Platform Account: Register for an EMQ account and choose the plan that best suits your needs. Then, create a new deployment in the EMQX Platform console, which will serve as the central point for MQTT client connections. You can follow the step-by-step instructions in our Creating a Deployment documentation.
- Migrate Your Custom Domain: With the Dedicated Plan, you can seamlessly migrate your CloudMQTT deployment to the EMQX Platform without requiring clients to update their settings. This makes migration effortless. For detailed instructions on how to bind a domain name, please refer to our documentation on How to Bind a Domain Name.
- Migrate Security and Authentication Settings: On the EMQX platform, reconfigure your security settings to mirror those in CloudMQTT, including creating client credentials or certificates and configuring authorization rules.
- For Serverless Deployment, we provide default encrypted ports for connections (MQTTS and WSS).
- For the Dedicated Plan, we support custom TLS/SSL configurations, as detailed in our TLS/SSL Configuration Documentation.
- Additionally, for client authentication and authorization, we offer tutorials to guide you through the process as outlined in our Client Authentication Documentation and Client Authorization Documentation.
- Update MQTT Client Configurations: Adjust MQTT clients to connect to the new EMQX Platform Deployment by updating the MQTT connection address, port, and authentication details. Ensure that all devices and applications acting as MQTT clients can connect to the new environment. If your devices were previously connected via a custom domain, you can directly point the domain to the connection address provided by the new EMQX Dedicated Plan, simplifying the client update process.
- Test and Validate Migration Configurations: Before going live, thoroughly test your configurations to ensure client connectivity and communication are functioning correctly. We recommend using MQTTX to simulate temperature and humidity data reporting, or any other MQTT client.
- Technical Support Assistance: If you encounter any issues during the migration process, you can reach out to our technical support team by sending an email to cloud-support@emqx.io or by submitting a ticket. Our Ticket Submission Guide provides detailed assistance.
See It in Action: Migrating to EMQX Made Simple
Add User & ACL Rule in CloudMQTT
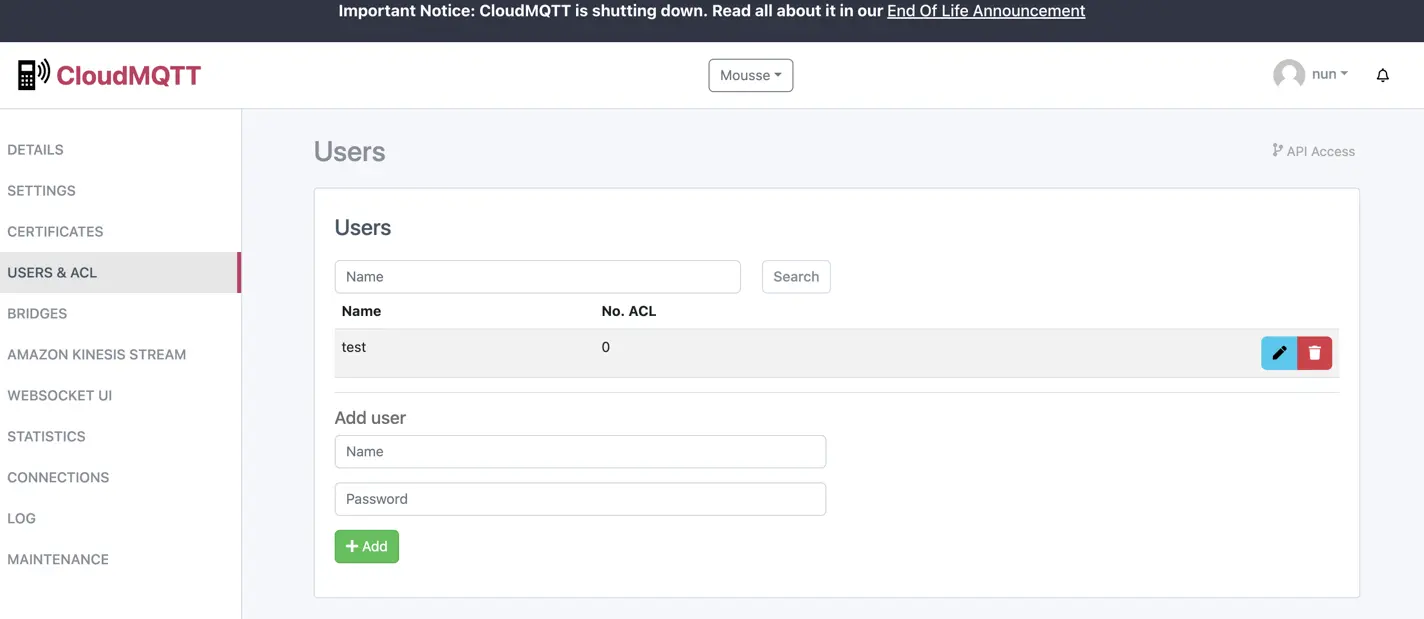
Username and Password Configuration: For this example, we used test/test.
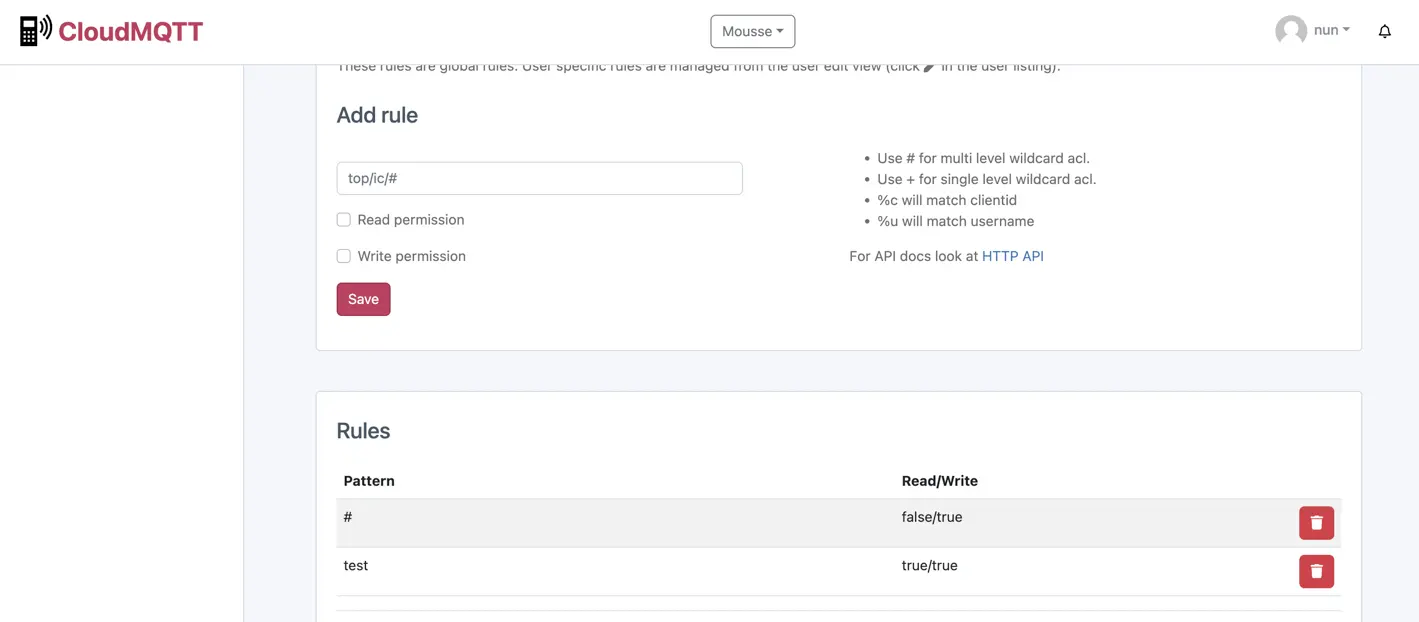
Topic Subscription Permissions: Since the Read permission for the wildcard topic # is set to false, the client using MQTTX cannot subscribe to all topics by default. However, with the Read permission for the topic test set to true, the client can subscribe to this specific topic. When connecting via client libraries, the connection URL should look like: mqtt://user:password@server:port.
Test the Connection Using MQTTX
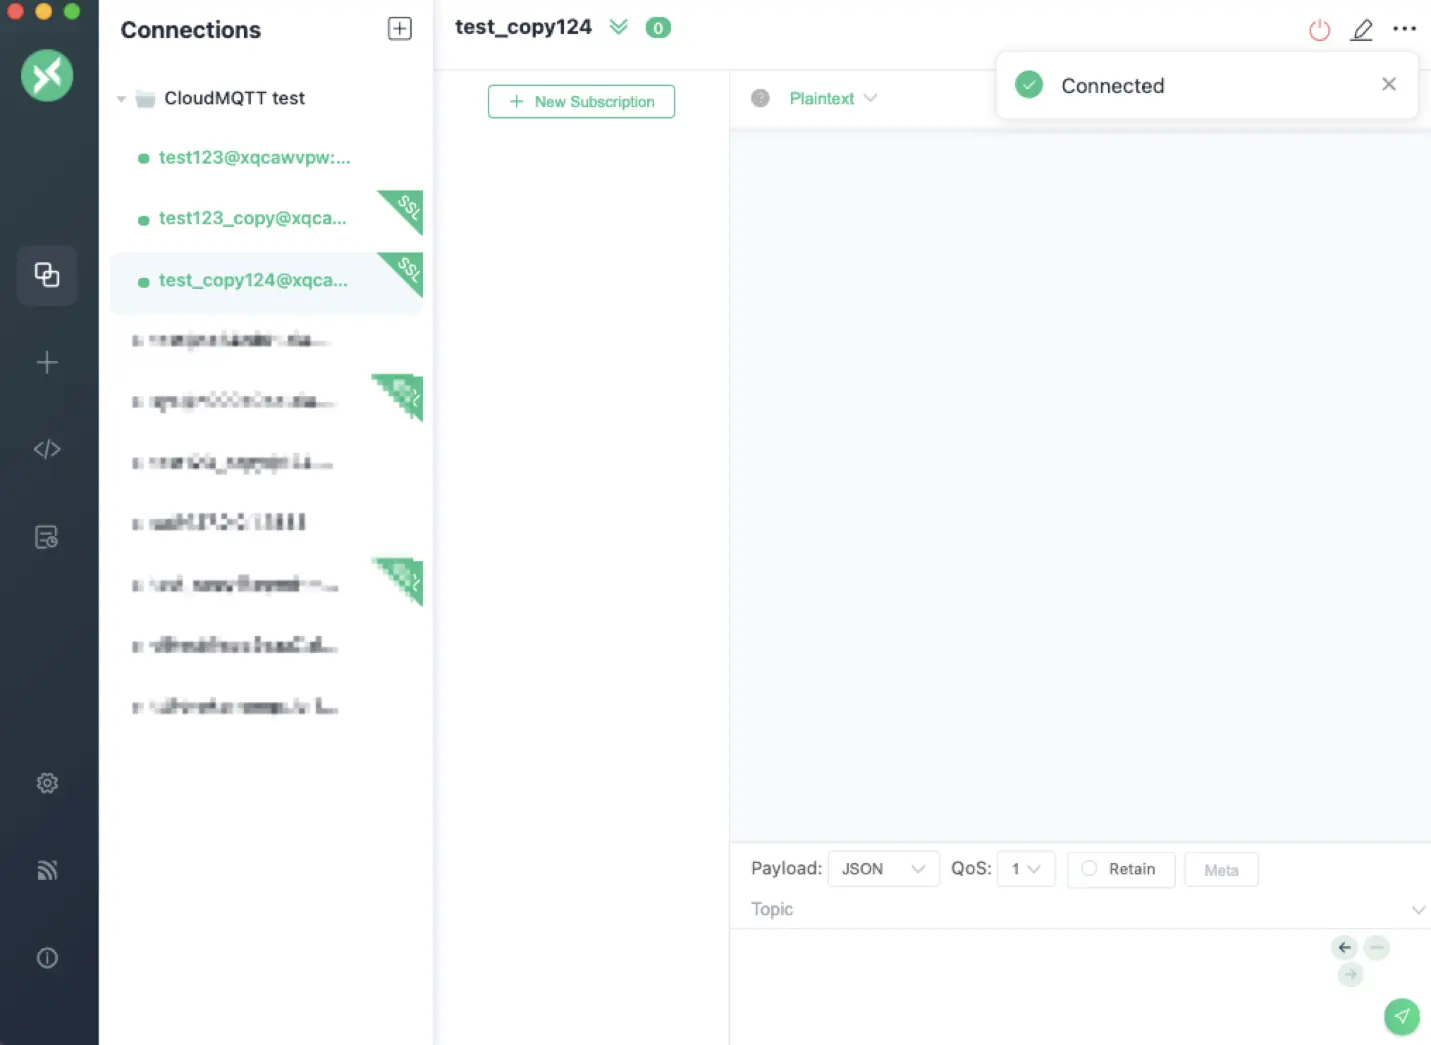
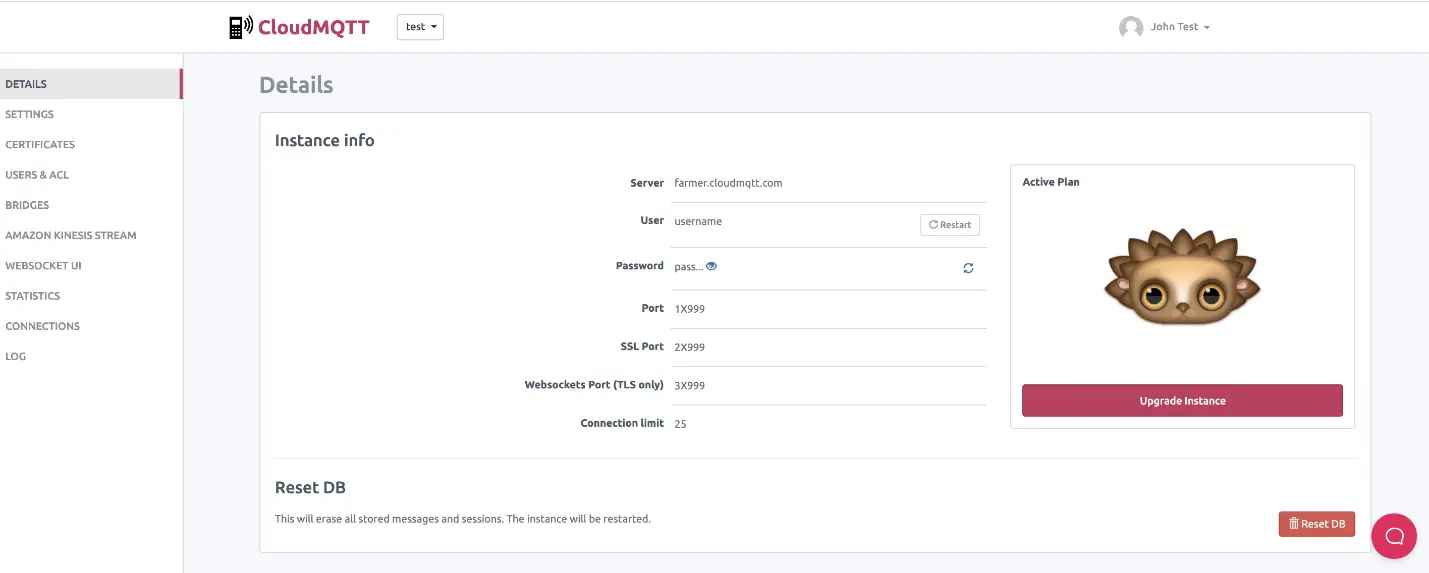
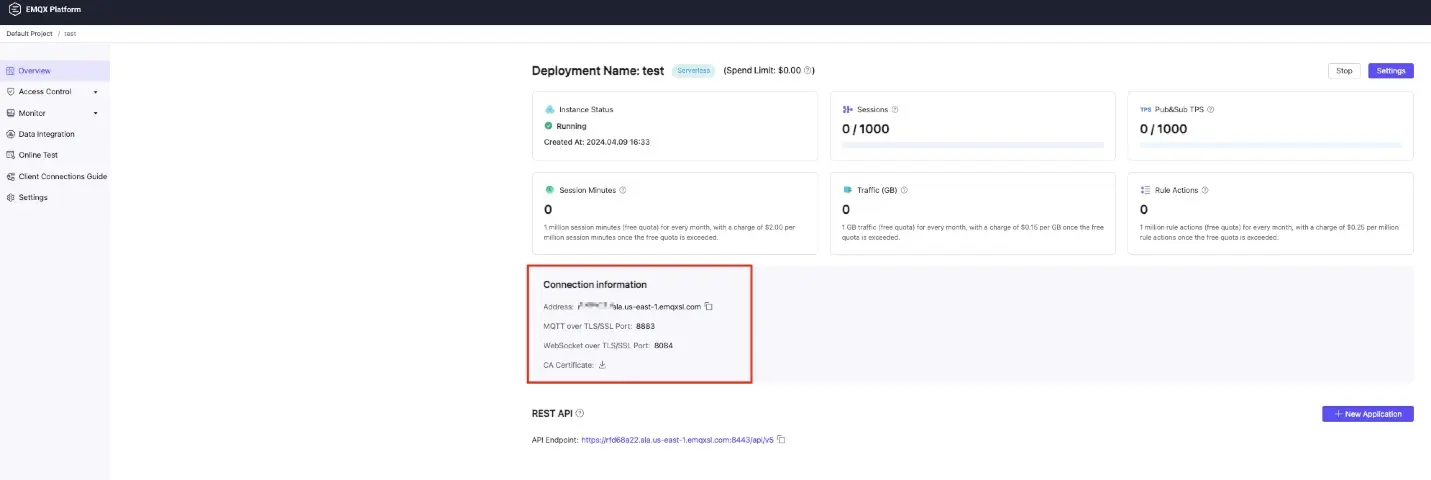
Synchronizing Configuration to EMQX Serverless Deployment: In response to the connection test, we will synchronize the configuration to the EMQX Serverless deployment. After creating the Serverless deployment as described in the previous tutorial, the connection information will be visible in the Overview.
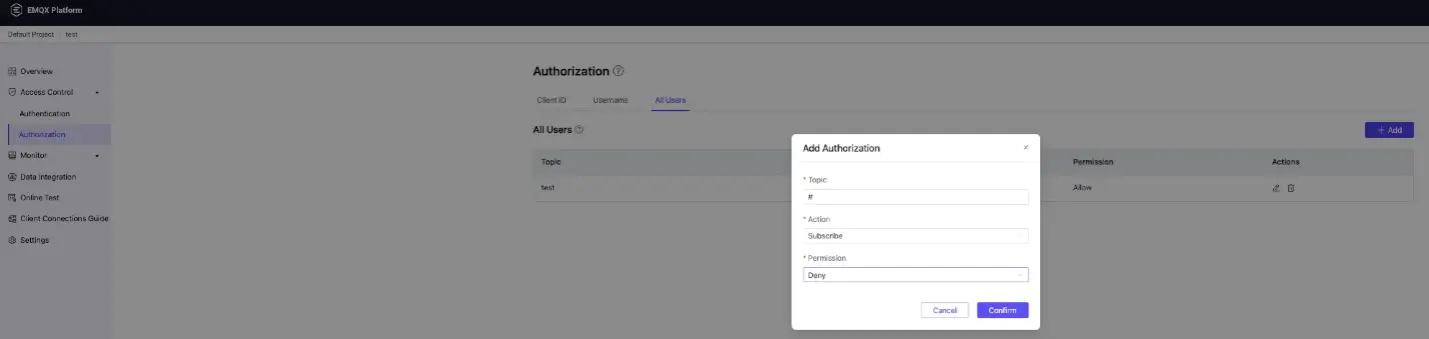
Adding Authentication and ACL Rules: Access Control should mirror what already exists in CloudMQTT.


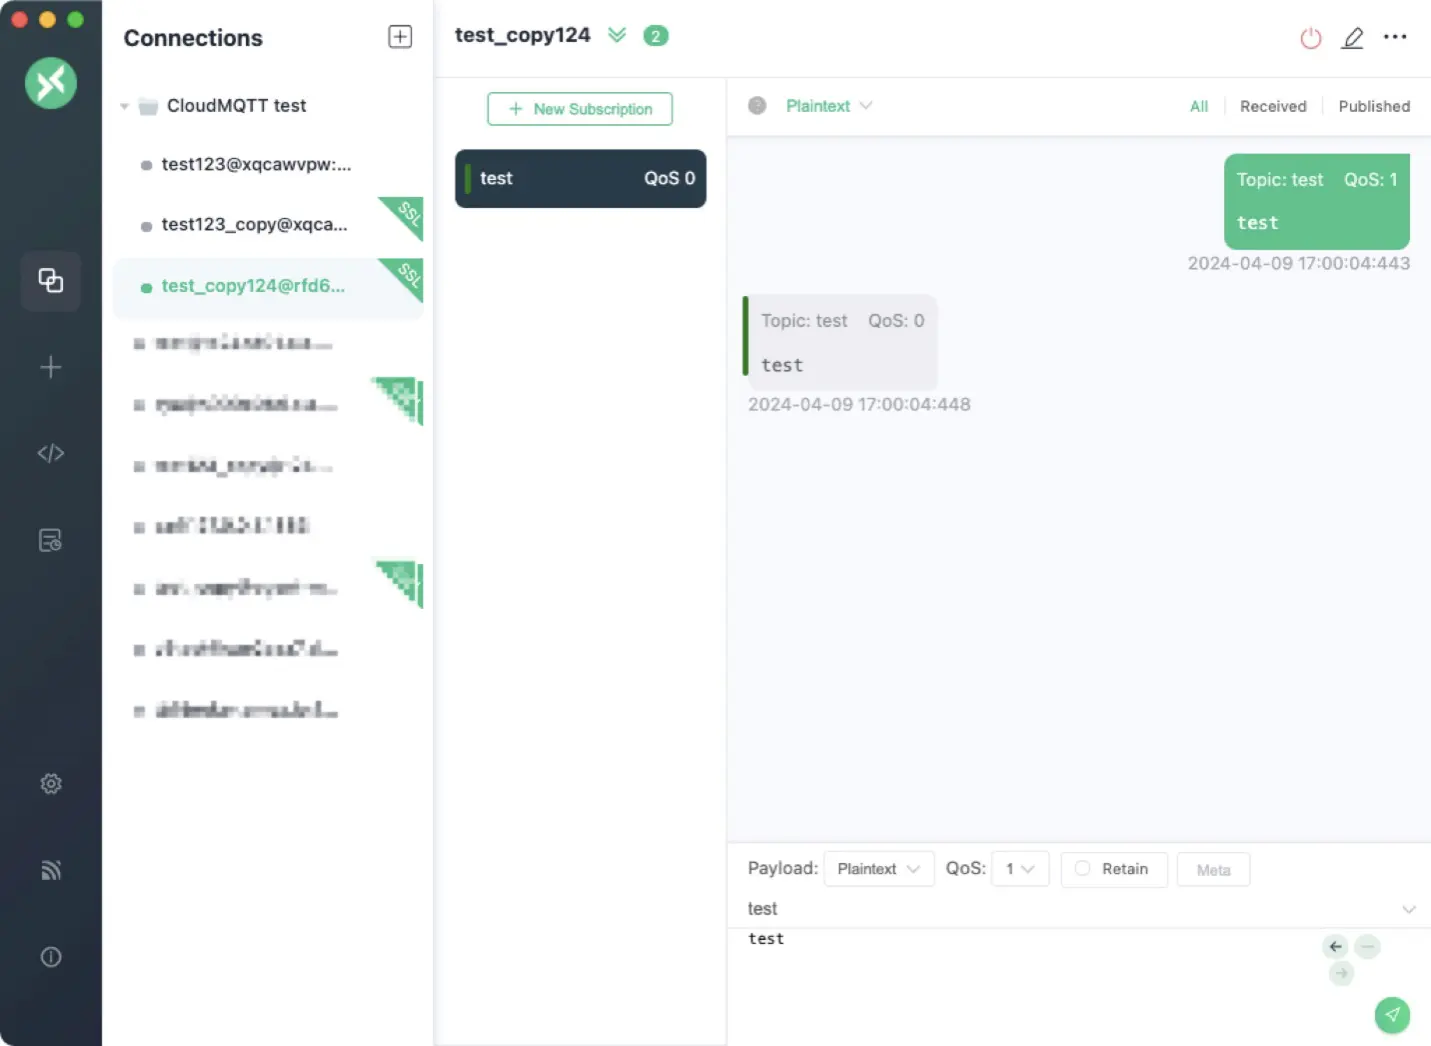
Use the MQTTX tool once more to connect to the Serverless deployment

Connection Support Notice: EMQX Serverless supports connections on port 8883 (mqtts) and 8084 (wss). If you choose the Dedicated plan, you can use a custom domain name and port to connect. The Dedicated plan supports ports 1883 (mqtt), 8083 (ws), 8883 (mqtts), and 8084 (wss) by default. You can resolve the custom domain name to the connection address provided by the Dedicated plan, and you can raise a ticket to change the connection port for your deployment. The MQTTX client can connect to the Serverless deployment and subscribe and publish to the test topic.
ACL Rule Restriction: Since this rule denied subscription to the wildcard topic '#', the MQTTX client failed to subscribe to topic 'test1'.

From this, we have completed a simple demonstration of migrating from CloudMQTT to an EMQX Serverless deployment, primarily involving the change of connection address and port, as well as the synchronization of authentication and ACL rules.
Post-Migration Advancements with EMQX
After migrating to EMQX Platform, users can rely on the platform's robust features for resource monitoring and optimization, as well as high availability:
- Resource Monitoring and Optimization: EMQX Platform provides comprehensive tools for monitoring the performance and resource utilization of your MQTT infrastructure. By analyzing these metrics, you can identify bottlenecks and optimize resource allocation to support continued growth effectively.
- High Availability: EMQX Platform ensures high availability by replicating data across multiple nodes and regions. In the event of node failures or network disruptions, the platform automatically redirects traffic to available nodes, minimizing downtime and ensuring uninterrupted service.
- Data Integration: EMQX Platform offers robust data integration capabilities, allowing users to seamlessly connect their MQTT data with other systems and applications. Whether you need to stream MQTT data to databases, analytics platforms, or other MQTT brokers, EMQX provides flexible and scalable solutions.
Additionally, with the EMQX Dedicated plan, users enjoy flexible scaling options. You can scale your deployment up or down to meet changing demands, accommodating increasing client connections or throughput requirements. For more information on scaling your deployment, refer to "How can I scale deployment?" here.
Summing up Our Journey
Successfully migrating from CloudMQTT to the EMQX Platform ensures that your IoT operations continue without interruption, leveraging advanced features for scalability, resource optimization, and high availability. By following the detailed steps outlined above, you can transition smoothly and maintain the robust functionality that your applications require.
As we conclude this guide on migration, it's crucial to understand the broader context and the rationale behind these necessary changes. If you haven't already done so, we encourage you to explore our initial blog post, which discusses the impending closure of CloudMQTT and how EMQX offers a strategic advantage in this scenario. Gaining a comprehensive understanding of the background will provide deeper insights into why this migration is essential and beneficial for your IoT infrastructure.
For those ready to begin their migration, please refer to our Get Started documentation to create your first EMQX Platform deployment and ensure a resilient IoT messaging infrastructure. With EMQX, you can rest assured that your service is scalable, secure, and supported every step of the way.
Thank you for entrusting EMQX with your IoT solutions. Our commitment is to provide unparalleled service and support, assisting you every step of the way as you scale and enhance your IoT capabilities.