A Comprehensive Guide to Serverless MQTT Service | EMQX Cloud
Introduction
EMQX Cloud recently launched Serverless 1.0, a cost-effective solution designed to help developers and startups efficiently test and develop MQTT-based applications. By utilizing shared clusters, this version provides a convenient MQTT service that simplifies the development process. It only takes a few seconds to have a fully functional MQTT server with EMQX Cloud Serverless.
Besides, users can get 1 million free session minutes per month, which is enough for 23 devices to be online for a whole month, perfectly covering tiny IoT test scenarios.
This article will show you how to create a serverless deployment, simulate a client connection to the deployment via MQTTX and test how to send/receive messages, helping you quickly realize a basic connectivity test scenario.
Prerequisites
Before you start, you need to:
- Register an account on EMQ official website.
- Make sure there are no overdue bills in your account if you already have one.
Create a Deployment in 5 Seconds
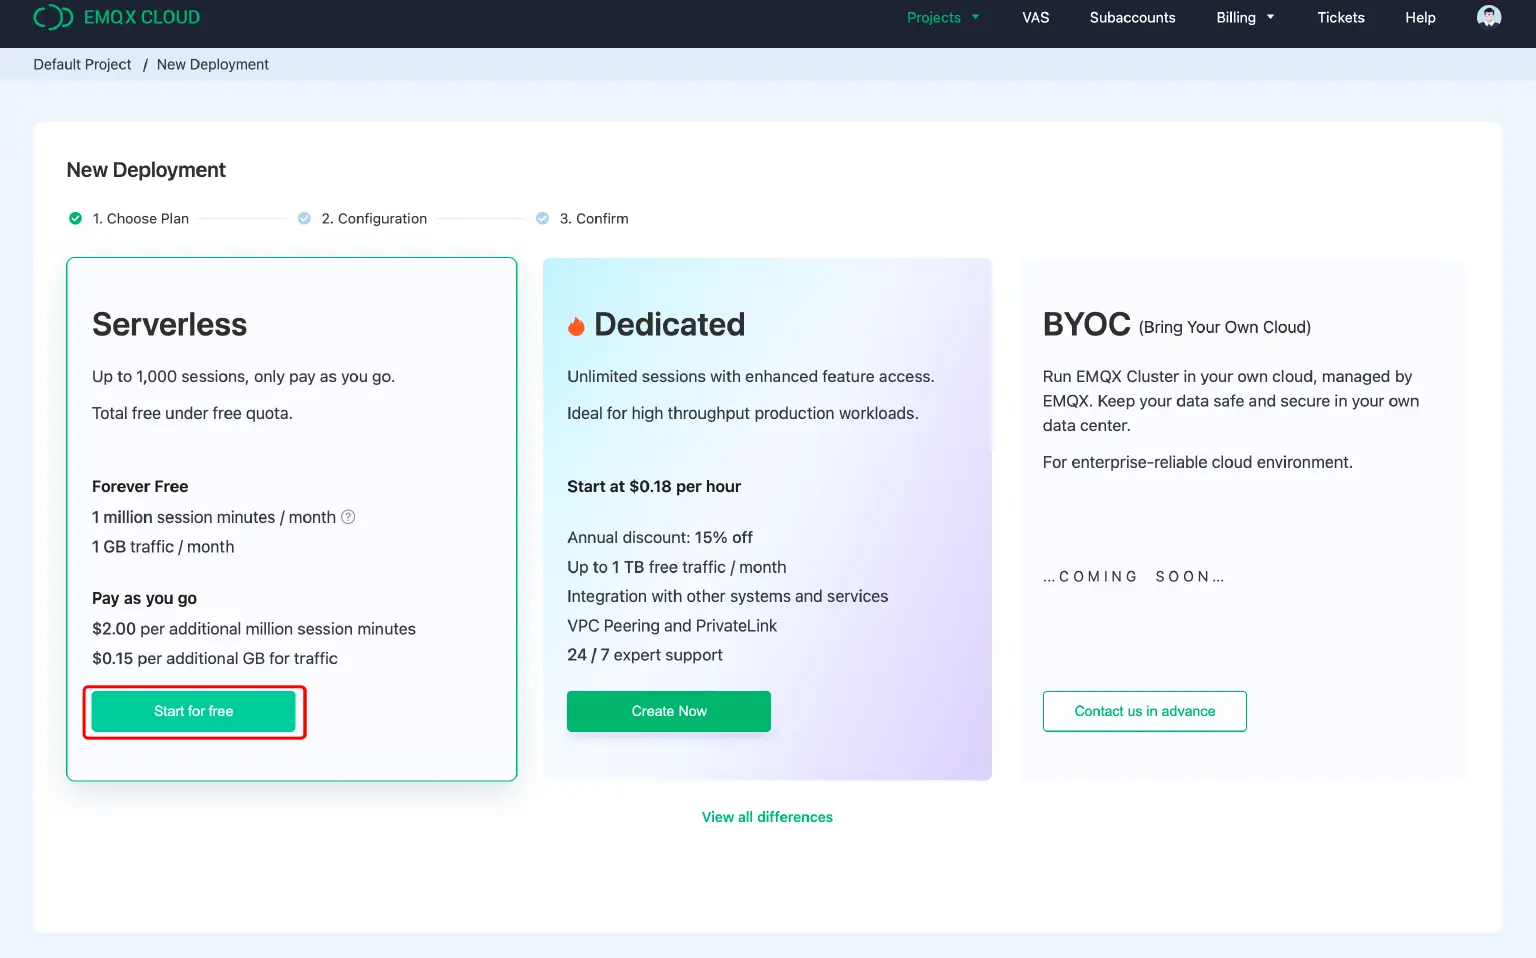
- Log in to the official website, select EMQX Cloud, choose the serverless edition, and click "Start for free".
Compared with the dedicated edition, the usage and charges of serverless edition are slightly different, mainly in the following aspects.

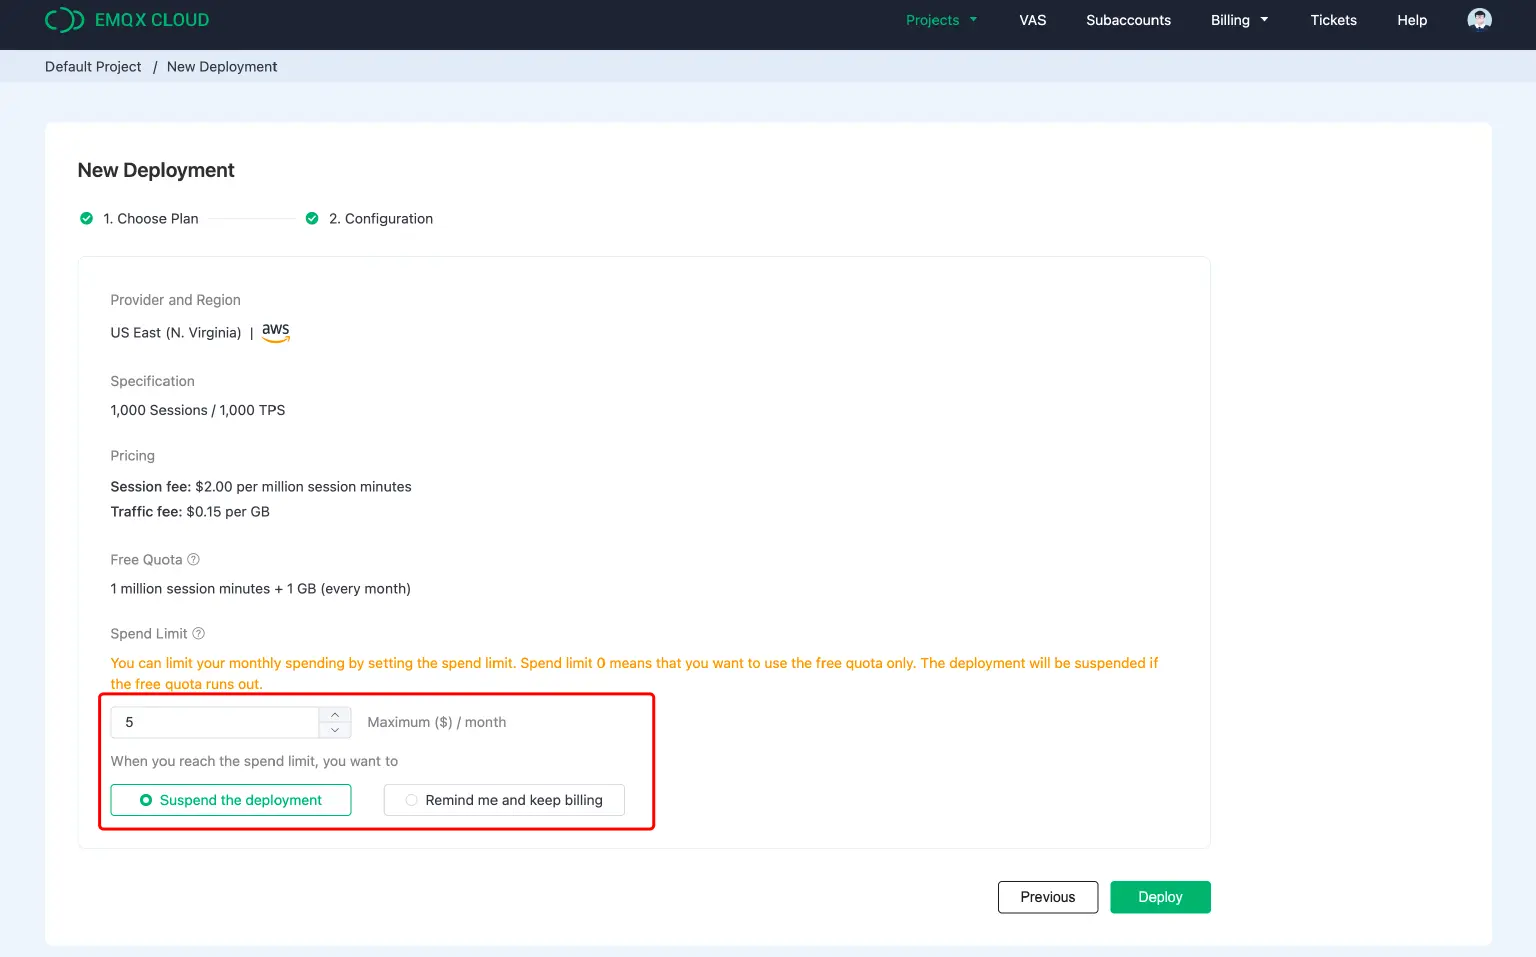
- Confirm the configuration details and set the spending limit, click "Deploy". Then read and agree to the terms and conditions.
Also, you can suspend your service or keep billing with a reminder when you reach the spending limit.
In this step, you should set the maximum amount you can spend after your usage exceeds the free monthly quota. This ensures that your spending is within a reasonable, predictable range.
Also, you can suspend your service or keep billing with a reminder when you reach the spending limit.Note: Now serverless can only be deployed in the AWS Virginia region.
Click “Get Started” to enter the deployment creation process.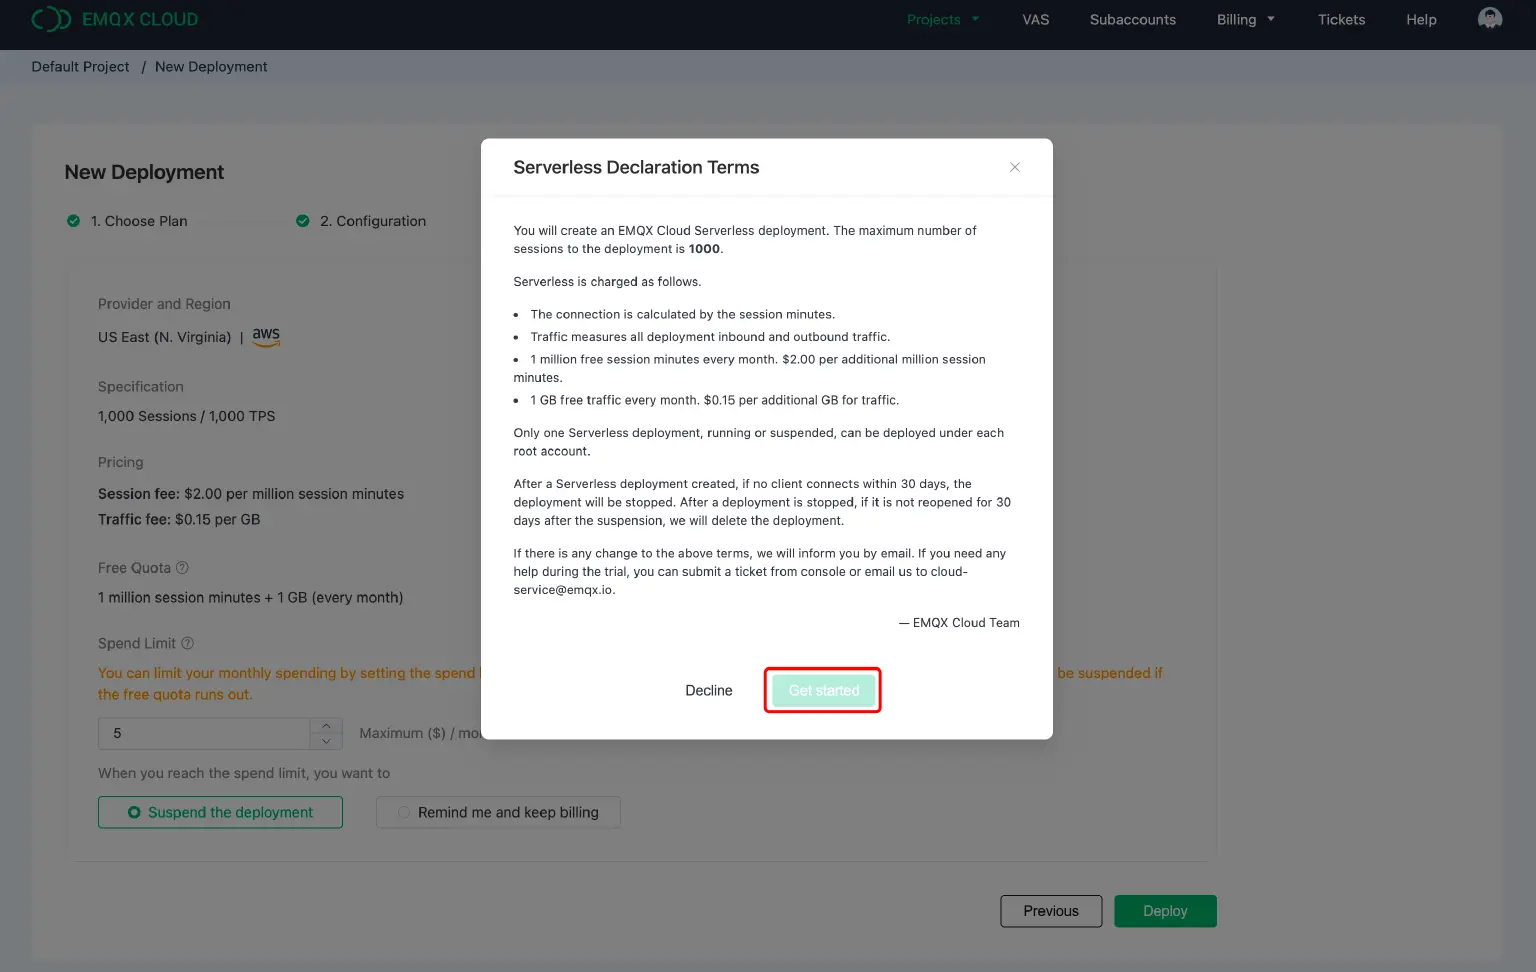
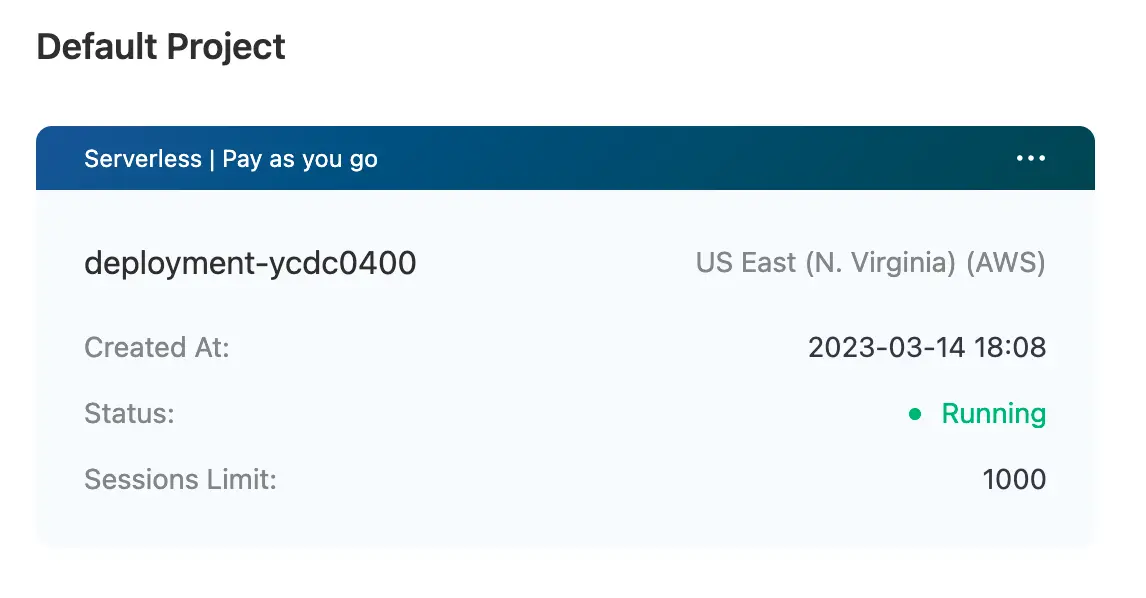
After waiting a few seconds, refresh the page, and you can see the deployment status changed from "Configuring emqx" to "Running", click the deployment card to enter the deployment overview page.
Understand the Main Functions of Serverless Deployment
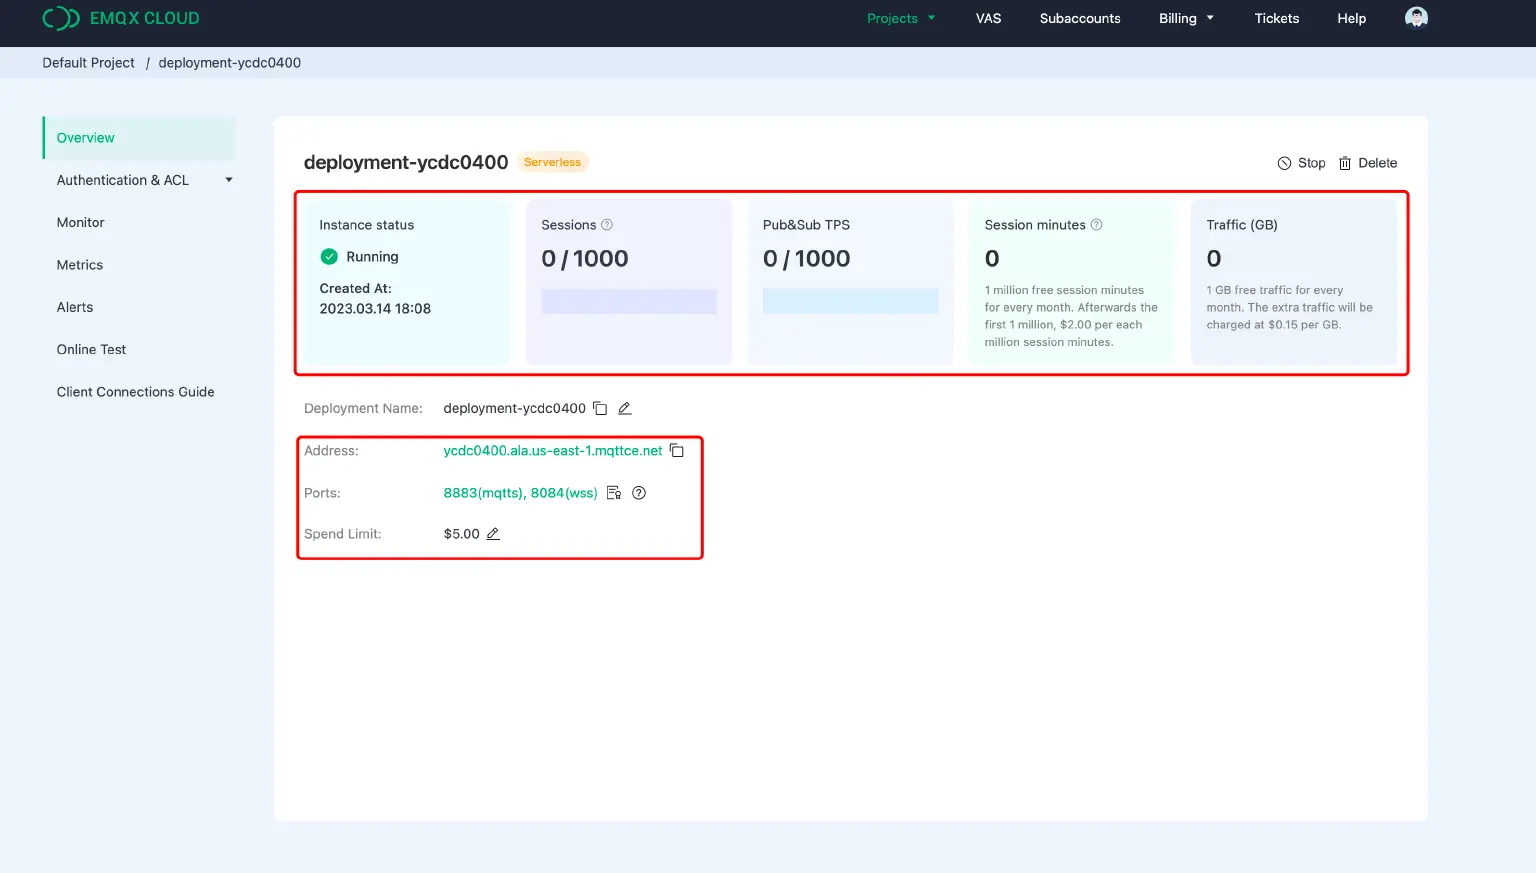
Deployment Overview
On the Deployment Overview page, you can view information about the usage of the deployment, as well as the connection addresses and connection ports that may be used.
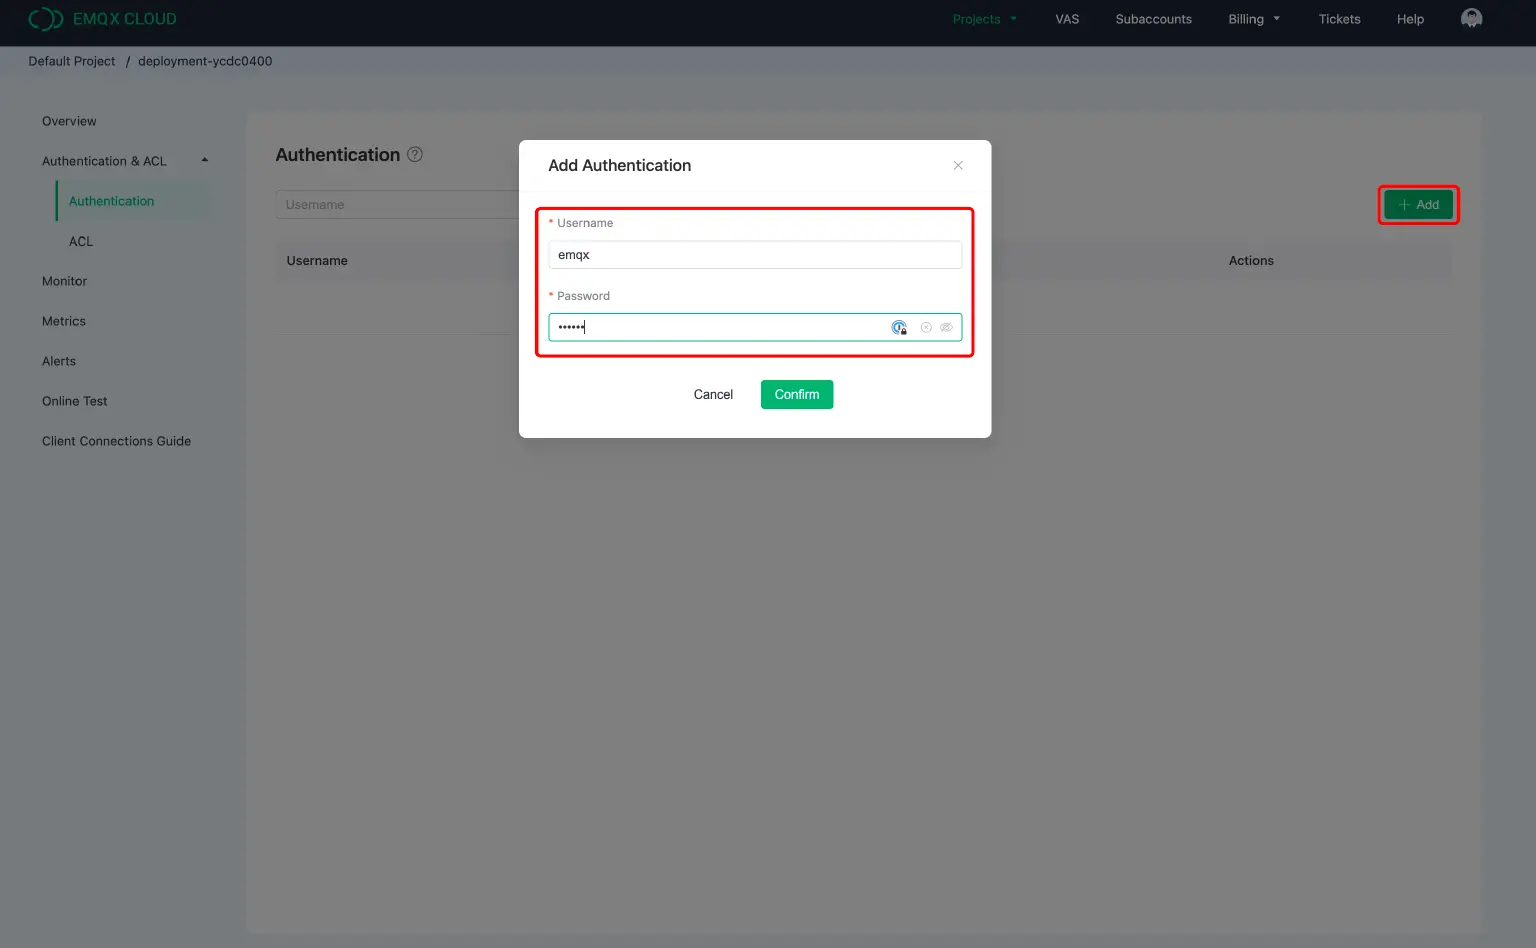
Authentication & ACL
On the Authentication page, you can add authentication information of a client or device by clicking "Add" and filling in "Username" and "Password" to add an authentication message.
On the ACL page, you can continue to set the access control privileges for the client by Client ID.
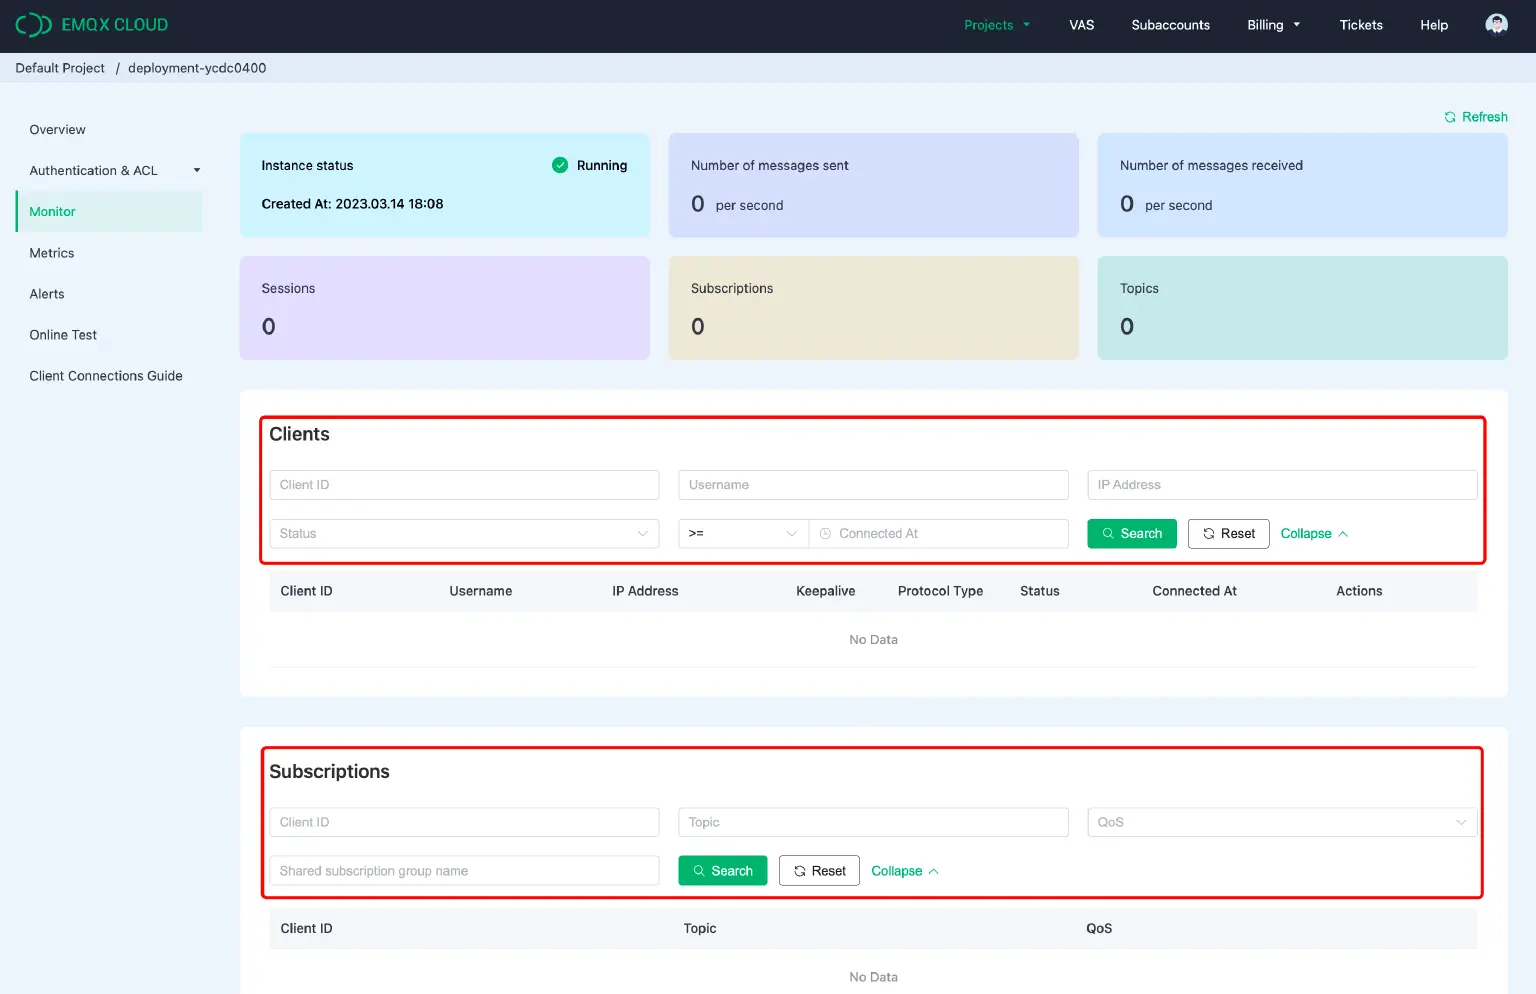
Monitor
You can view real-time data such as the number of connections, TPS, subscriptions, and topics on the monitoring page. It also supports searching by specified criteria from clients or subscriptions level. Specific search rules can be found at: Monitors.
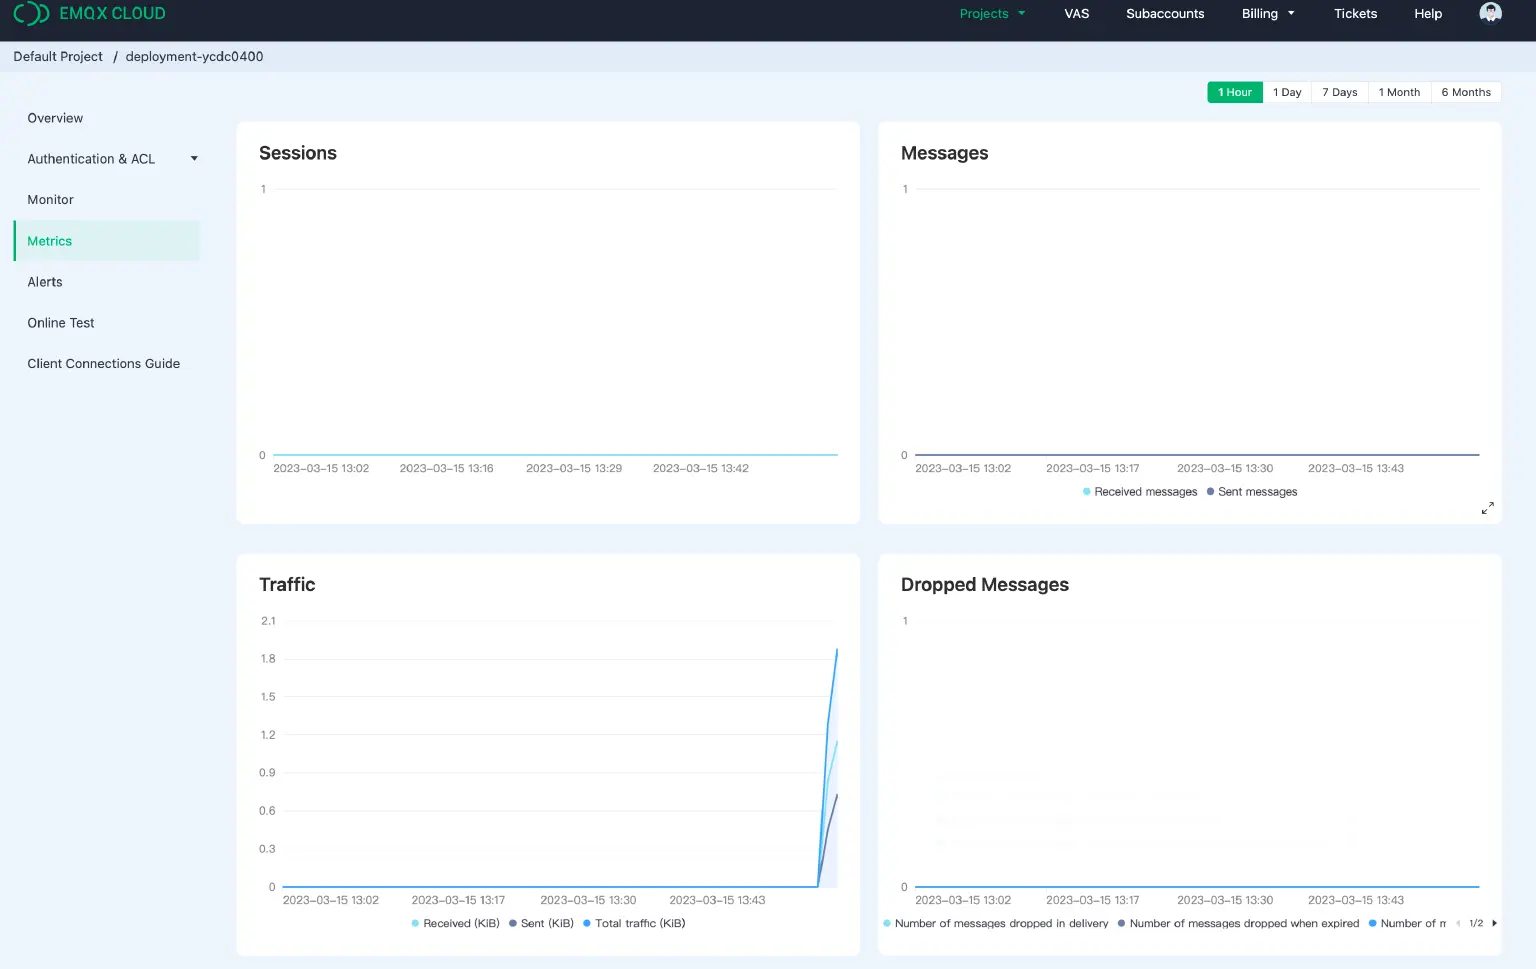
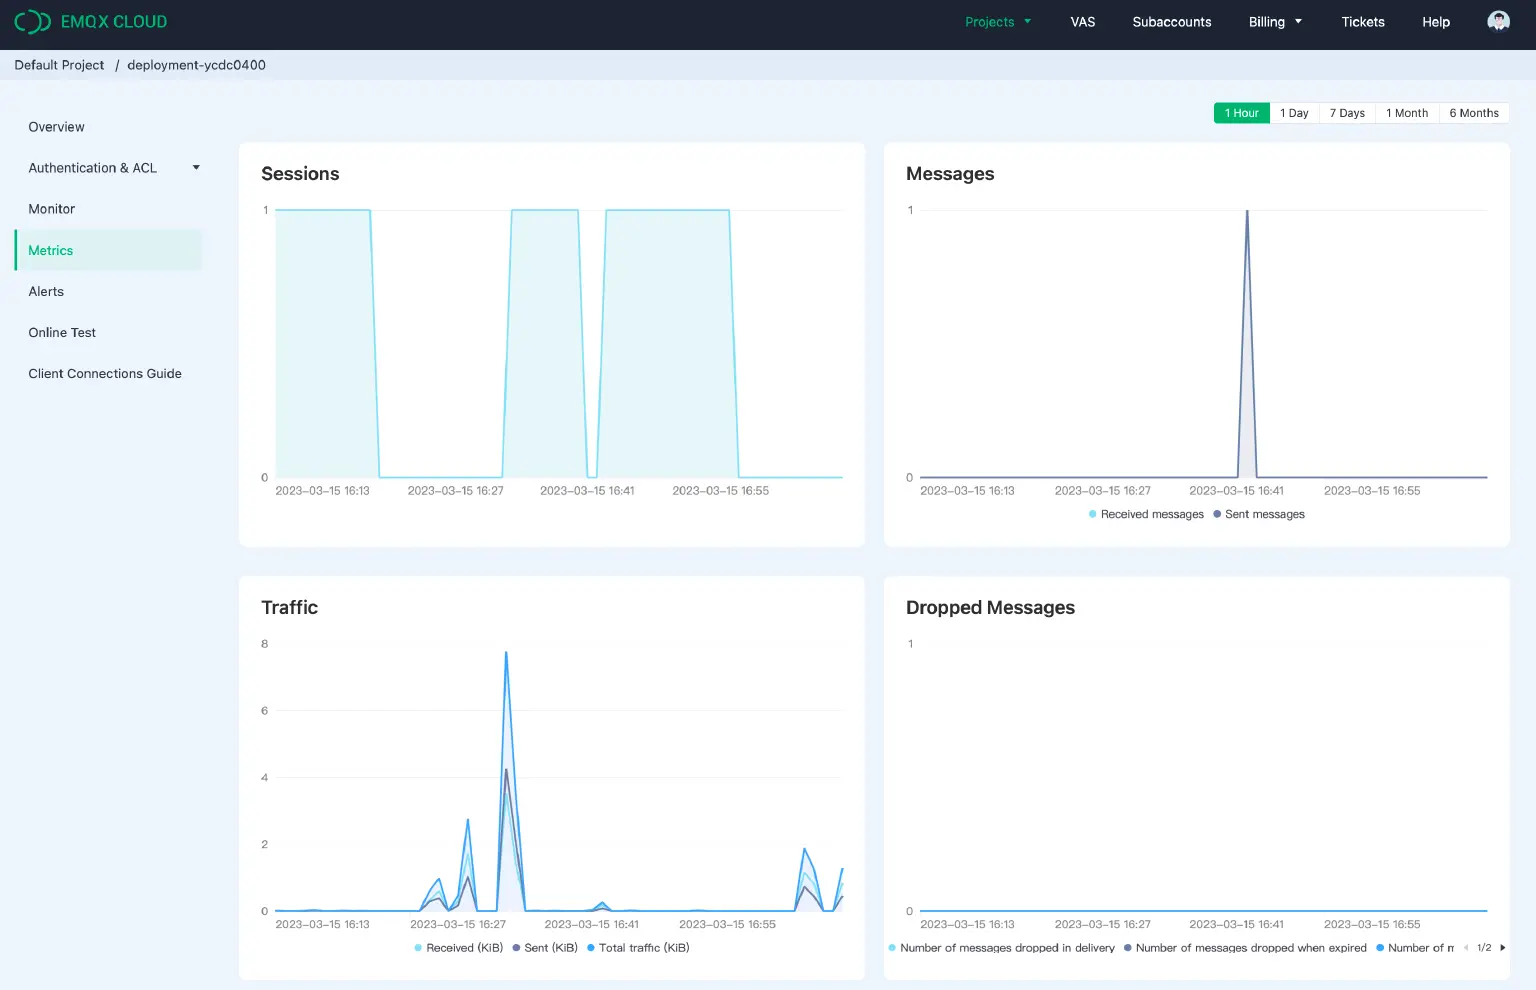
Metrics
EMQX Cloud provides four types of incremental metrics: sessions, messages, traffic, and dropped messages. You can view these charts corresponding to each metric and detailed information at a certain time. In the upper right corner, you can switch between the 1 hour, 1 day, 7 days, 1 month, and 6 months of data.
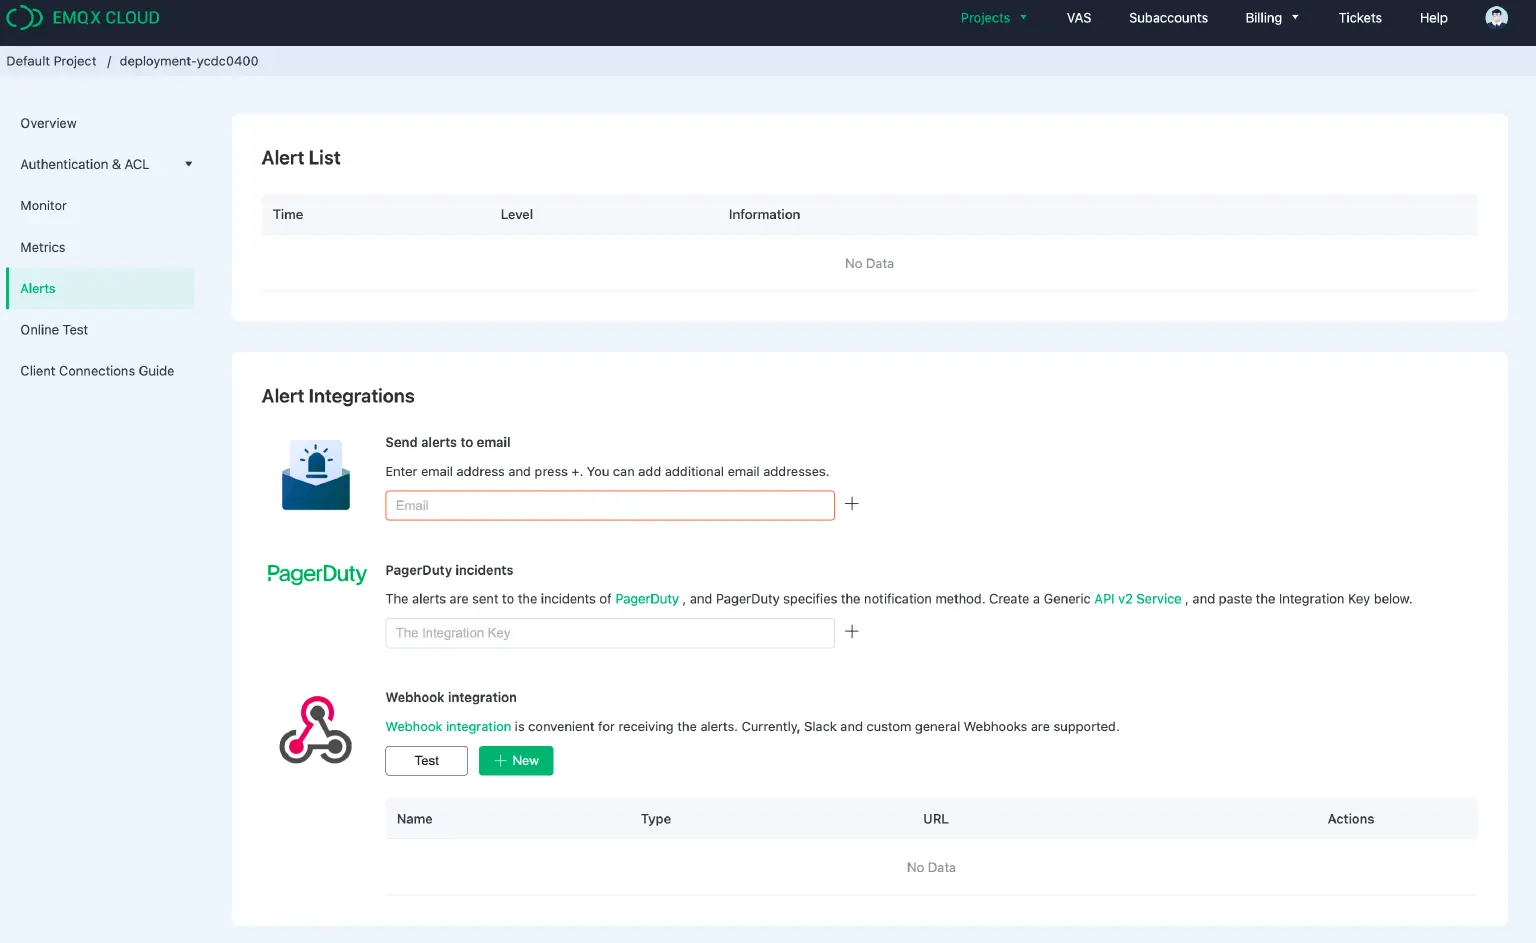
Alerts
This page allows you to configure alert messages sent by EMQX Cloud to your email address or integrate them with other third-party notification platforms. By receiving timely alerts, you can quickly respond to issues and take necessary measures to resolve them.
The specific alert events provided can be viewed at: Alerts.
Online Test Tool
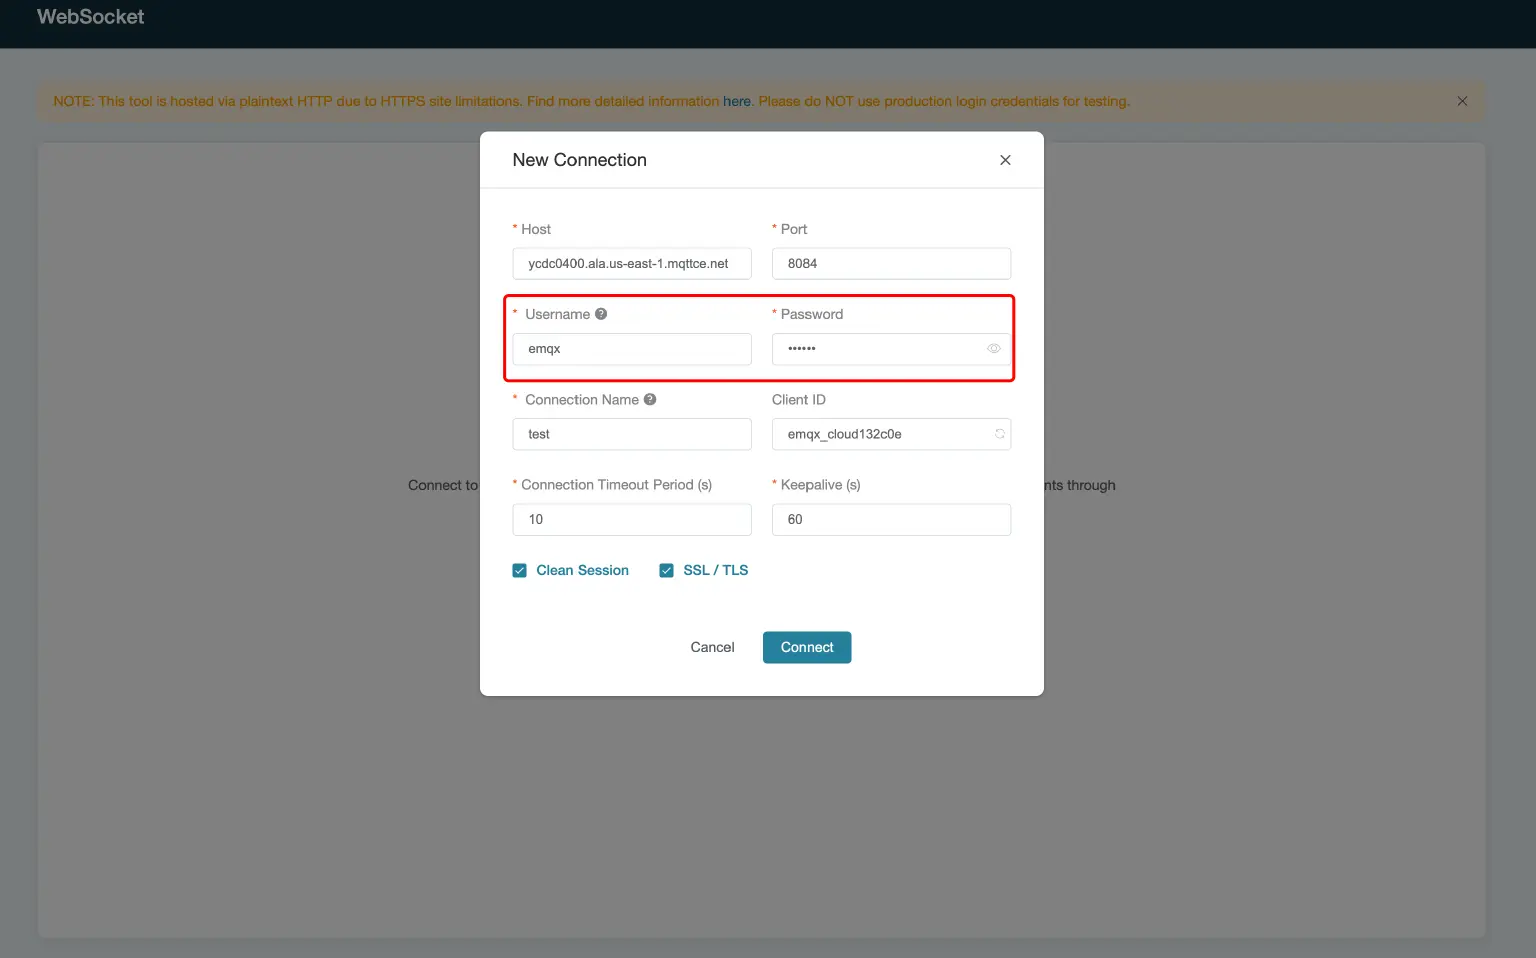
The online test tool provides an online web testing tool to debug the communication between clients online through a graphical interface, which can be used to test the connection quickly.
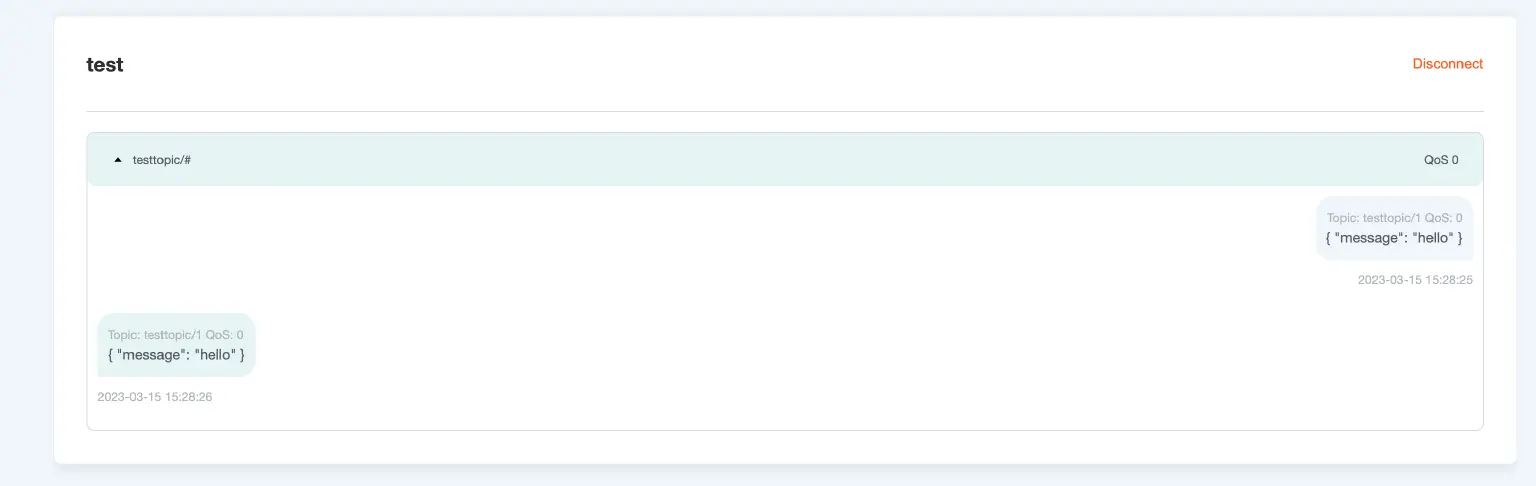
Username and password can be filled in with the information you just added to the authentication page. Give a connection name like "test" leave other information as default and click "connect", you will find the connection is successful.
Before we publish the message, we should create a subscription. Click Subscribe to create a subscription.

Then you can publish a message. Here we use the default message. Of course, you can send any message you like, only if the message fits the message specification.
Click the "Publish".
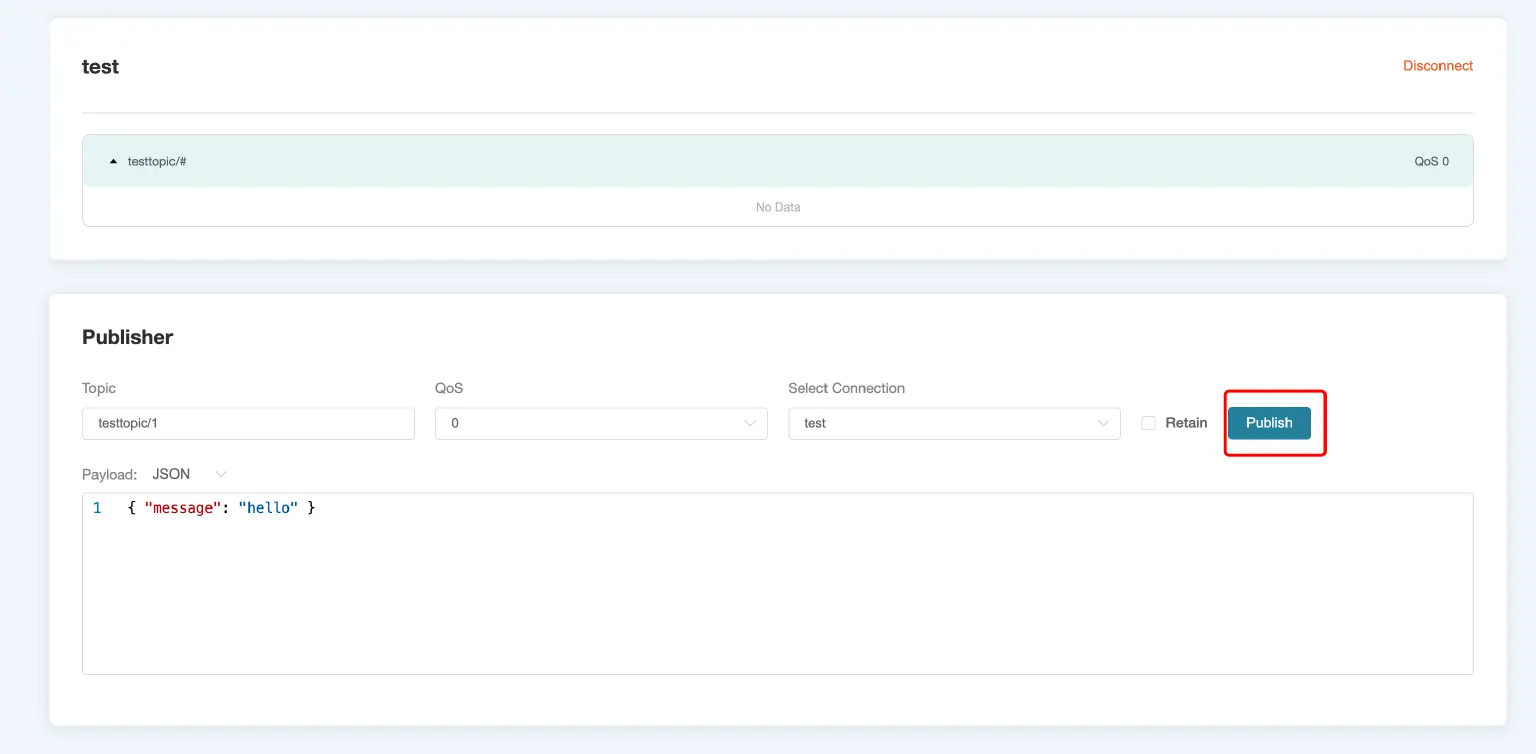
You can find the message you sent on the topic you created before has been received successfully.
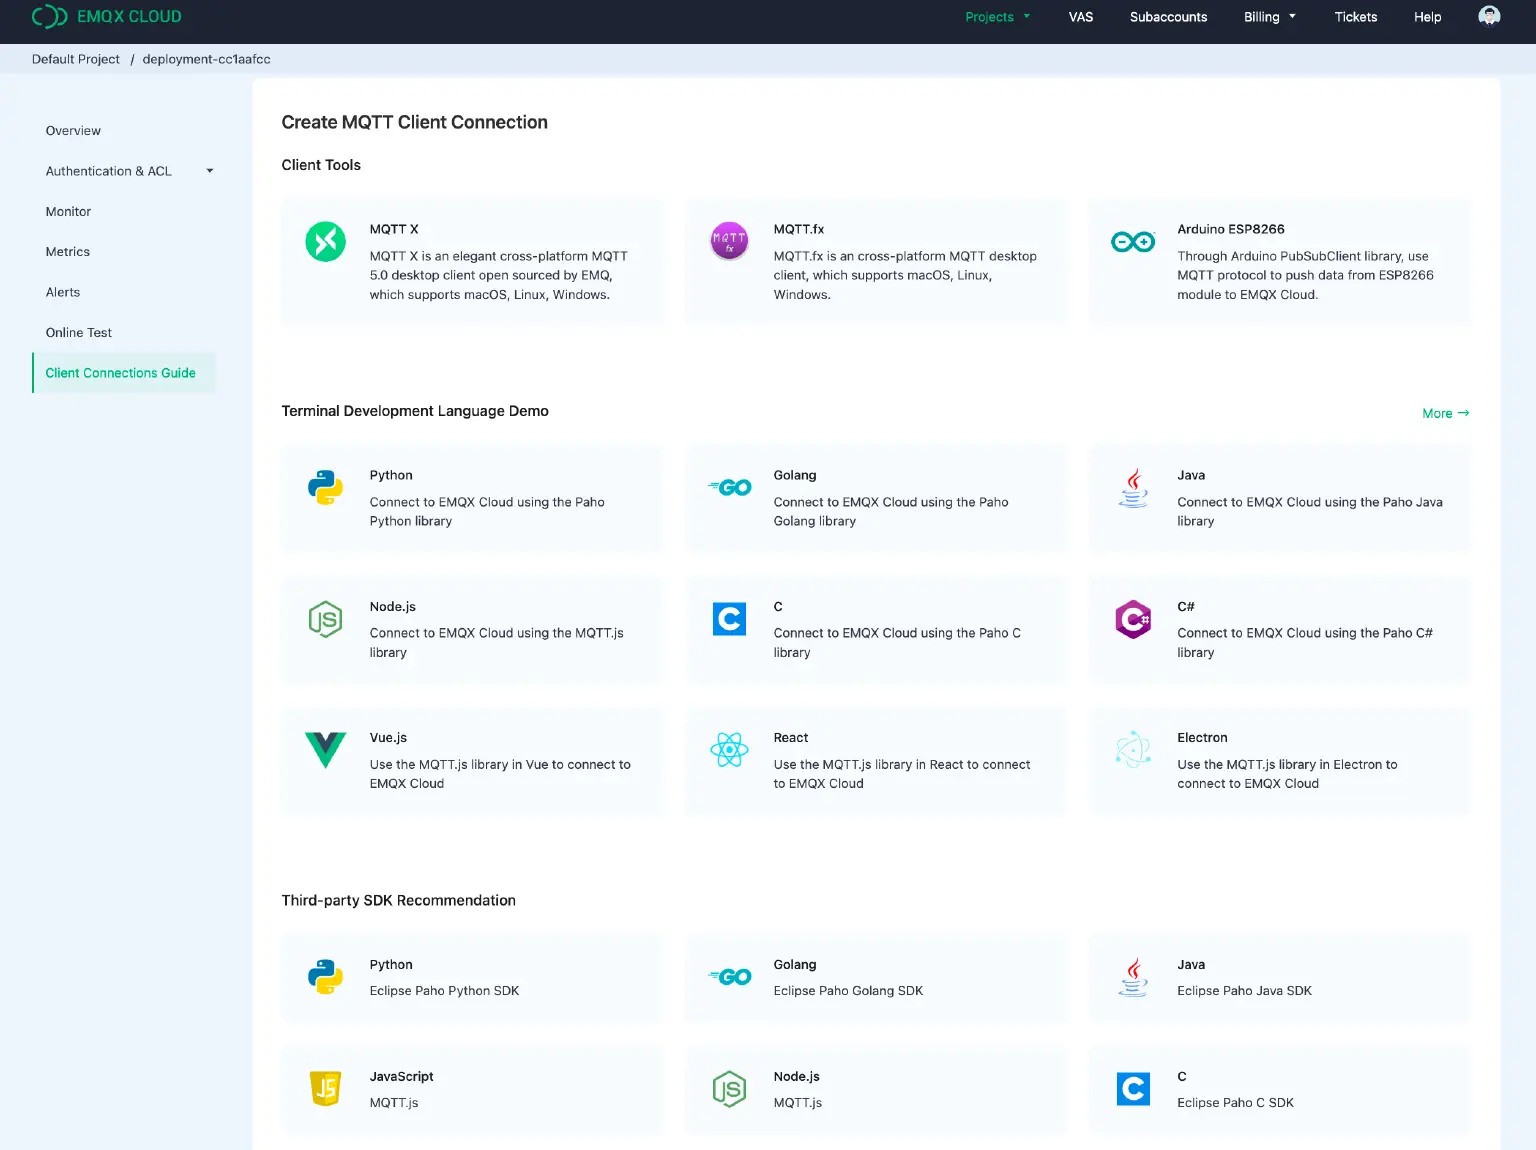
Client Connections Guide
This page provides you with a variety of ways to establish MQTT client connections, including client-side tools, various development languages, and third-party SDKs. You can choose the way you are familiar with and follow the guides to establish a connection. Any problems in establishing a connection can be feedback to the technical support team by submitting a ticket in the upper right corner of the console.
Using MQTTX to Test Connections to Serverless Deployment
In this tutorial, we choose MQTTX to test the connection. MQTTX is an elegant cross-platform MQTT 5.0 desktop client provided by EMQ.
Download and Install: https://www.emqx.com/en/try?product=MQTTX
Create a new connection
- Start MQTTX. Click “New Connection”.
- Fill in the general information.
- Name: Type “serverless”
- Client ID: It is randomly generated.
- Host and Port: Select the host and type the port based on the information on the deployment overview page. The port for mqtts:// is 8883 and wss:// is 8084.
- Username and Password: Type the information based on what you have added in the Authentication page.
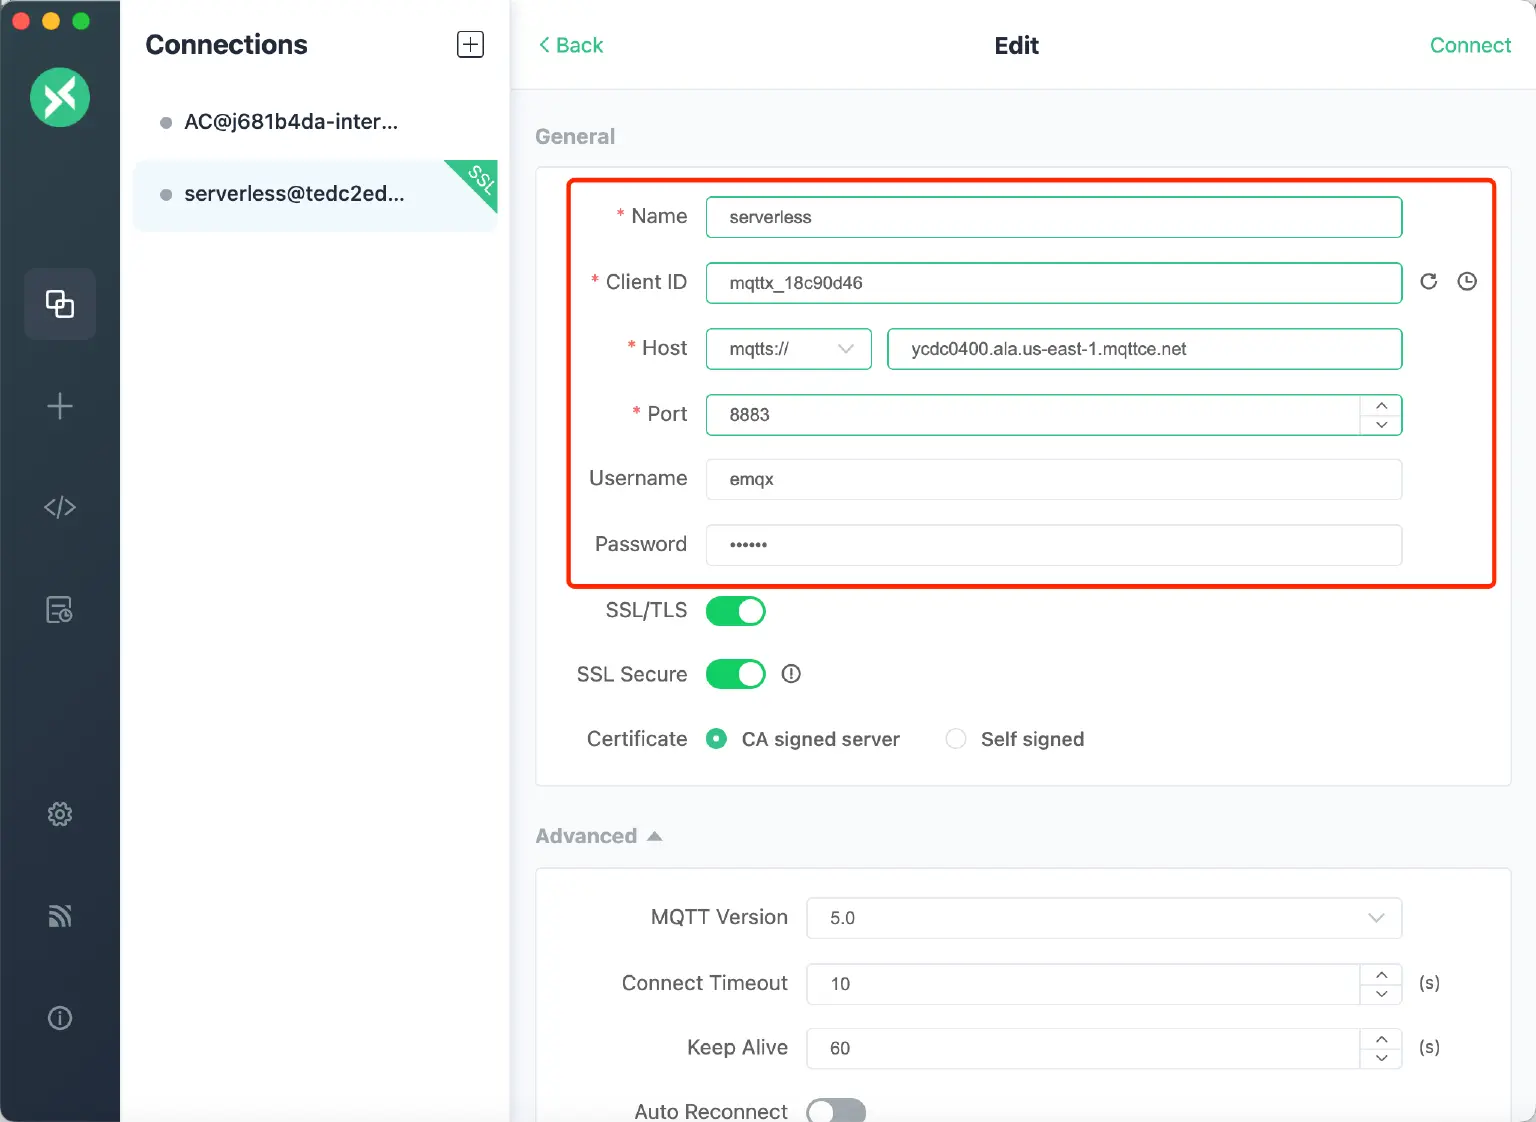
- Enable the SSL/TLS and SSL Secure.
Note: EMQX Cloud serverless version needs to establish a secure connection based on TLS/SSL, if the client needs a CA file, you can go back to the deployment overview page to download it.
- Click “Connect”.
You can see on the deployment overview page that the connection is successful.
You can fill in the Username and Password just added in the authentication, click "connect", and you can see the connection is successful.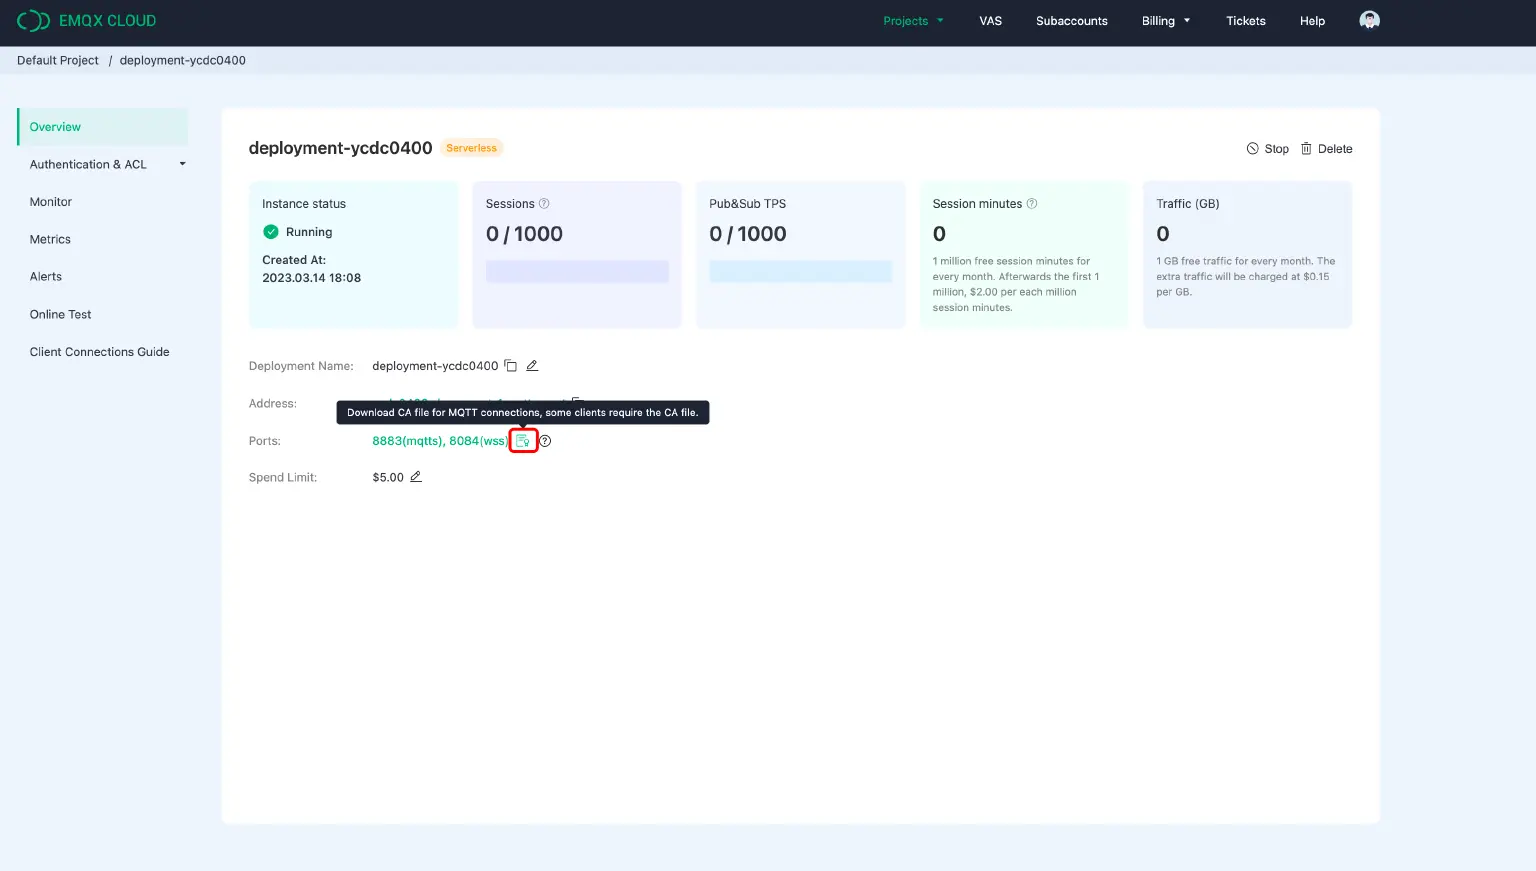
Publish and Subscribe
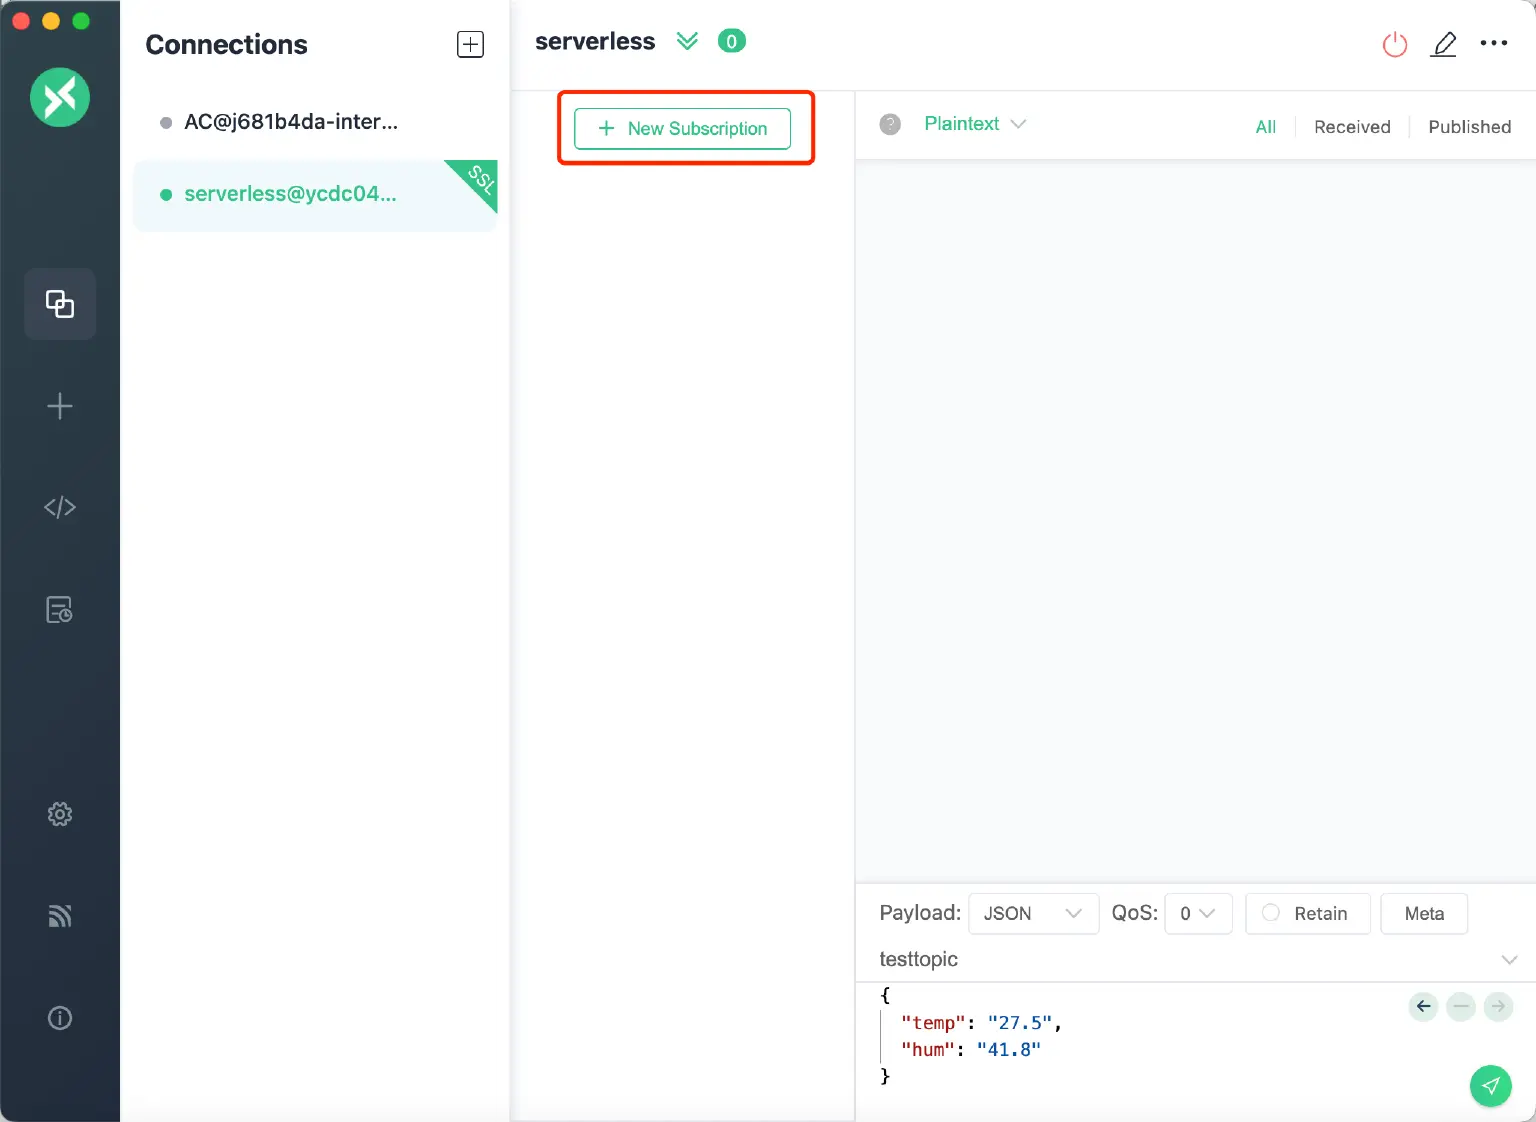
- Click "+ New Subscription"
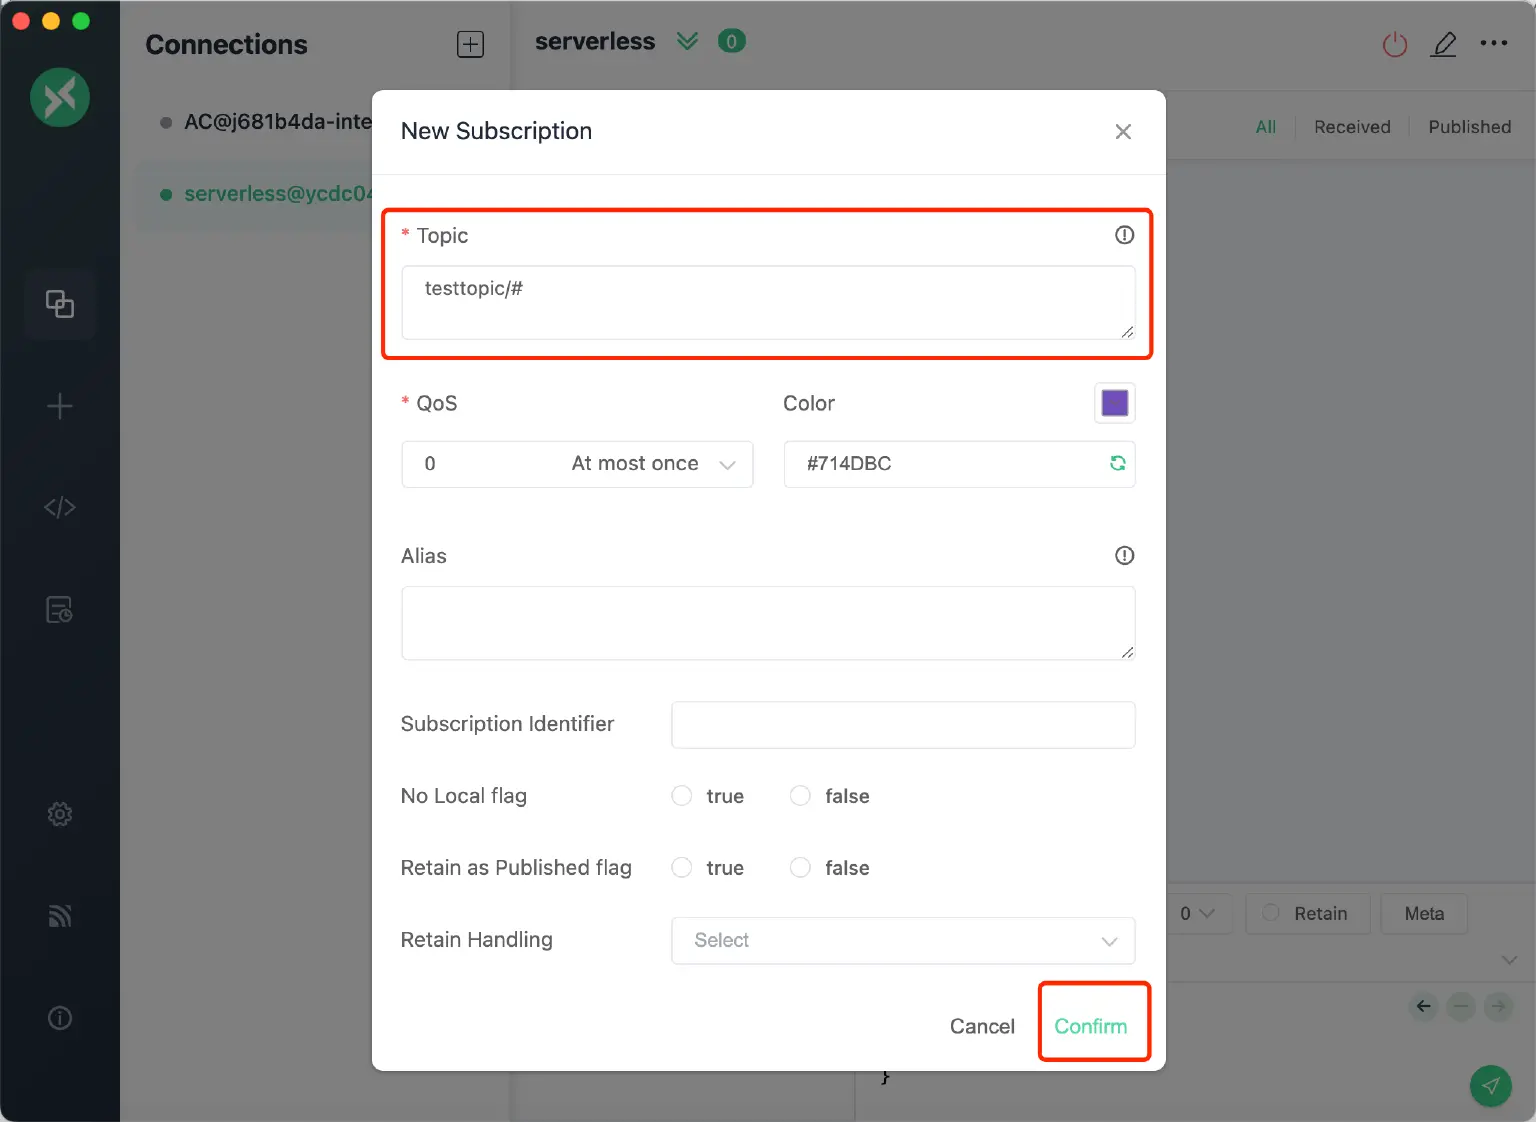
- Leave the topic name as the default, or you can type your own topic name.
- Leave other settings as default. Click “Confirm”.
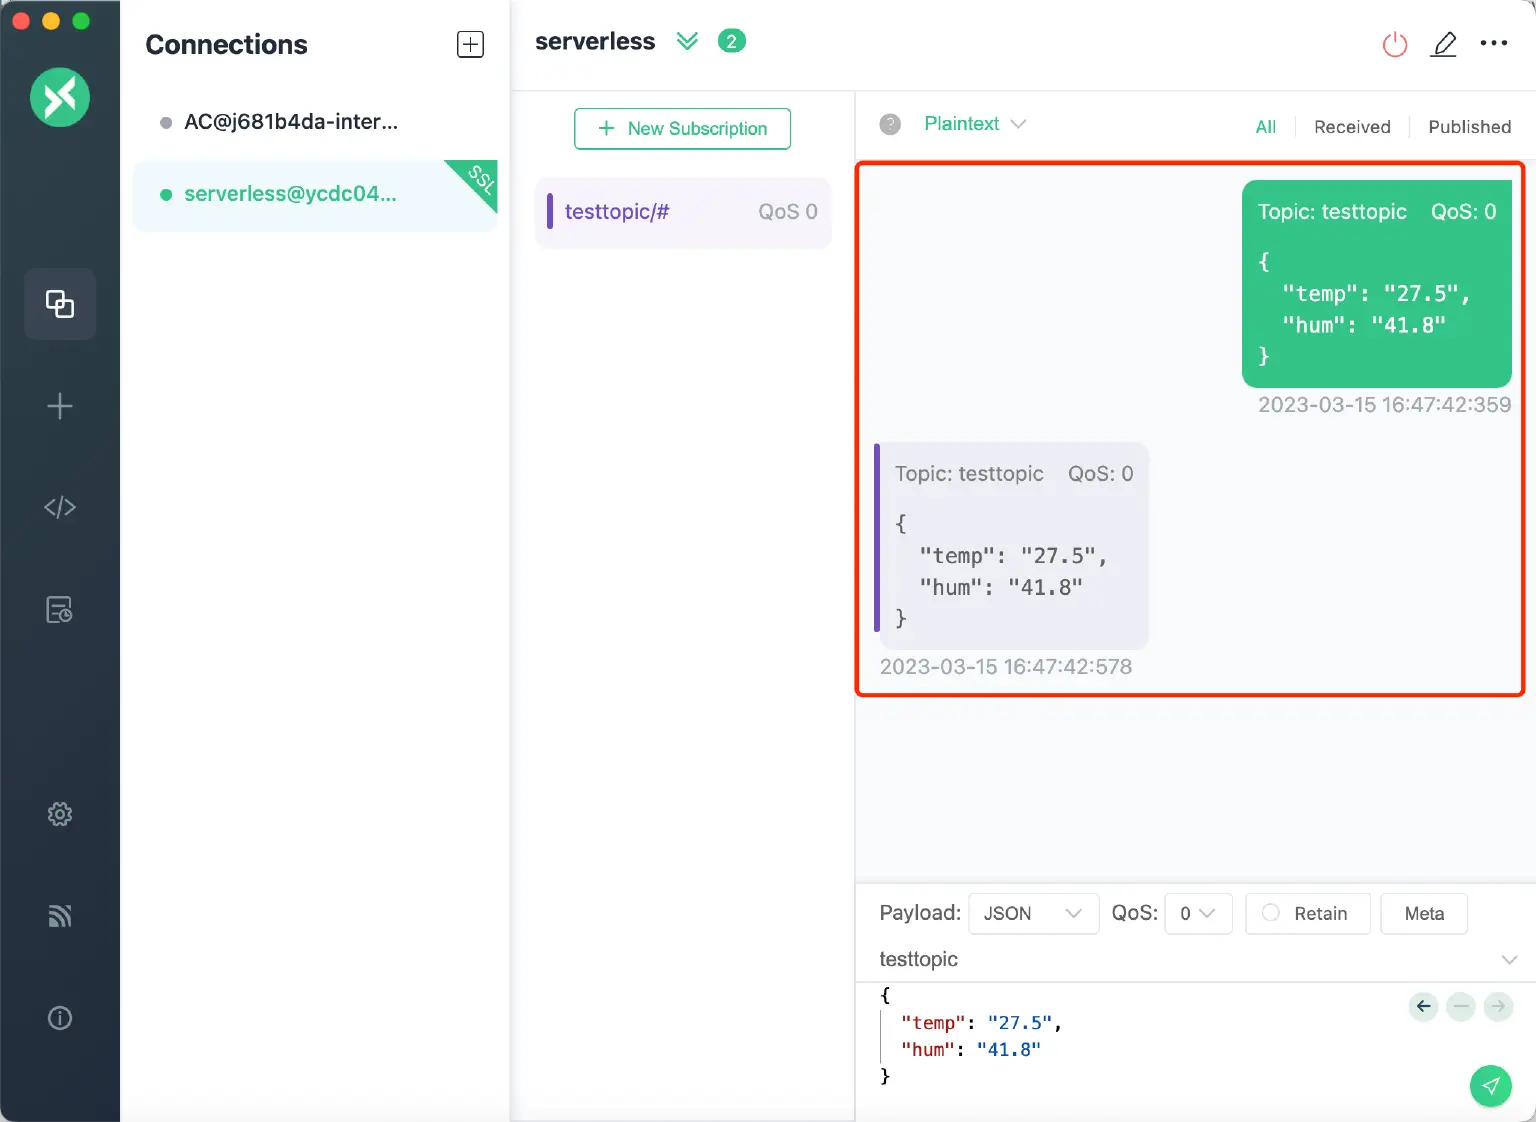
- Use the same connection as a client to publish a preset message on the topic “testtopic”. Click the “send” icon.
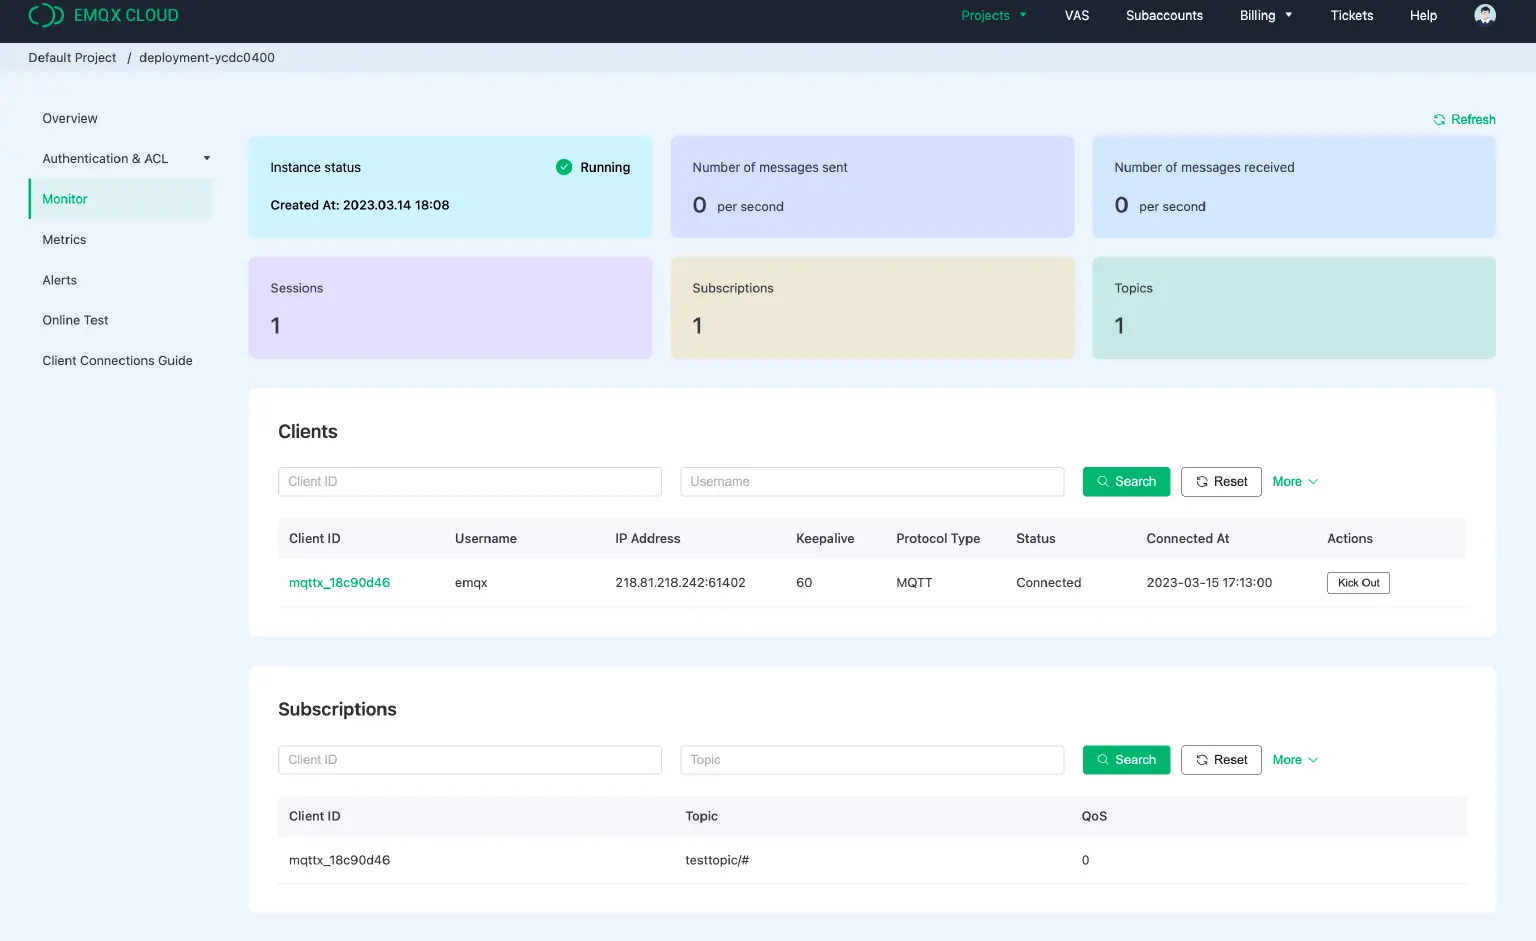
View Monitoring Information and Metrics
You can view the metrics on the Console monitor and metrics page.
Conclusion
EMQX Cloud Serverless is a powerful tool that simplifies the deployment and management of your MQTT messaging infrastructure. With this guide, you can easily create serverless deployments, simulate MQTT client connections, and test message sending and receiving. By utilizing EMQX Cloud Serverless, you can streamline your development process and scale your infrastructure with ease.
Learn more here. If you have any questions or feedback, please feel free to contact us.