Migrate Your Business from GCP IoT Core 04|VPC Network Peering and Transfer Data to GCP
As you have set up the connection to EMQX Cloud under the guide in our previous articles, it's time to send the data back to the services in GCP(If you are using databases or data analytics in GCP). This tutorial will demonstrate the VPC Network Peering between EMQX Cloud and GCP to help you with data transmission.
VPC Peering Setup
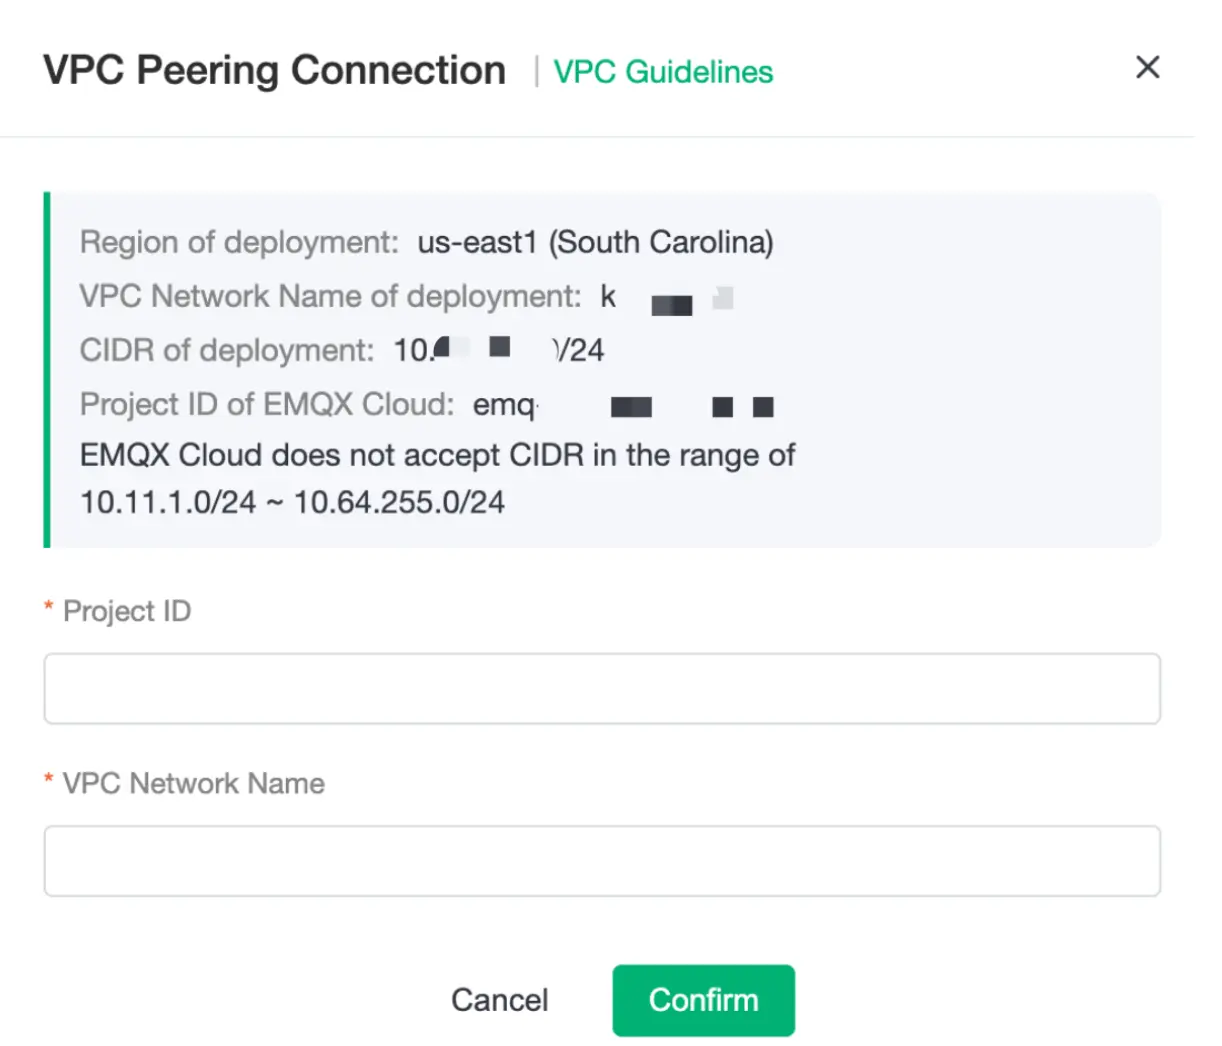
Log in to EMQX Cloud console, go to the deployment overview, click the + VPC Peering Connection, fill in the information and keep the information for further use:
- VPC Network Name of deployment
- Project ID of EMQX Cloud
- CIDR of deployment
The Project ID and VPC Network Name can be found in your GCP Control Panel - VPC network peering.
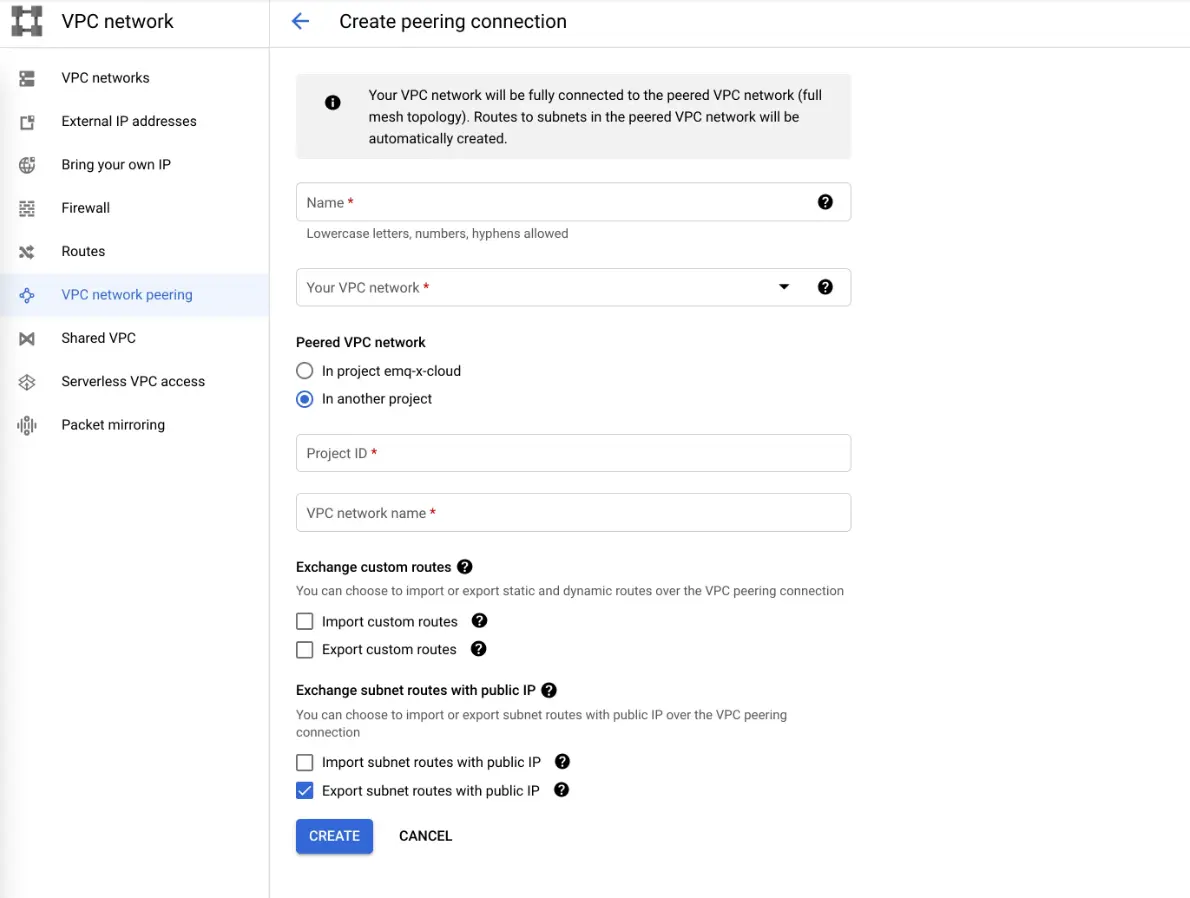
Log in to your GCP console, create the peering connection.
- In the Google Cloud Console, click VPC network peering.
- Click CREATE PEERING CONNECTION, and click Continue.
- In Name, enter a name for your peering connection.
- In Your VPC Network, enter the name of your GCP VPC network.
- In Peered VPC network, select In another project.
- In Project ID, enter EMQX Cloud Project ID. You can find this name in the VPC Peering view in EMQX Cloud.
- In VPC network name, enter your EMQX Cloud VPC Network Name. You can find this name in the VPC Peering view in EMQX Cloud.
- Click CREATE.
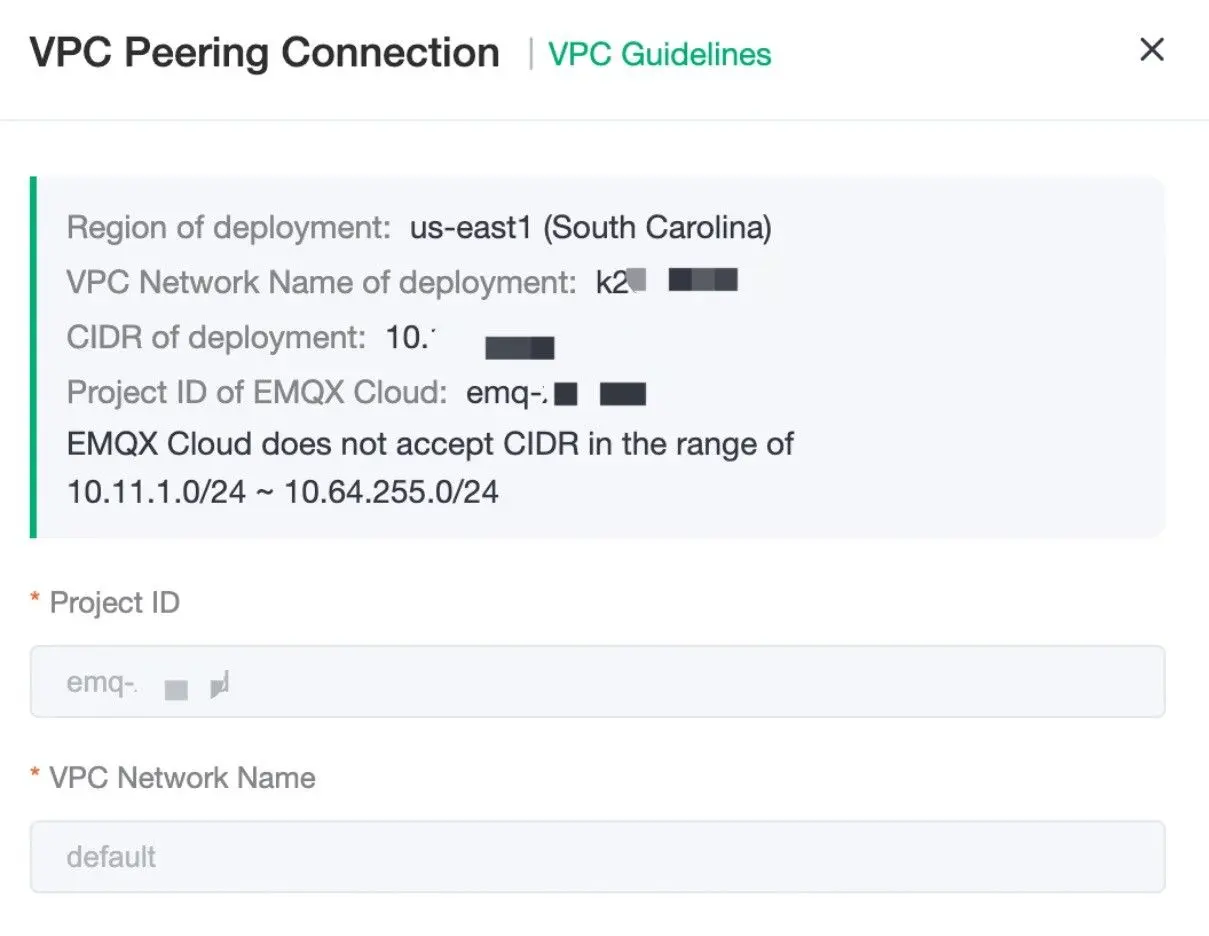
Fill the following information in the VPC Network Peering into the EMQX Cloud VPC configration panel.

- Project ID: GCP Project ID of your peering VPC
- VPC Network Name: Your VPC network
You will see the status of peering connection is Active if everything goes well.

and you will see the status of VPC Peering on EMQX Cloud is running.

Create Firewall to allow your EMQX Cloud deployment to access your GCP network.
- Click Firewall, and Click CREATE FIREWALL RULE.
- In Network, select your GCP network.
- In Targets, select All instances in the network, or you can select other option according to your situation.
- In Source IP ranges, fill in the CIDR of EMQX Cloud VPC in step 1.
- Seletc your Protocols and ports.

Data Integration
I will create a VM instance in GCP console and use Docker to install Redis for data storage.
1. Redis Configuration
Start a Redis container on the server with the following command.
docker run -itd --name redis -p 6379:6379 redis:latest
docker exec -it redis redis-cli
Once Redis is ready, it's time to start the configuration of the EMQX Cloud data integration!

2. Save device data to Redis
Enter Data Integration, and choose the Redis Single Mode card.
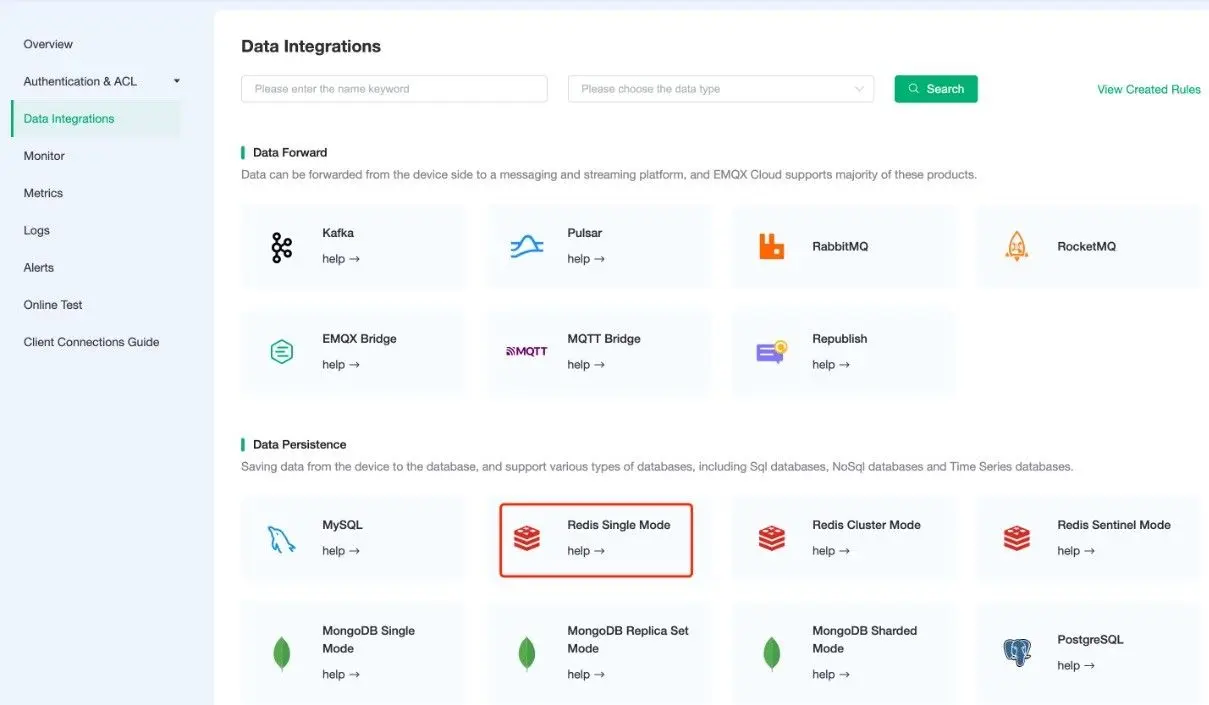
Create Redis Single Mode Resource
In the Create Resource page, set Redis Server (IP address and port of the server) as follows:
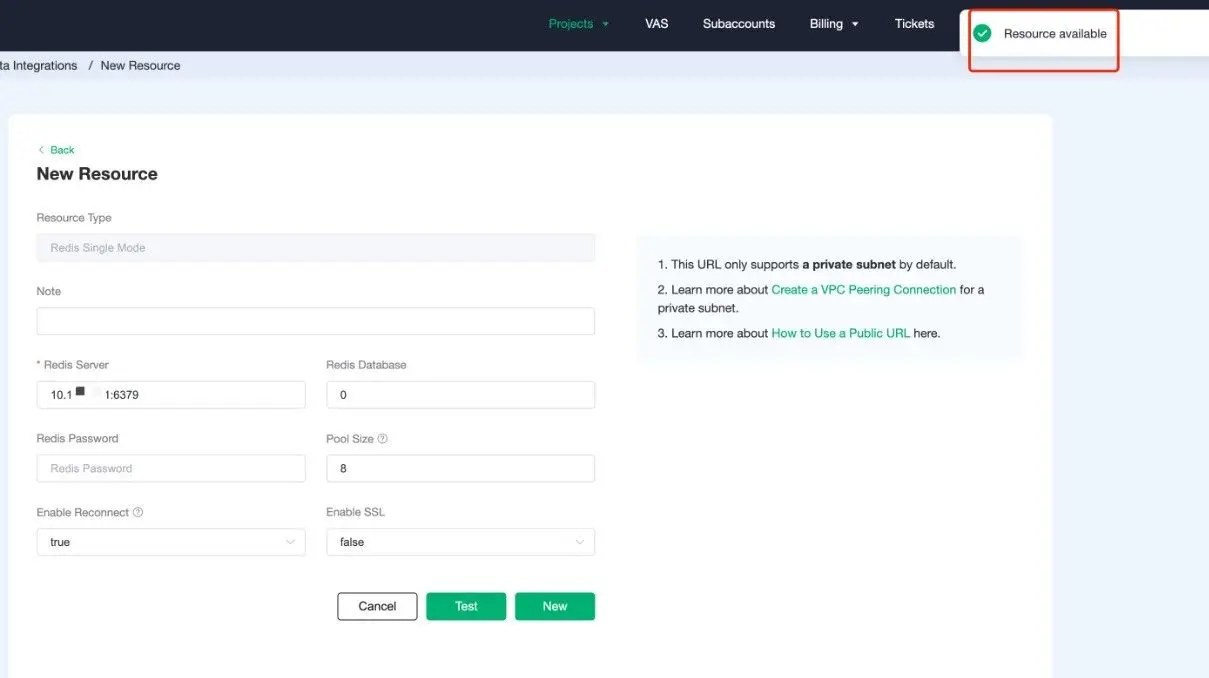
Click Test button when the configuration is complete, then click New button to create a resource when it is available. If it's shown that init resource failed, you need to check your VPC peering and Firewall configuration. You can view more on the log details page.
Create Rule
After the resource is available, click New to enter the create rule page.
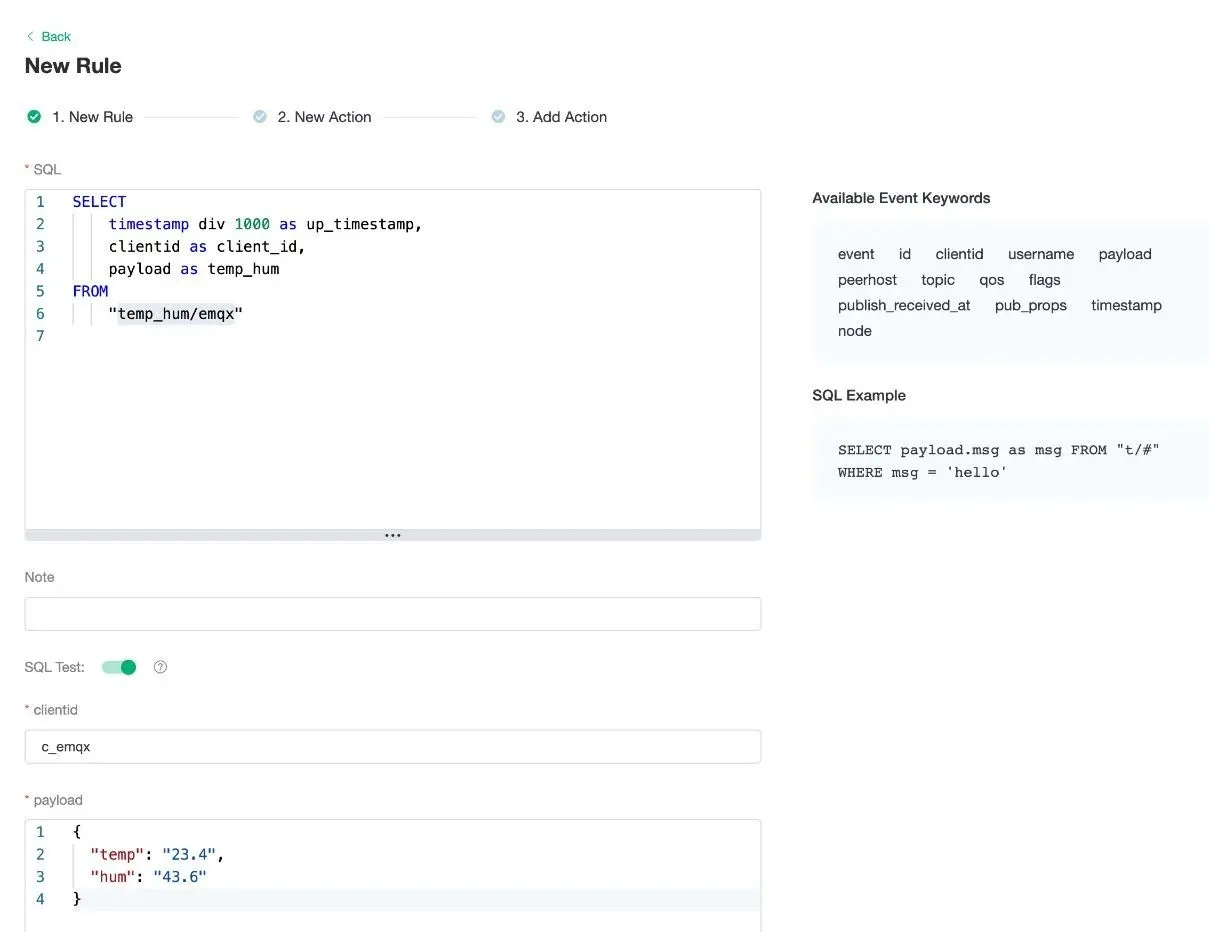
Our goal is to trigger the engine when the client sends a temperature and humidity message to the temp_hum/emqx topic. Here you need a certain process of SQL:
- Only for 'temp_hum/emqx'
Based on the above principles, our final SQL should look like this.
SELECT
    timestamp div 1000 as up_timestamp, clientid as client_id, payload as temp_hum
FROM
    "temp_hum/emqx"
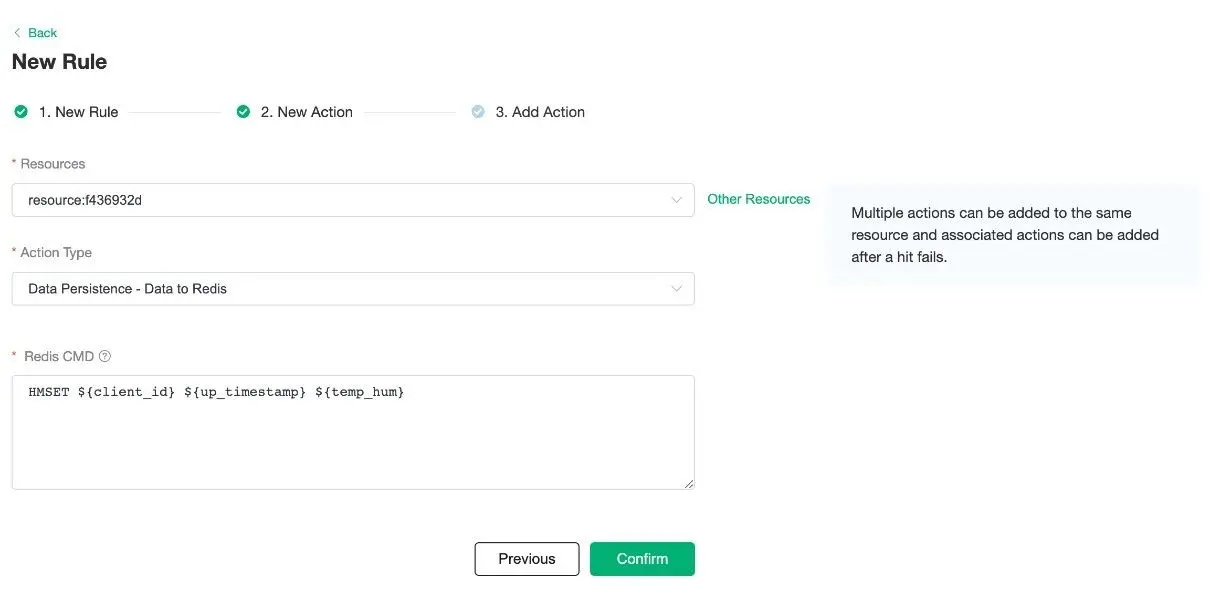
Create Action
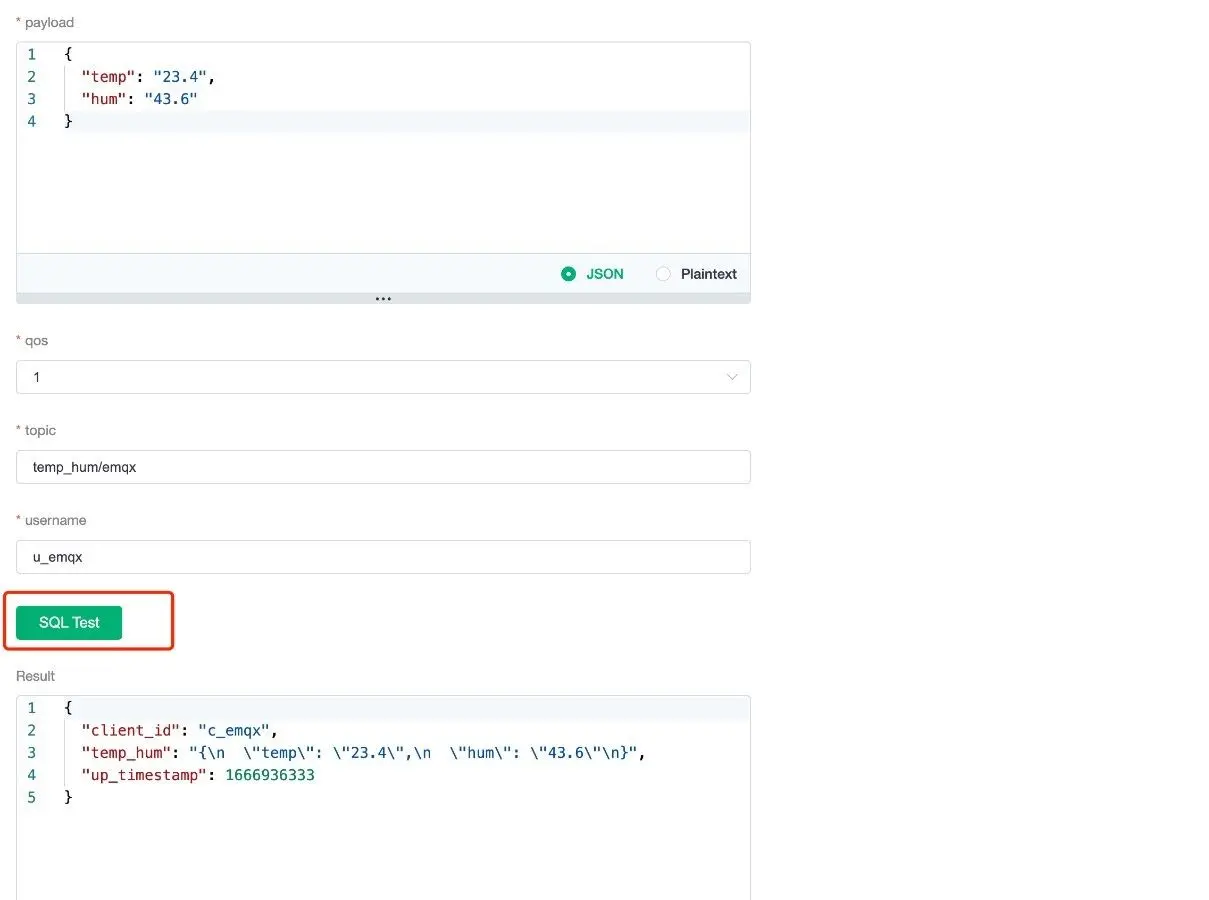
After completing the rule configuration, click Next to configure and create an action. We read the up_timestamp, client ID, temperature and humidity from the topic and save it to Redis.
HMSET ${client_id} ${up_timestamp} ${temp_hum}
Test
- Use MQTTX to connect the deployment
You need to replace broker.emqx.io with the created deployment connection address, and add client authentication information to the EMQX Cloud console.
- View the data saving results
keys *
HGETALL <client_id>
- View rules monitoring
Under View rule monitoring, the number of data dumping successes has increased.
Summary
At this point, I hope you have successfully forwarded the data to GCP and integrated EMQX Cloud with other cloud services you have.
With this series of tutorials, you can enjoy a smooth migration of your business from GCP IoT Core to its alternative, EMQX Cloud. EMQX Cloud also provides some other excellent features, such as Shadow Service which implements IoT applications quickly through Topics and APIs. Readers are welcome to explore more in your IoT development journey with EMQX Cloud.
Other articles in this series
- Migrate Your Business from GCP IoT Core 01 | Create Deployment and Connect Devices
- Migrate Your Business from GCP IoT Core 02 | Enable TLS/SSL over MQTT to Secure Your Connection
- Migrate Your Business from GCP IoT Core 03|Use JSON Web Token (JWT) to Verify Device Credentials
- Migrate Your Business from GCP IoT Core 05|Bridge Data to GCP Pub/Sub