Migrate Your Business from GCP IoT Core 05|Bridge Data to GCP Pub/Sub
In the previous article, we described how to transfer data to GCP using VPC Network Peering. In addition to this approach, we have an even simpler one. In this article, we will describe how to use EMQX Cloud's data integration feature to bridge data to GCP pub/sub and then transfer data to other applications (e.g. data analytics, database services).
Brief
In this article, we will simulate temperature and humidity data and report it to the EMQX Cloud via the MQTT protocol, after which we will use the EMQX Cloud data integration to bridge the data to the GCP Pub/Sub.
Tips:
- Professional deployment on the GCP platform uses the private network by default; no additional network configuration is required.
- But for professional deployment (AWS, Azure) users: Please complete the NAT gateway first; all IPs mentioned below refer to the public IP of the resource.
- So we recommend you use professional deployment on the GCP platform.
GCP Pub/Sub Introduction
GCP Pub/Sub is an asynchronous and scalable messaging service that decouples services producing messages from services processing those messages.
Pub/Sub allows services to communicate asynchronously, with latencies on the order of 100 milliseconds.
Pub/Sub is used for streaming analytics and data integration pipelines to ingest and distribute data. It's equally effective as a messaging-oriented middleware for service integration or as a queue to parallelize tasks.
Pub/Sub enables you to create systems of event producers and consumers, called publishers and subscribers. Publishers communicate with subscribers asynchronously by broadcasting events, rather than by synchronous remote procedure calls (RPCs).
Publishers send events to the Pub/Sub service, without regard to how or when these events are to be processed. Pub/Sub then delivers events to all the services that react to them. In systems communicating through RPCs, publishers must wait for subscribers to receive the data. However, the asynchronous integration in Pub/Sub increases the flexibility and robustness of the overall system.
To get started with Pub/Sub, check out the Quickstart using Google Cloud console. For a more comprehensive introduction, see Building a Pub/Sub messaging system.
Create Deployments
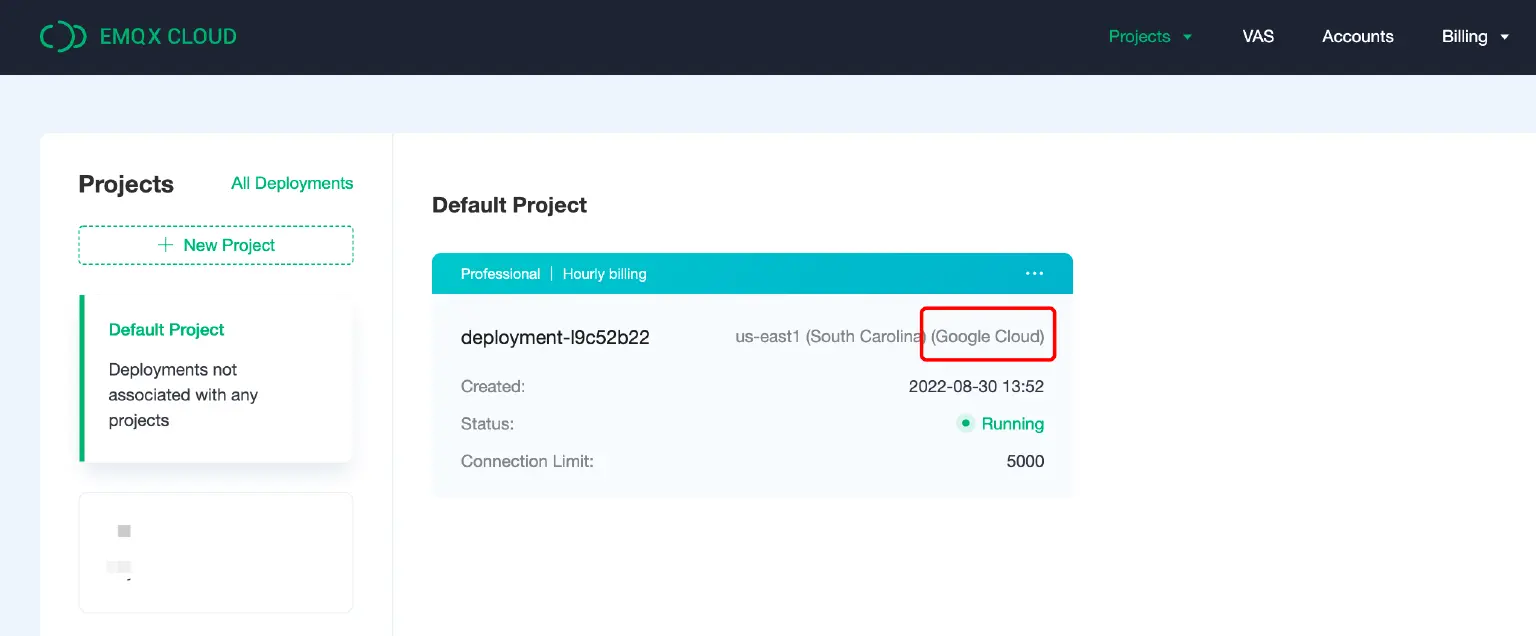
Create EMQX Cluster
Create a GCP deployment of EMQX Cloud, other options default.
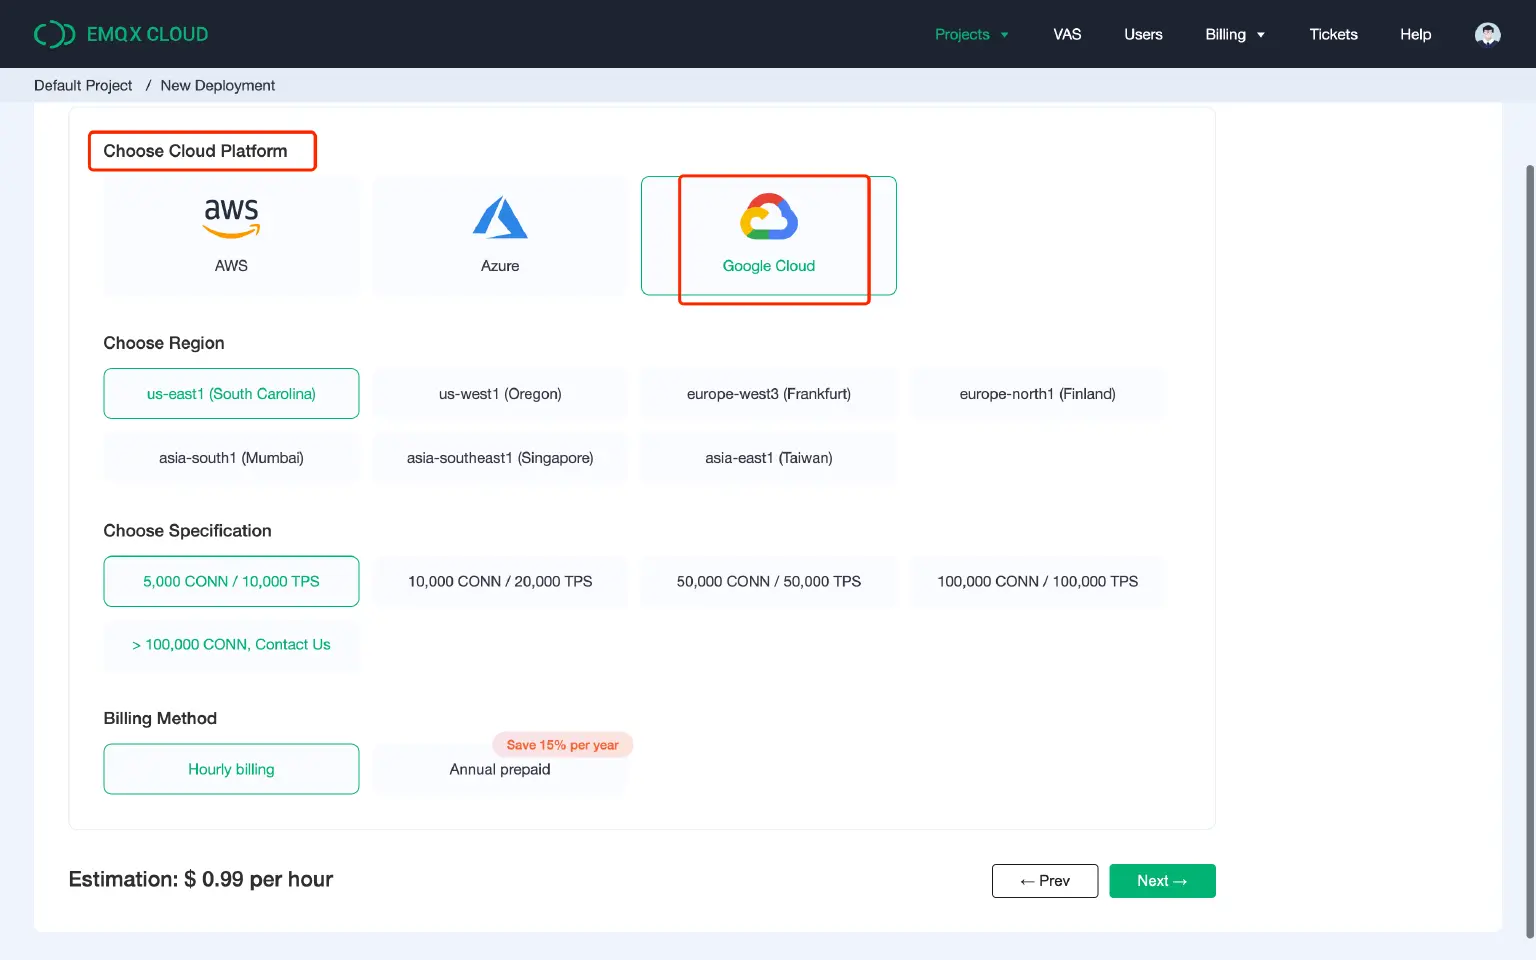
When the status is Running, the creation of the deployment is complete.
Create GCP Pub/Sub instances
If you are using GCP Pub/Sub for the first time, you can refer to the help document.
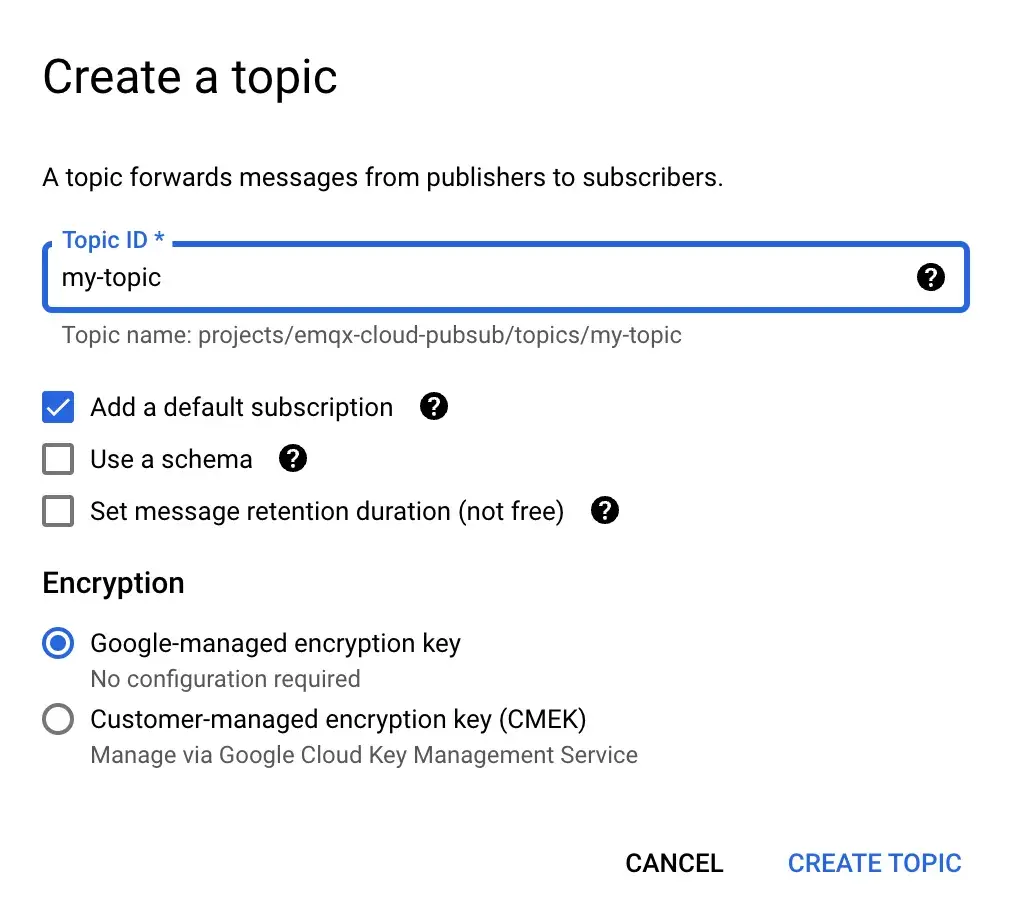
Create a topic
Enter the GCP Pub/Sub console, click Create Topic, and enter the Topic ID named my-topic to successfully create a Topic.
Click on the Topic ID to view the Topic details.
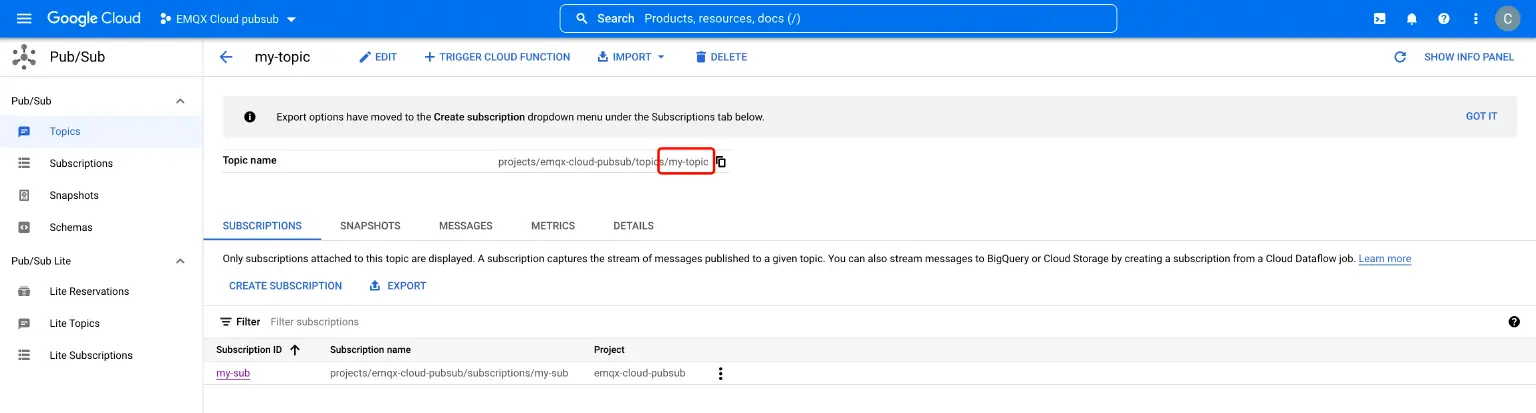
Click Subscriptions to view the subscribed topic details and message forwarding results.

Data Integrations
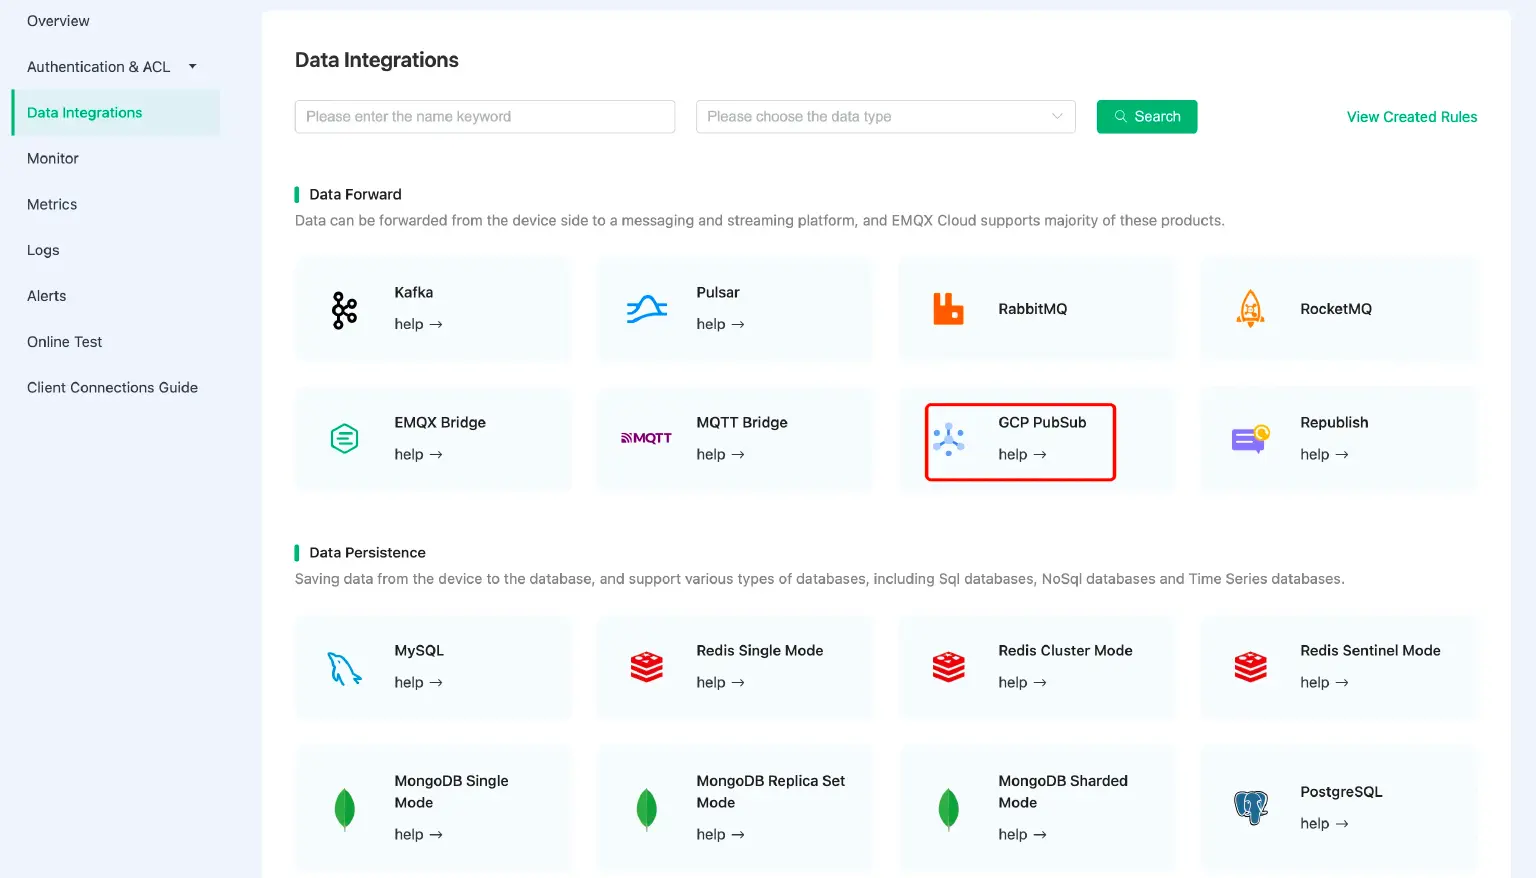
1. Create GCP Pub/Sub resources
Go to the Data Integrations page. On the data integration page, click GCP Pub/Sub resources.
Fill in the Service Account JSON and other details, and then click test. Please check the GCP Pub/Sub service if the test fails.
Tips: Service Account JSON : Go to the GCP console, select the appropriate project - IAM & Admin - Service Accounts - Email, enter the email details page, click KEYS, and generate a JSON file for identity authentication.

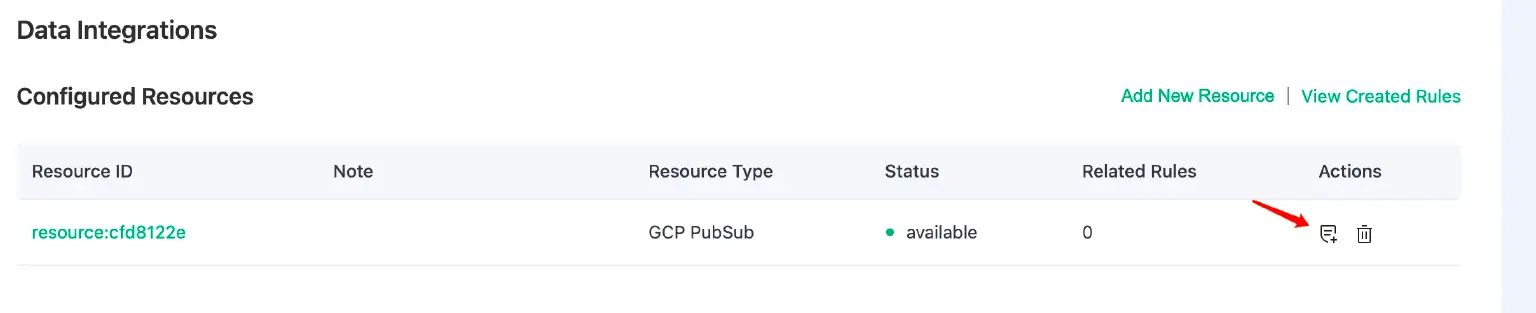
Click the New button after the test is passed and you will see the Create Resource successfully message.
2. Create a new rule
Put the following SQL statement in the SQL input field. The device reporting message time (up timestamp), client ID, and message body (Payload) will be retrieved from the temp hum/emqx subject in the SQL rule, and the device ambient temperature and humidity will be read from the message body.
SELECT
timestamp as up_timestamp,
clientid as client_id,
payload.temp as temp,
payload.hum as hum
FROM
"temp_hum/emqx"
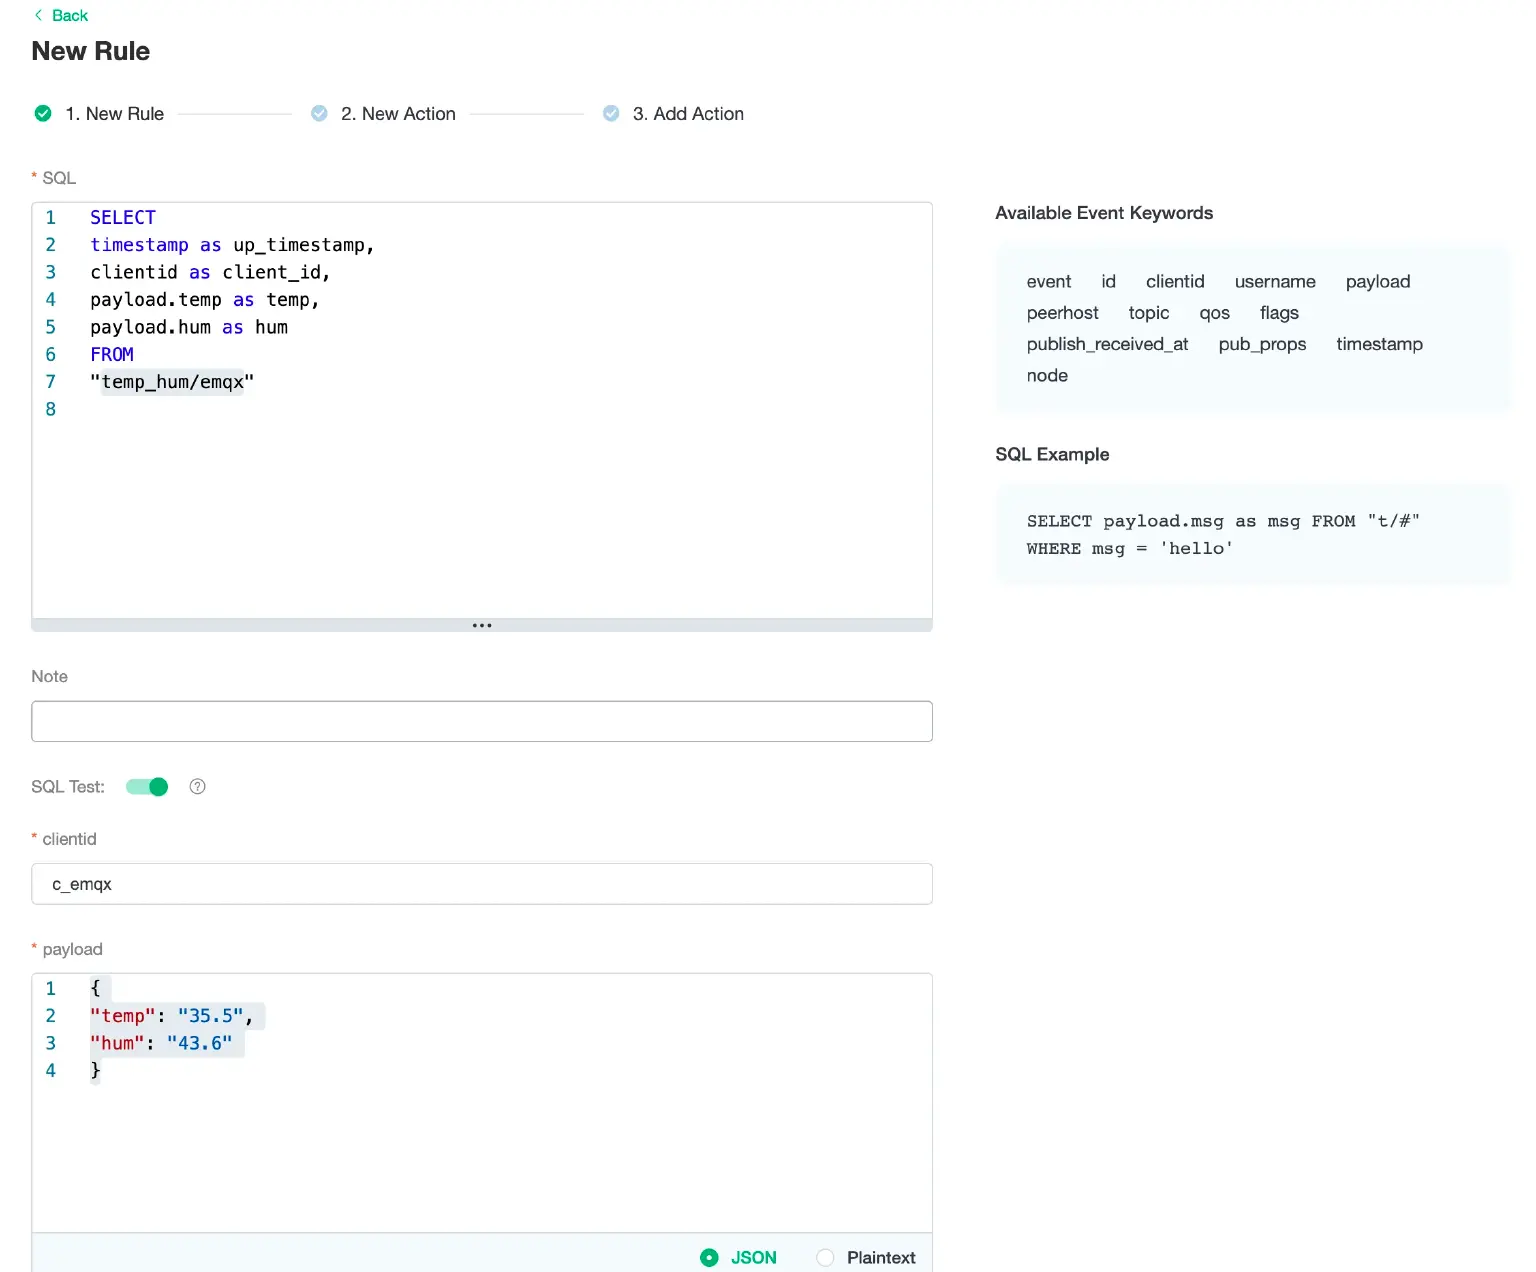
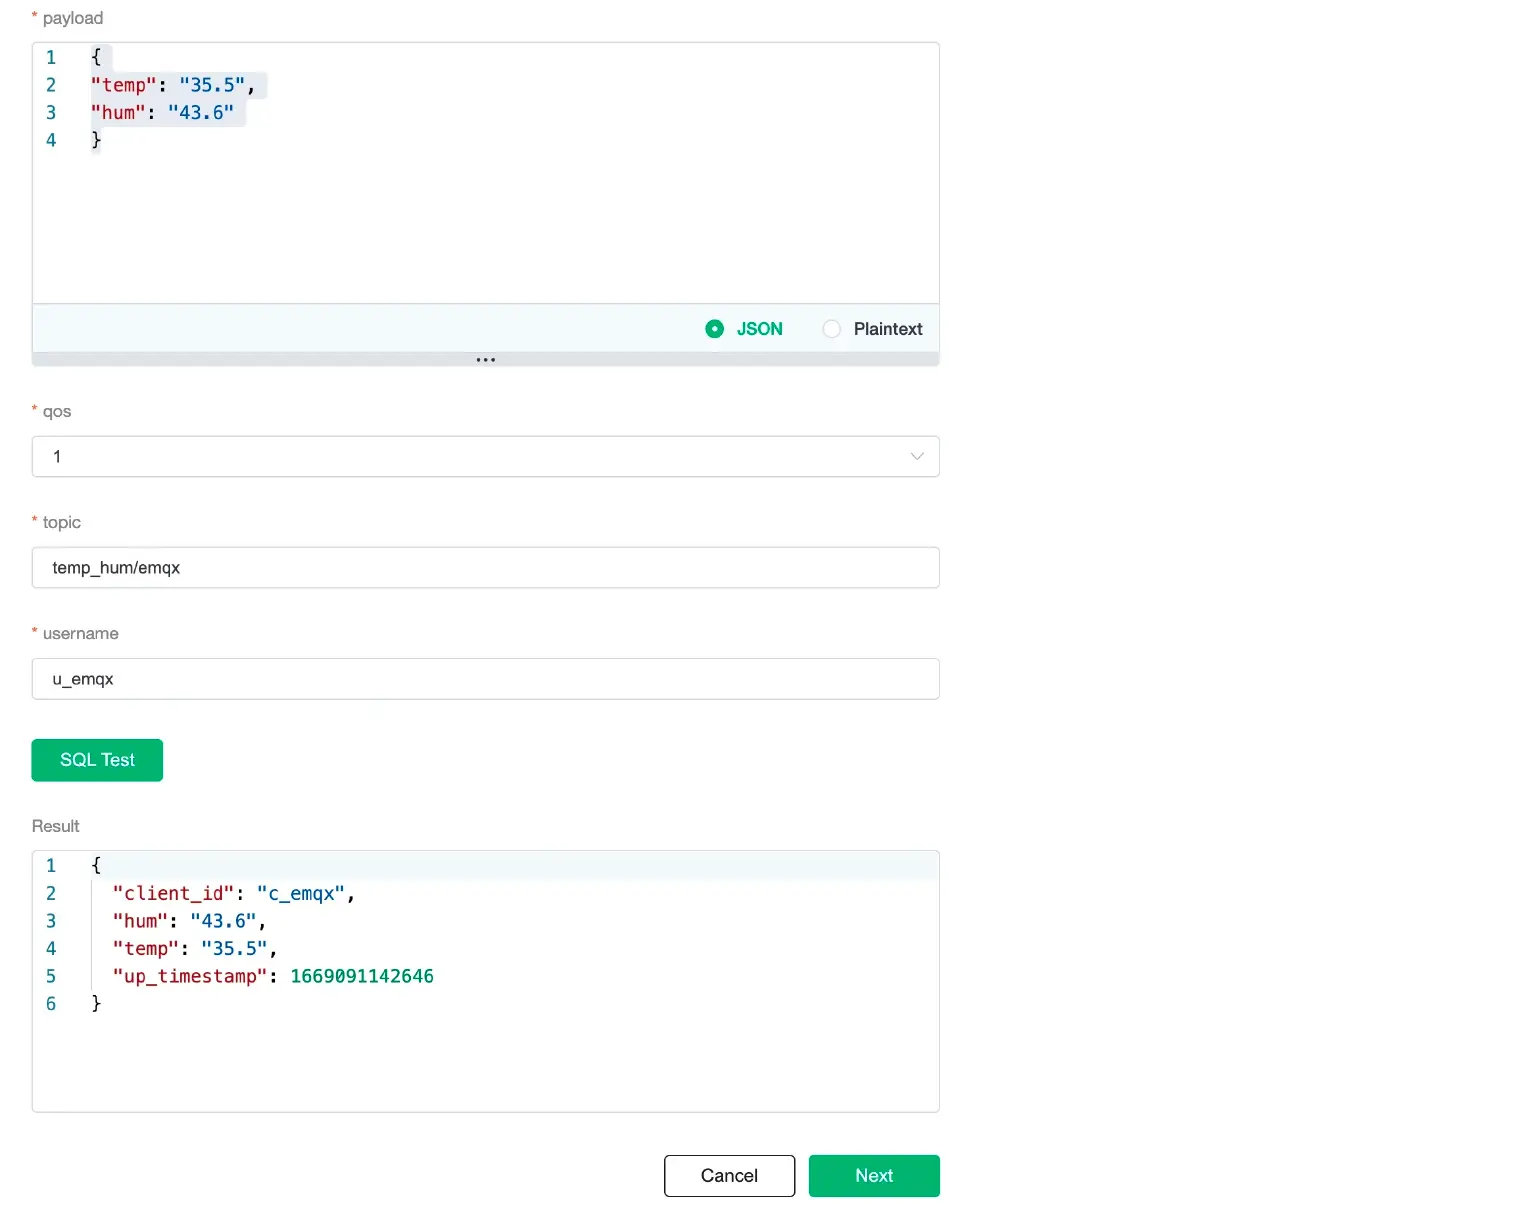
You can click SQL Test under the SQL input box to fill in the data:
- topic: temp_hum/emqx
- payload:
{
  "temp": 35.5,
  "hum": 43.6
}
Click Test to view the obtained data results. If the settings are correct, the test output box should get the complete JSON data as follows:
If the test fails, please check whether the SQL is compliant and whether the topic in the test is consistent with the SQL filled in.
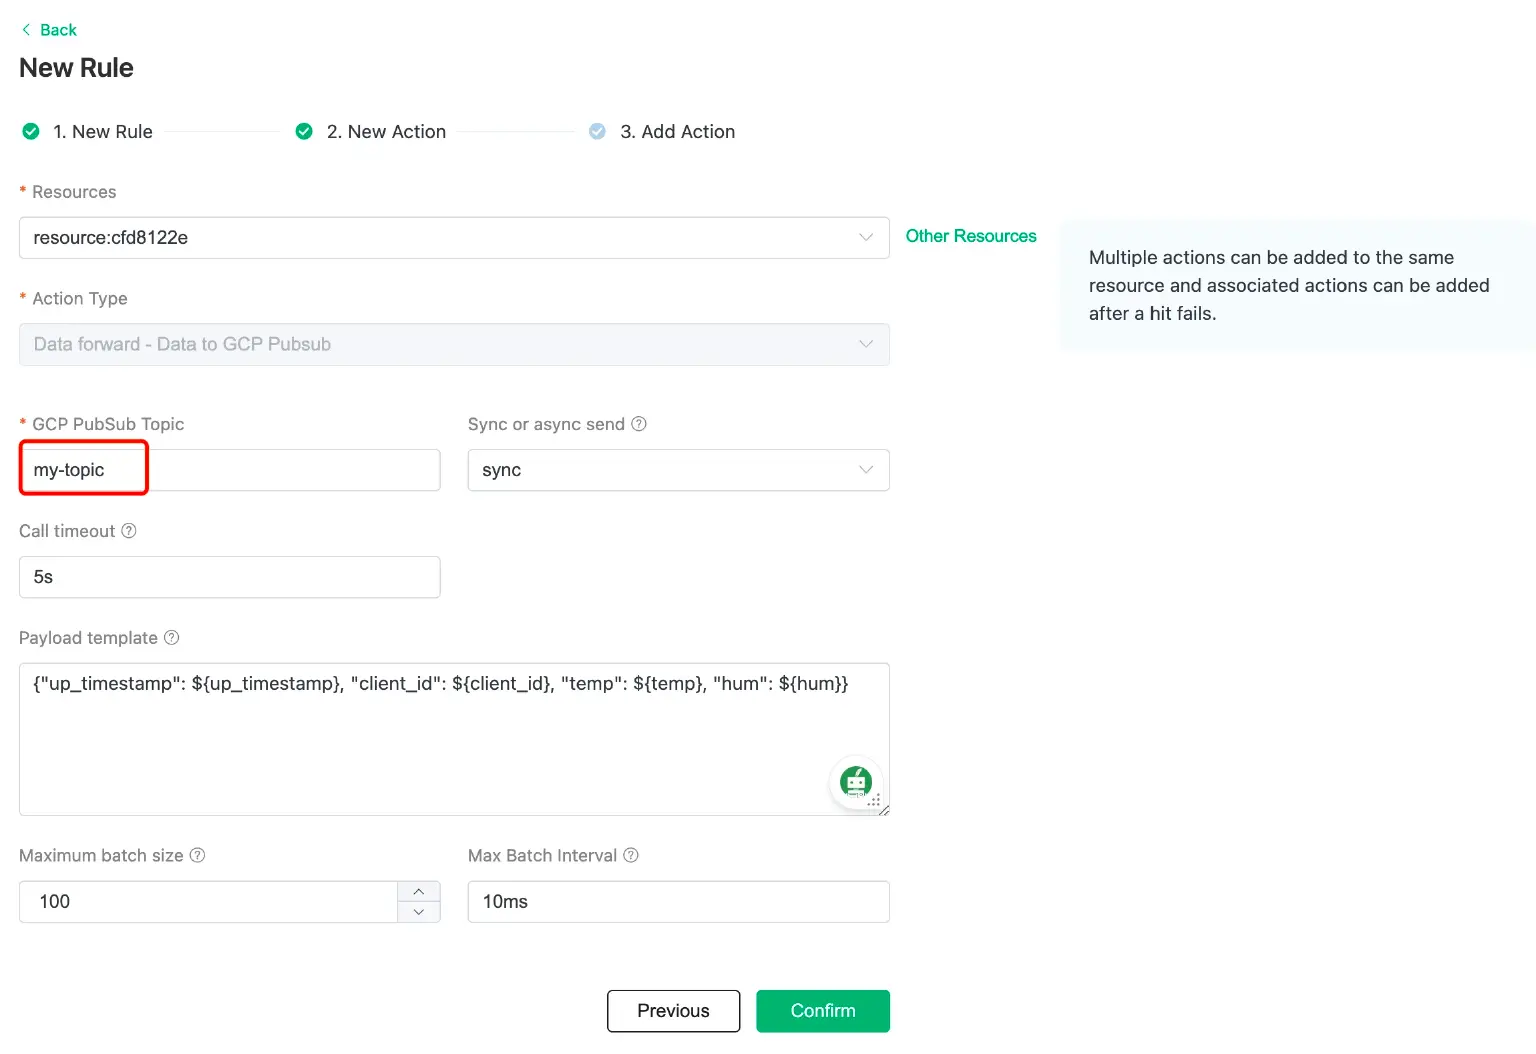
3. Add Action to Rule
Click Next to add a GCP Pub/Sub forwarding action to the rule once the SQL test succeeds. To demonstrate how to forward the data reported by the device to GCP Pub/Sub, we'll utilize the following GCP Pub/Sub topic and message template.
# GCP Pub/Sub message template
{"up_timestamp": ${up_timestamp}, "client_id": ${client_id}, "temp": ${temp}, "hum": ${hum}}
After successfully binding the action to the rule, click View Details to see the rule SQL statement and the bound actions.
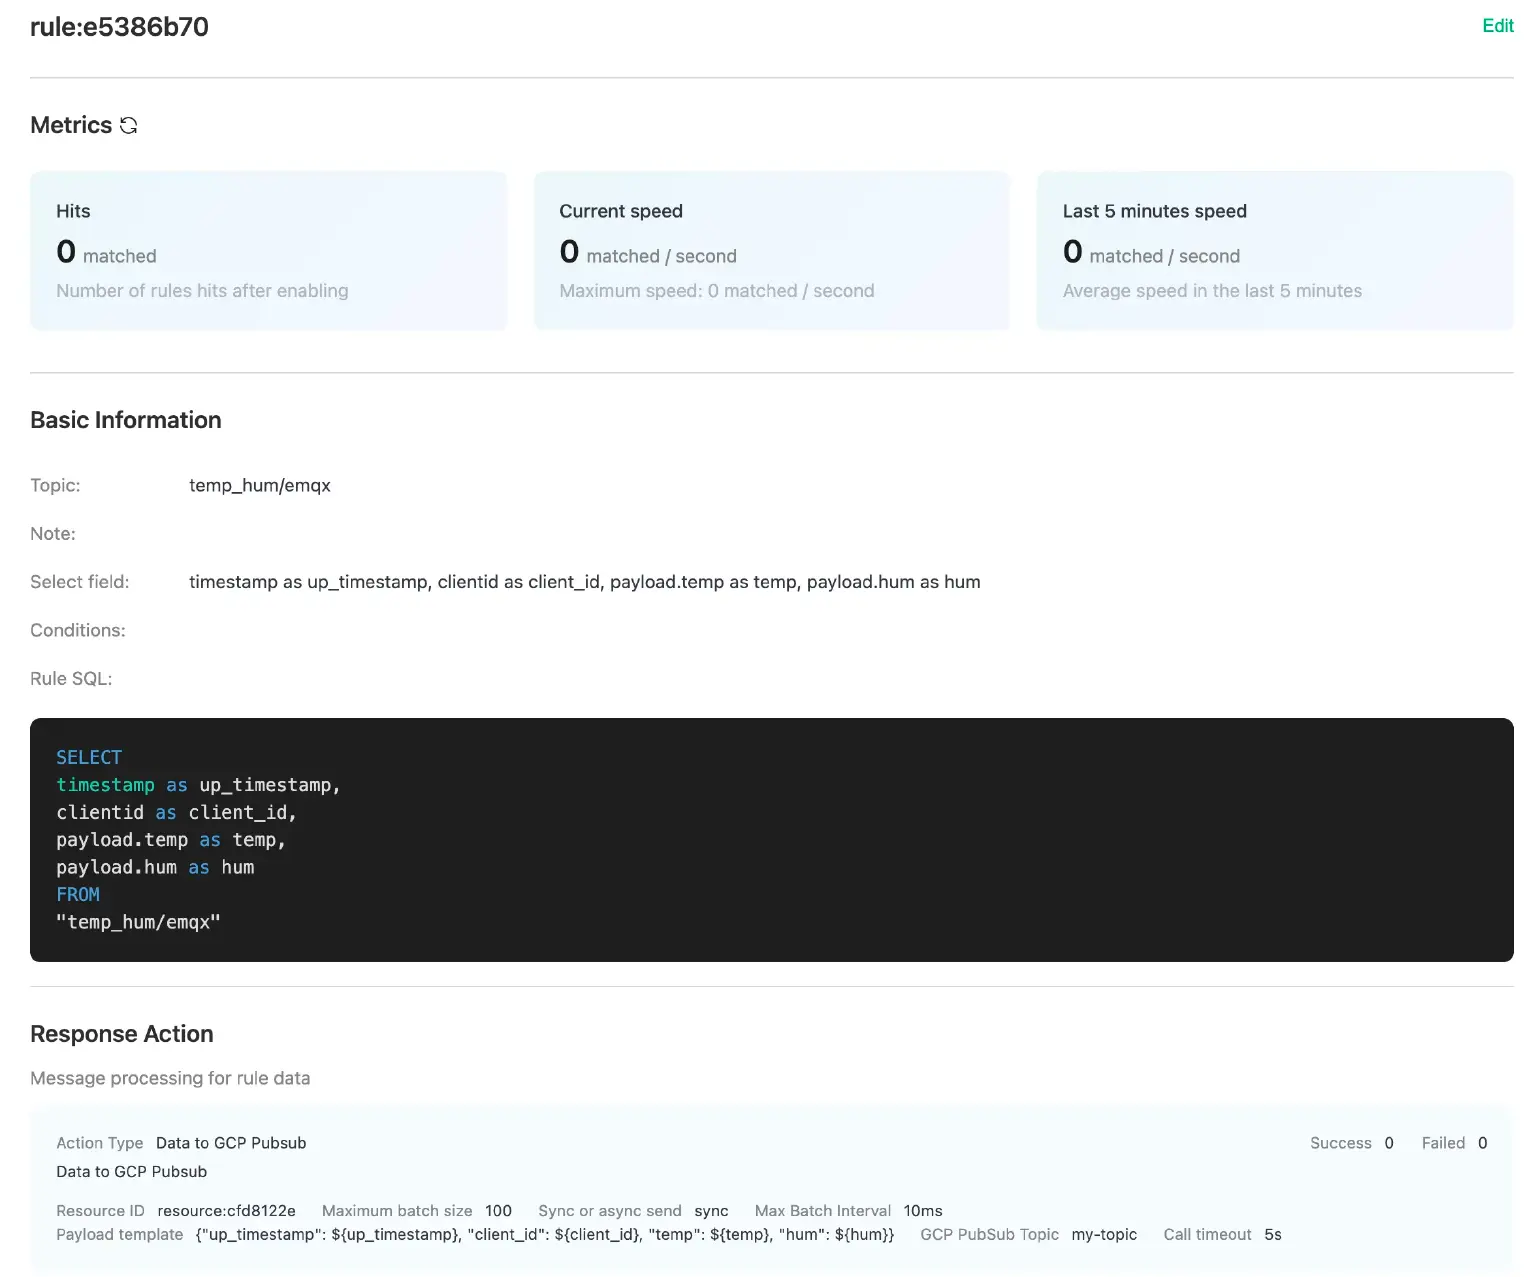
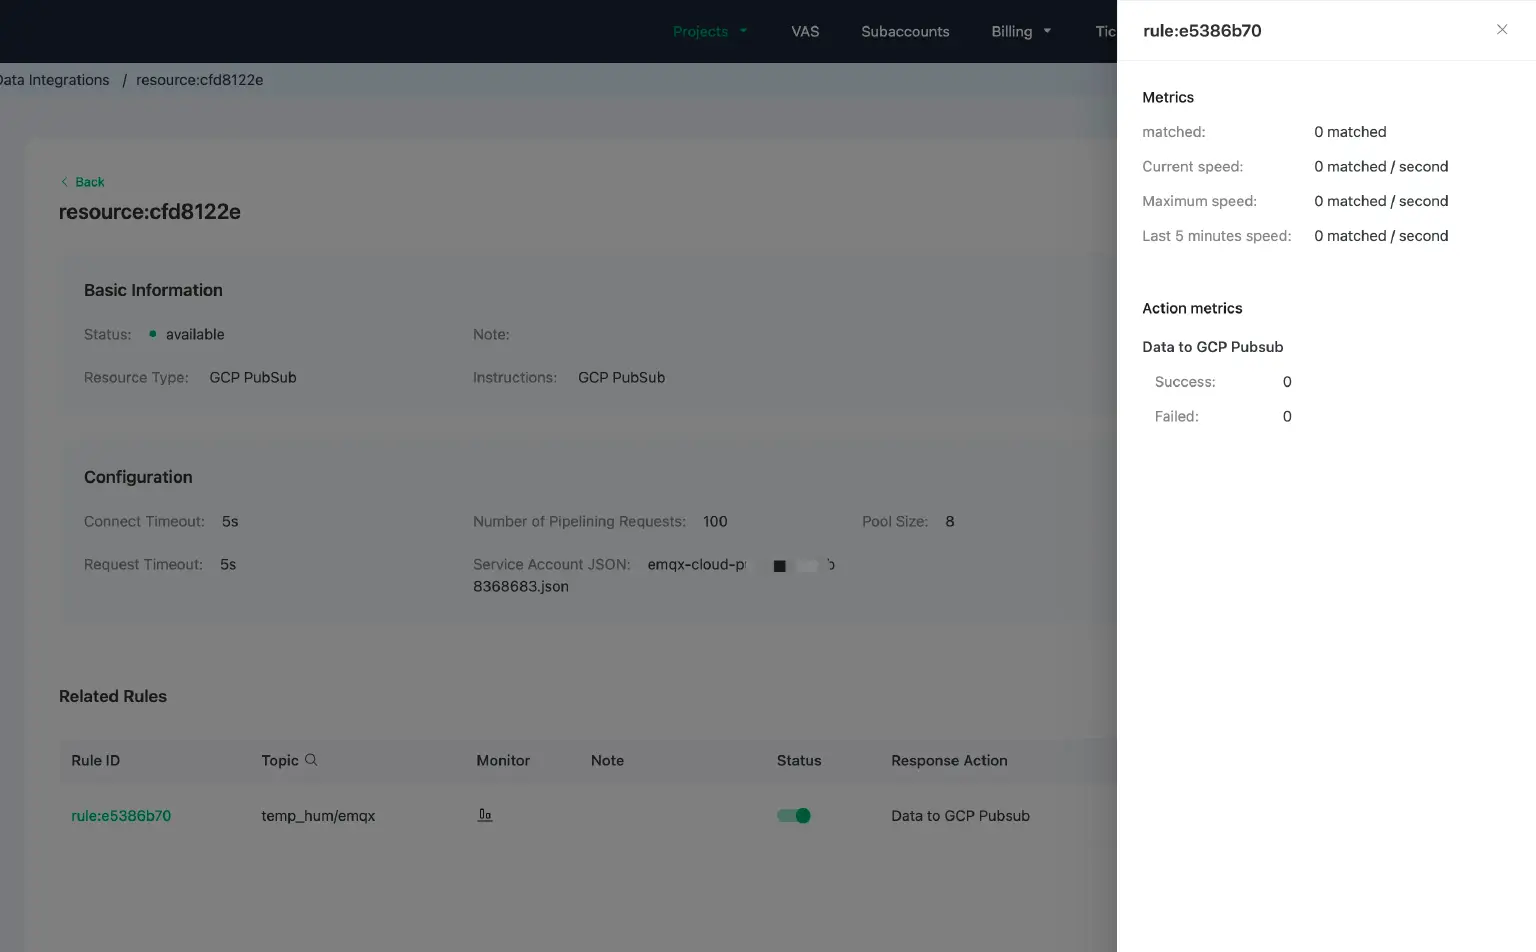
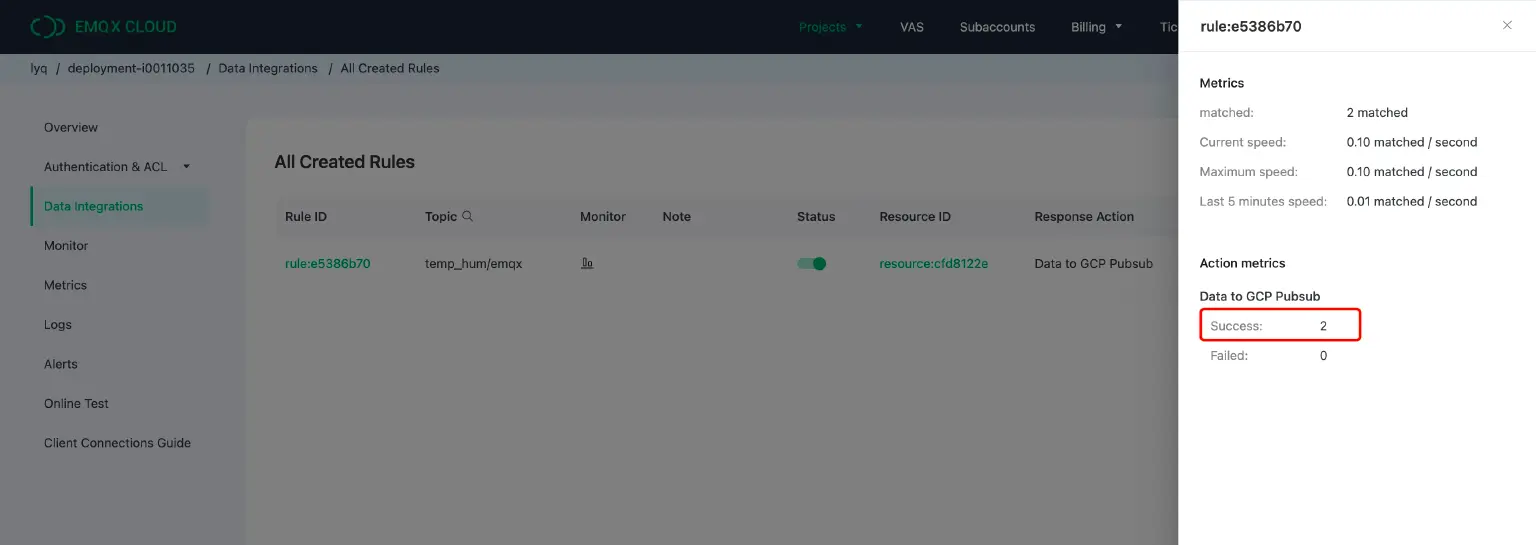
To see the created rules, go to Data Integrations/View Created Rules. Click the Monitor button to see the detailed match data of the rule.
Verification
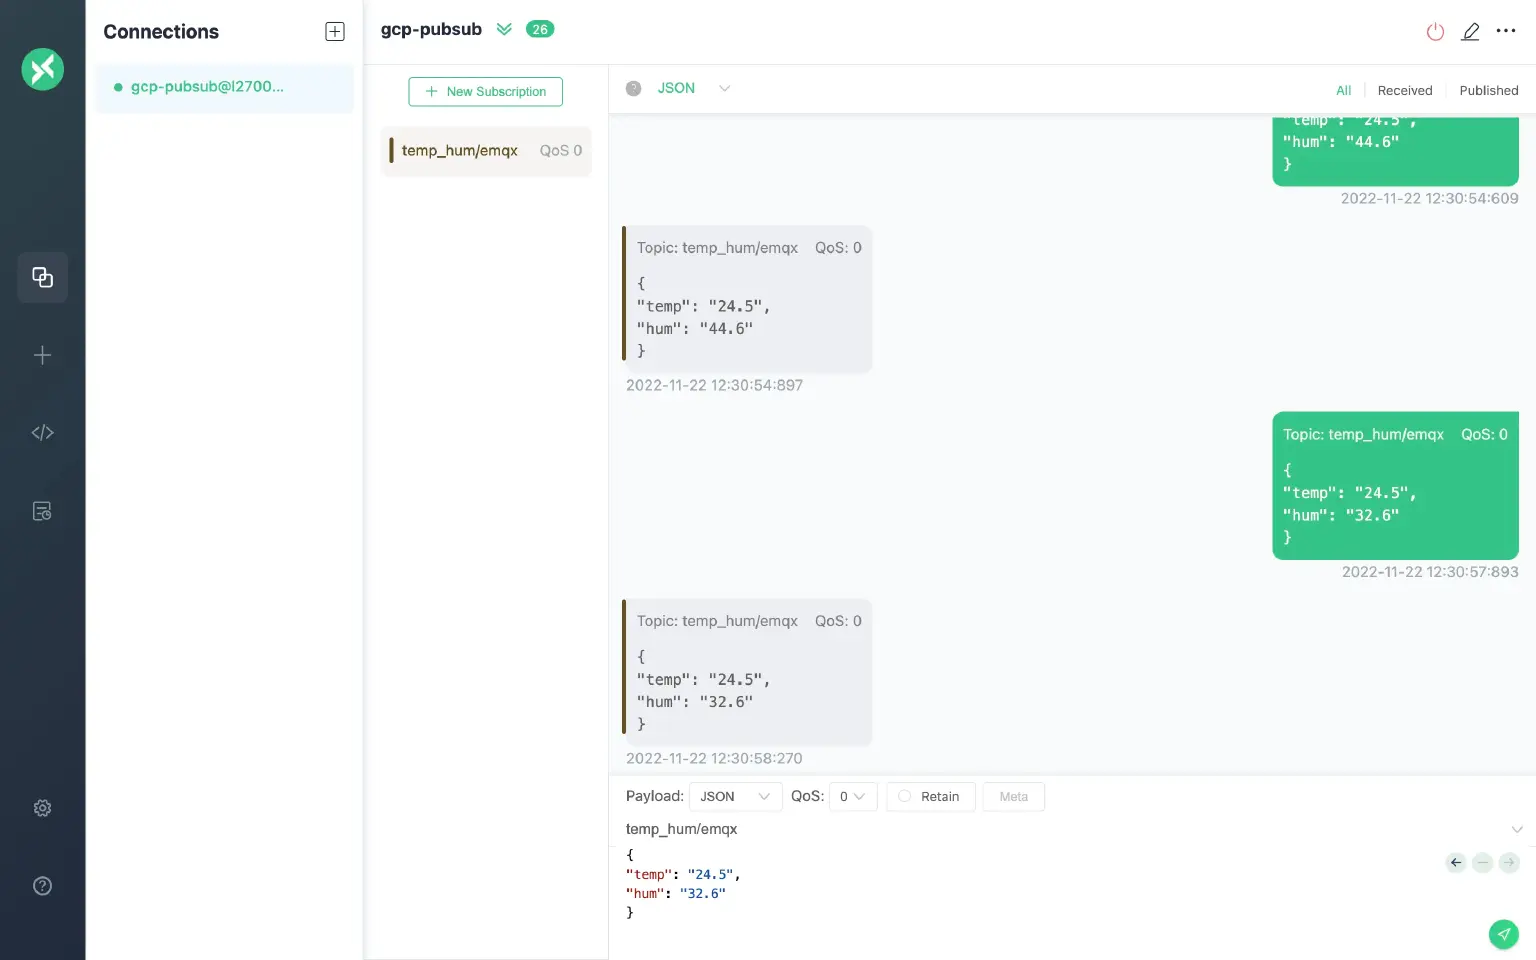
1. Use MQTTX to simulate data reporting
We recommend you use MQTTX, an elegant cross-platform MQTT 5.0 desktop client to subscribe/publish messages.
Click on the add button and fill in the deployment information to connect to the deployment. You need to replace broker.emqx.io with the created deployment connection address, and add client authentication information to the EMQX Cloud console. Enter the topic name and payload message to publish the message.
2. View rules monitoring
Check the rule monitoring and add one to the "Success" number.
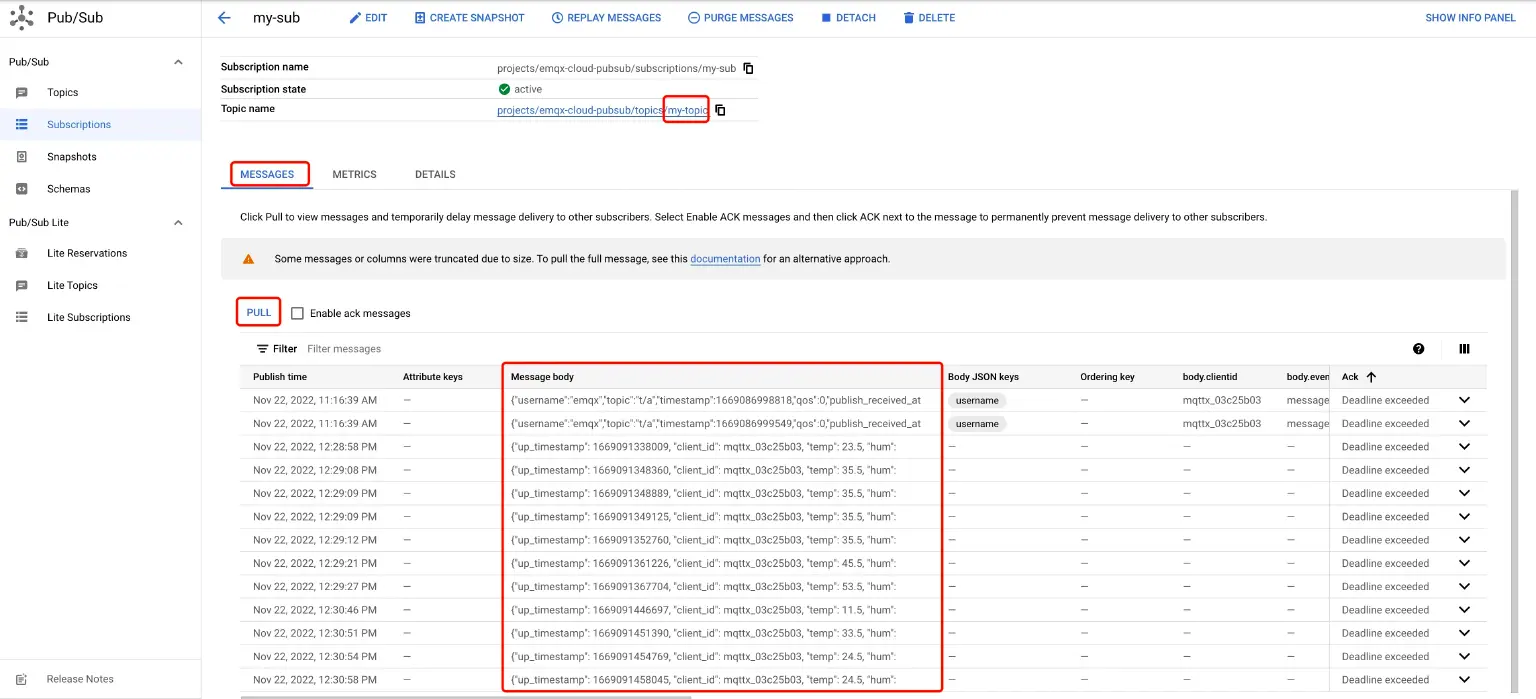
3. View results in GCP Pub/Sub console
Go back to the GCP Pub/Sub console and go to the Subscriptions page. Select the messages, then GCP Pub/Sub will pull the results for you.
Summary
So far, we have used EMQX Cloud data integration based on the public cloud to bridge the entire process of data to the GCP Pub/Sub.
Most GCP IoT Core users have built IoT applications with the data services provided by GCP. Although GCP IoT Core is about to shut down its business, you can still get your business ongoing without any changes after migrating your hosting service to EMQX Cloud and bridging the data to GCP Pub/Sub by data integration feature.
Enjoy your migration and new IoT journey with EMQX Cloud!
Other articles in this series
- Migrate Your Business from GCP IoT Core 01 | Create Deployment and Connect Devices
- Migrate Your Business from GCP IoT Core 02 | Enable TLS/SSL over MQTT to Secure Your Connection
- Migrate Your Business from GCP IoT Core 03|Use JSON Web Token (JWT) to Verify Device Credentials
- Migrate Your Business from GCP IoT Core 04 | VPC Network Peering and Transfer Data to GCP