Two-way TLS/SSL with EMQX Cloud, MQTTX, and Let's Encrypt
Overview
EMQX Cloud is the first fully hosted MQTT 5.0 cloud messaging service in the world. With the support of EMQX Cloud, you can create an MQTT cluster on the cloud and use the features of EMQX Enterprise Edition. This allows you to spend more time on business connections and less time for EMQX operation, maintenance, and management.
In this article, we will set up a two-way TLS/SSL authentication for an EMQX Cloud deployment with a third-party certification.
- Let's Encrypt, a free third-party Certificate Authority, will be used to certify a custom domain purchased from AWS Route 53, which will point to the EMQX Cloud deployment.
- OpenSSL will be used for client-side TLS/SSL.
- MQTTX will be used to validate the encrypted connection.
Prerequisites
- An EMQX Cloud Professional deployment up and running: for this example, a deployment to AWS will be used.
- An MQTT client installed: for this example, MQTTX will be used.
- A registered domain: for this example, AWS Route 53 will be used.
Create client-side self-signed certificate
Alternatively to the step by step below, instructions can be followed from the EMQX Cloud TLS/SSL documentation.
# Create CA certificate
openssl req -new -newkey rsa:2048 \
    -days 365 -nodes -x509 \
    -subj "/C=US/O=Test Org/CN=Test CA" \
    -keyout client-ca.key -out client-ca.crt

# Create private key
openssl genrsa -out client.key 2048

# Create certificate request file
openssl req -new -key client.key -out client.csr -subj "/CN=Client"

# Create client certifite by feeding the certificate request file to the newly created CA
openssl x509 -req -days 365 -sha256 -in client.csr -CA client-ca.crt -CAkey client-ca.key -CAcreateserial -out client.crt

# View and verify the client certificate
openssl x509 -noout -text -in client.crt
openssl verify -CAfile client-ca.crt client.crt
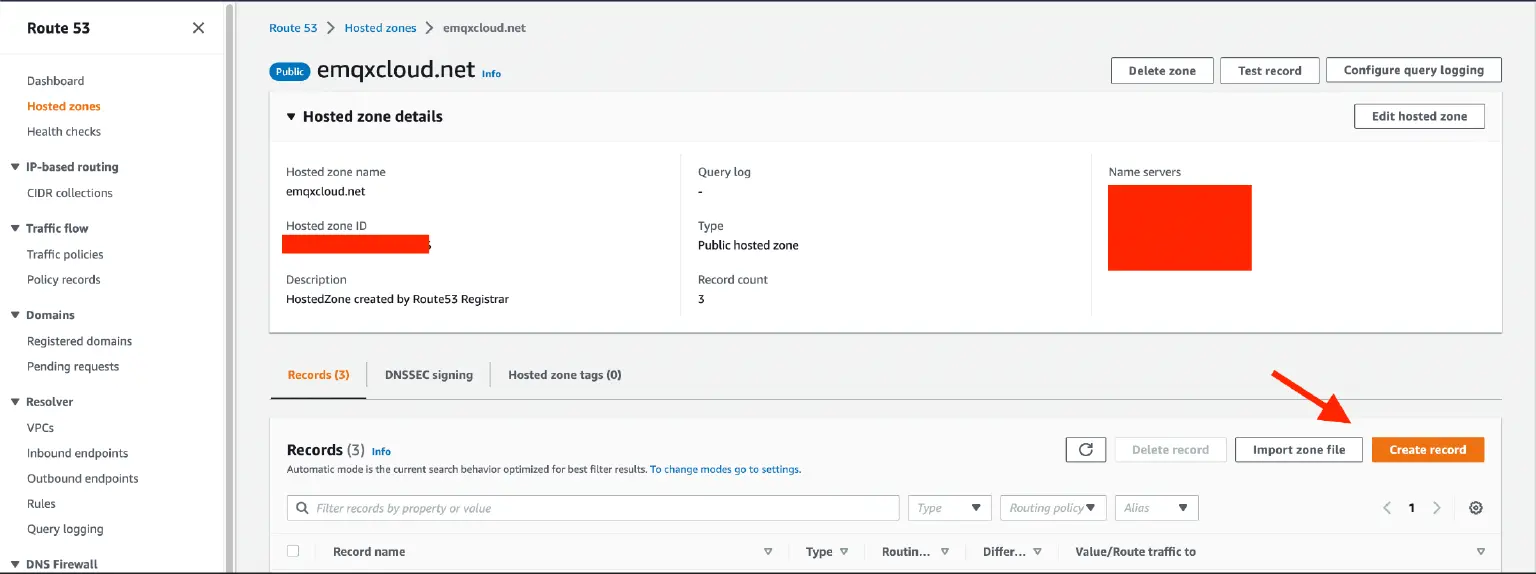
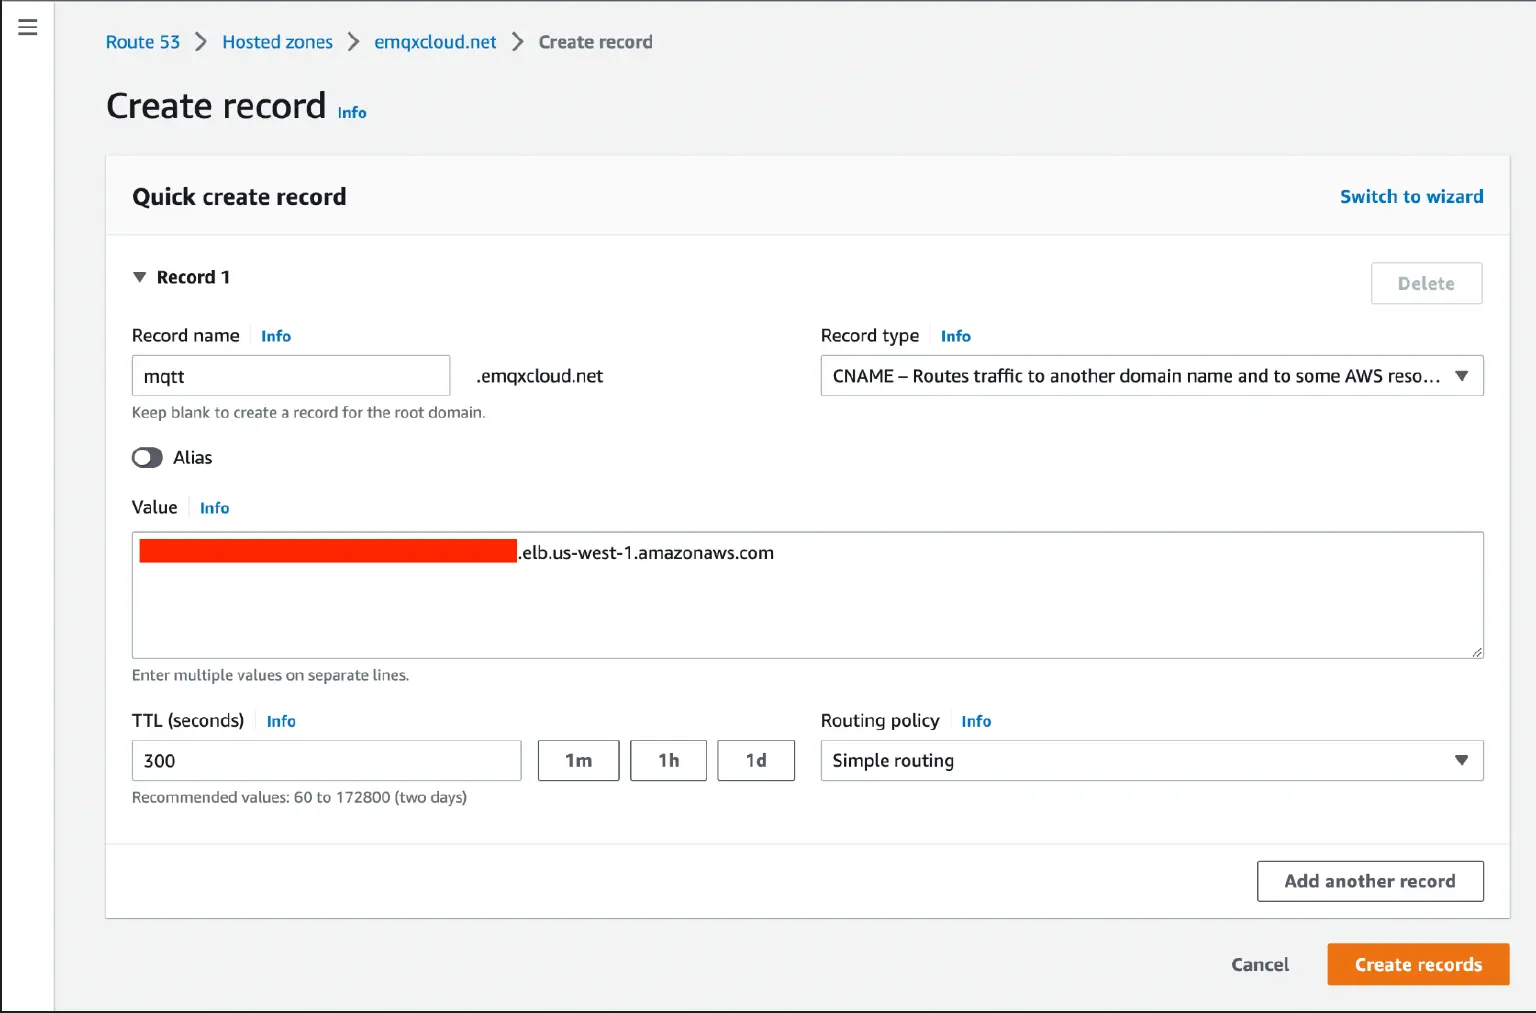
Point a subdomain to the EMQX Cloud deployment cluster
- Copy the EMQX Cloud deployment URL from the EMQX Cloud console.
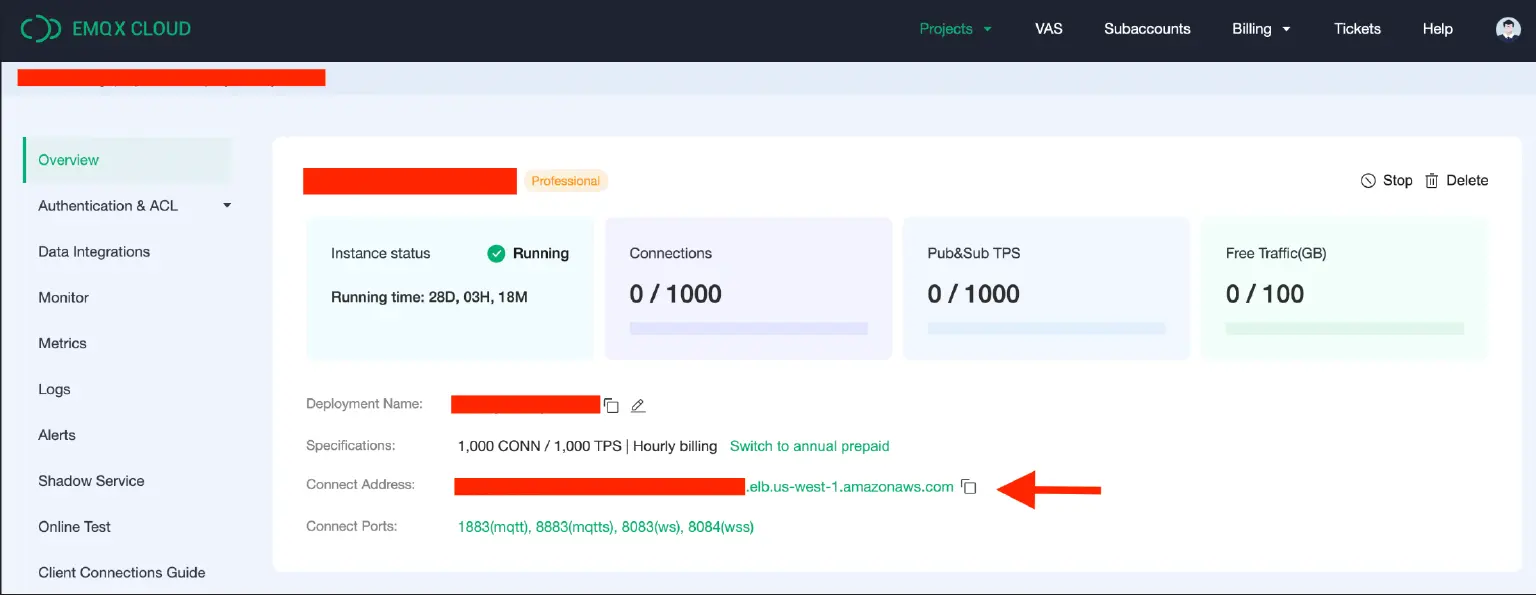
- Create a CNAME record in AWS Route 53 hosted zone pointing to the EMQX Cloud deployment.
Get a certificate for the subdomain
Alternatively to the step by step below, instructions are available from Let's Encrypt/Certbot for certbot and Route 53 plugin. Be sure to select "Other" for the "Software" dropdown, and the "Wildcard" tab.
- Install package manager, Certbot, and DNS plugin using the CLI:
- macOS:
# Install Homebrew if needed /bin/bash -c "$(curl -fsSL https://raw.githubusercontent.com/Homebrew/install/HEAD/install.sh)" # Install certbot with brew brew install certbot # Install DNS plugin (discussion on why Homebrew doesn't work: https://github.com/certbot/certbot/issues/5680) $( brew --prefix certbot )/libexec/bin/pip install certbot-dns-route53 - Ubuntu:
# Install snap if needed
sudo snap install core; sudo snap refresh core

# Install certbot with snap and configure it
sudo snap install --classic certbot
sudo ln -s /snap/bin/certbot /usr/bin/certbot
sudo snap set certbot trust-plugin-with-root=ok

# Install DNS plugin
sudo snap install certbot-dns-route53
- macOS:
- Give AWS permissions to the plugin:
- Create IAM policy with the following statement, changing
YOURHOSTEDZONEID: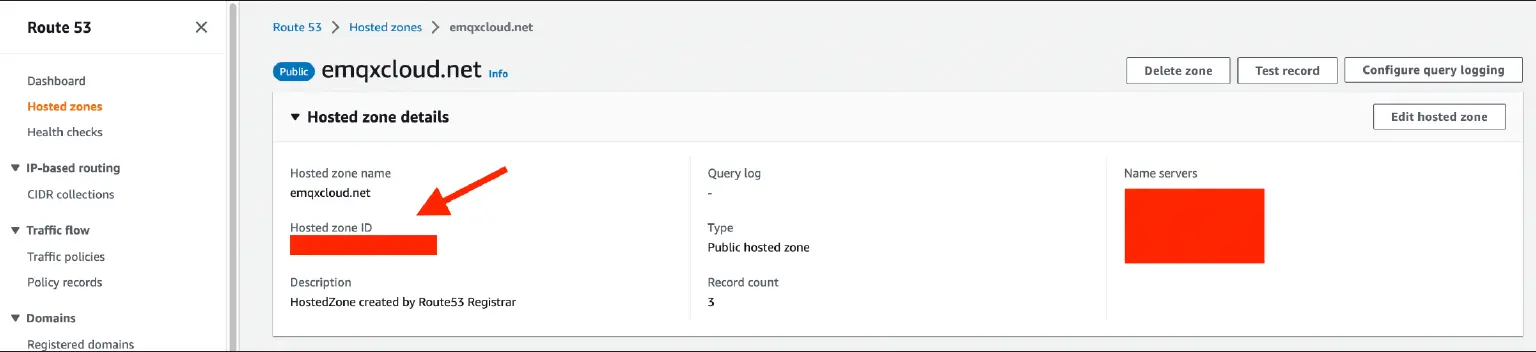
{ "Version": "2012-10-17", "Id": "certbot-dns-route53 policy", "Statement": [ { "Effect": "Allow", "Action": [ "route53:ListHostedZones", "route53:GetChange" ], "Resource": [ "*" ] }, { "Effect" : "Allow", "Action" : [ "route53:ChangeResourceRecordSets" ], "Resource" : [ "arn:aws:route53:::hostedzone/YOURHOSTEDZONEID" ] } ] } - Create a new IAM user, attach the new policy to its permissions, and save the
Access key IDandSecret access key.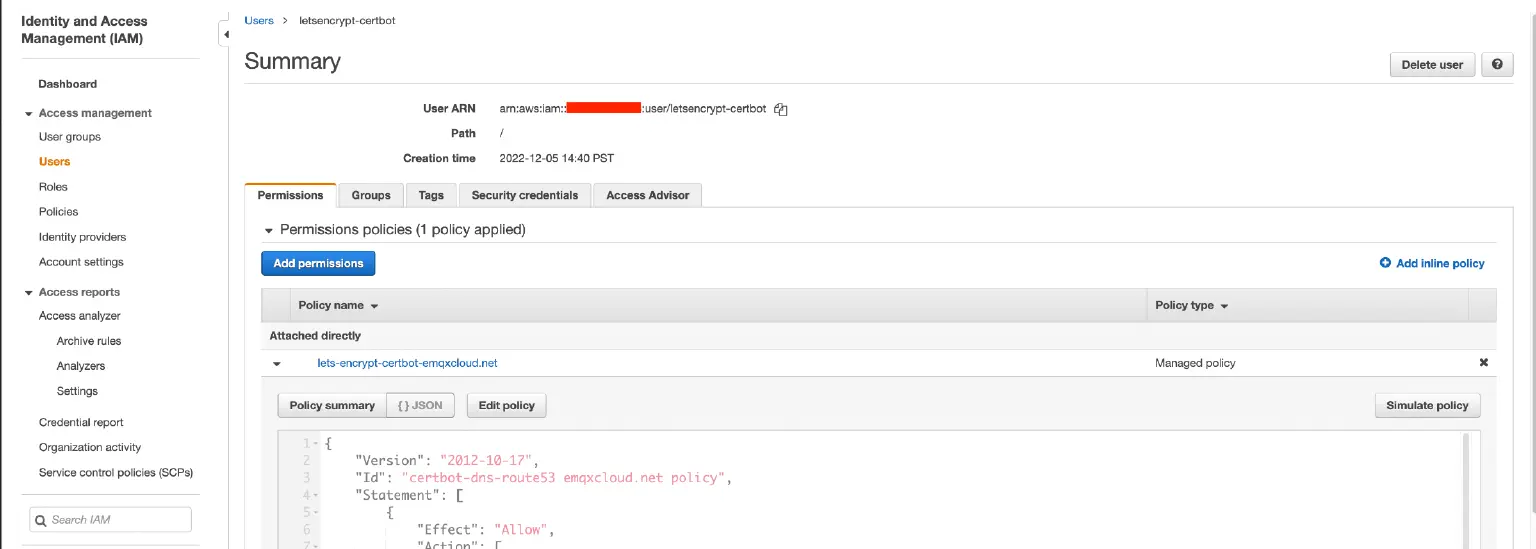
- Set credentials for the new IAM user in the CLI as environment variables and acquire a certificate:
export AWS_ACCESS_KEY_ID=AKIA---------EXAMPLE
export AWS_SECRET_ACCESS_KEY=wJalrXUtnFEMI-----------------EXAMPLEKEY

certbot certonly --dns-route53 -d mqtt.YOURDOMAIN.COM
- Create IAM policy with the following statement, changing
Understanding the Certbot certificates
fullchain.pem: The full chain of certificates involving the certification of the domain. Usually includes three certificates that can be broken down in the following manner:- Certificate body (first): the certificate for the registered domain.
- Intermediate certificate (second): the certificate for Let's Encrypt.
- Root certificate (third): the certificate from a trusted certificate authority, which belongs to a select few set of CA's shipped by default in most OS and web browsers.
cert.pem: The first certificate from the full chain.chain.pem: All the certificates from the full chain, except the first.privkey.pem: Used to encrypt/decrypt data.
More information from Let's Encrypt on their certificate chain can be found here.
Set up two-way TLS/SSL in EMQX Cloud deployment
- Click on
+ TLS/SSLin EMQX Cloud console.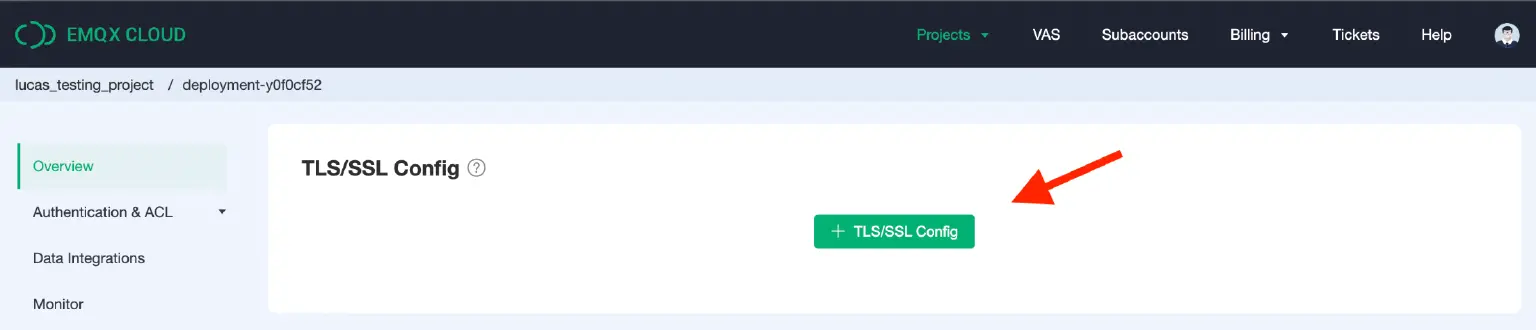
- Select "two-way" for "Type", add the certificates from previous steps to the EMQX Cloud deployment, and click "Confirm".
- Certificate body:
cert.pemfrom Let's Encrypt. The certificate created by Let's Encrypt for the subdomain. - Certificate chain: The intermediate (second) certificate in
fullchain.pemfrom Let's Encrypt. The chain should include all certificates between the certified (sub)domain and the root certificate, which in this case should be just one. - Certificate private key:
privkey.pemfrom Let's Encrypt. - Client CA certificate:
client-ca.crtlocally created previously with openssl. Since the client connecting to the deployment also needs to be verified, the deployment needs to know the trusted CA to check client certificates with.
- Certificate body:
Test two-way TLS/SSL with MQTTX
- Ensure the existence of a username and password to connect to the deployment. Help creating users can be found here.
- In the Let's Encrypt certificate directory, create a new
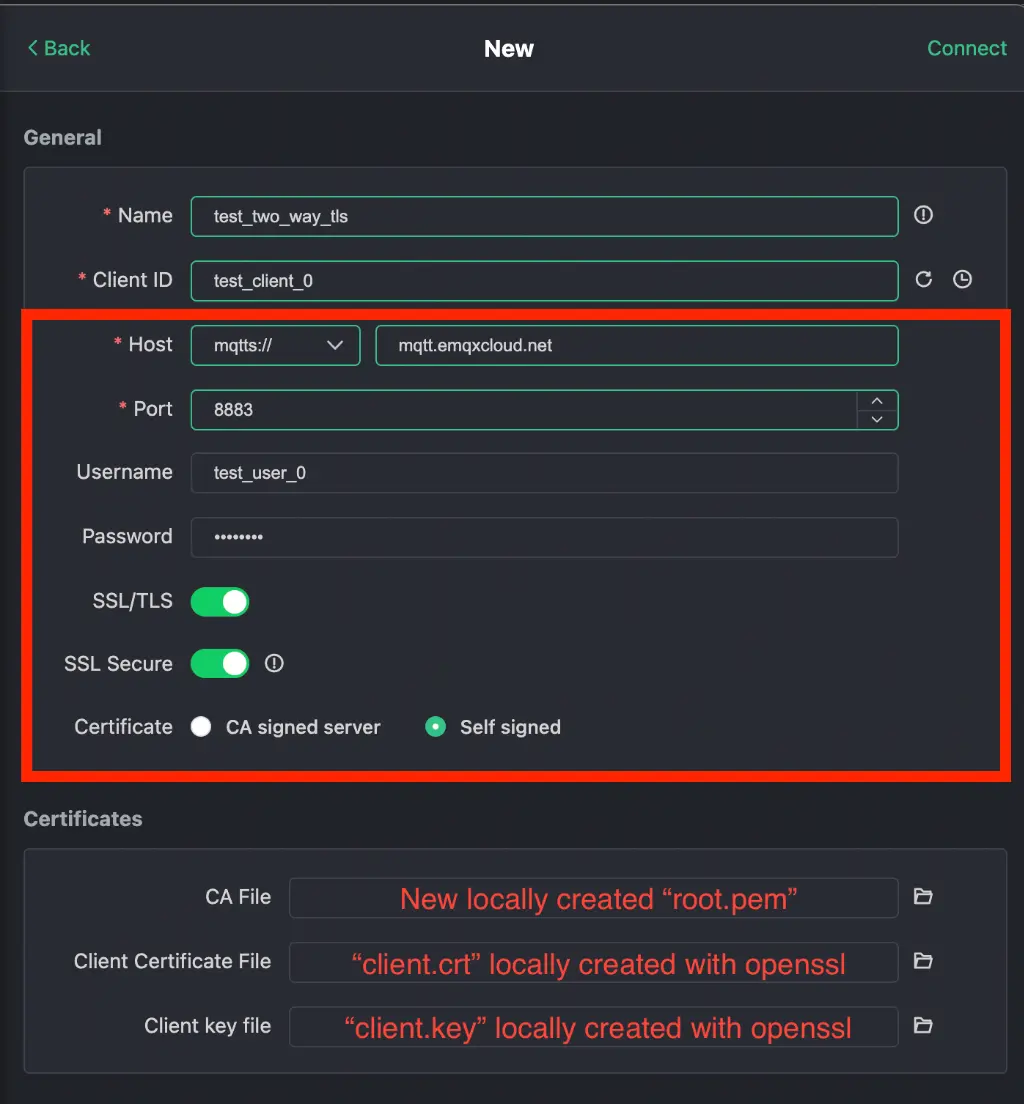
root.pemfile and add the root (last) certificate fromfullchain.pem. - Open MQTTX and create a new connection.
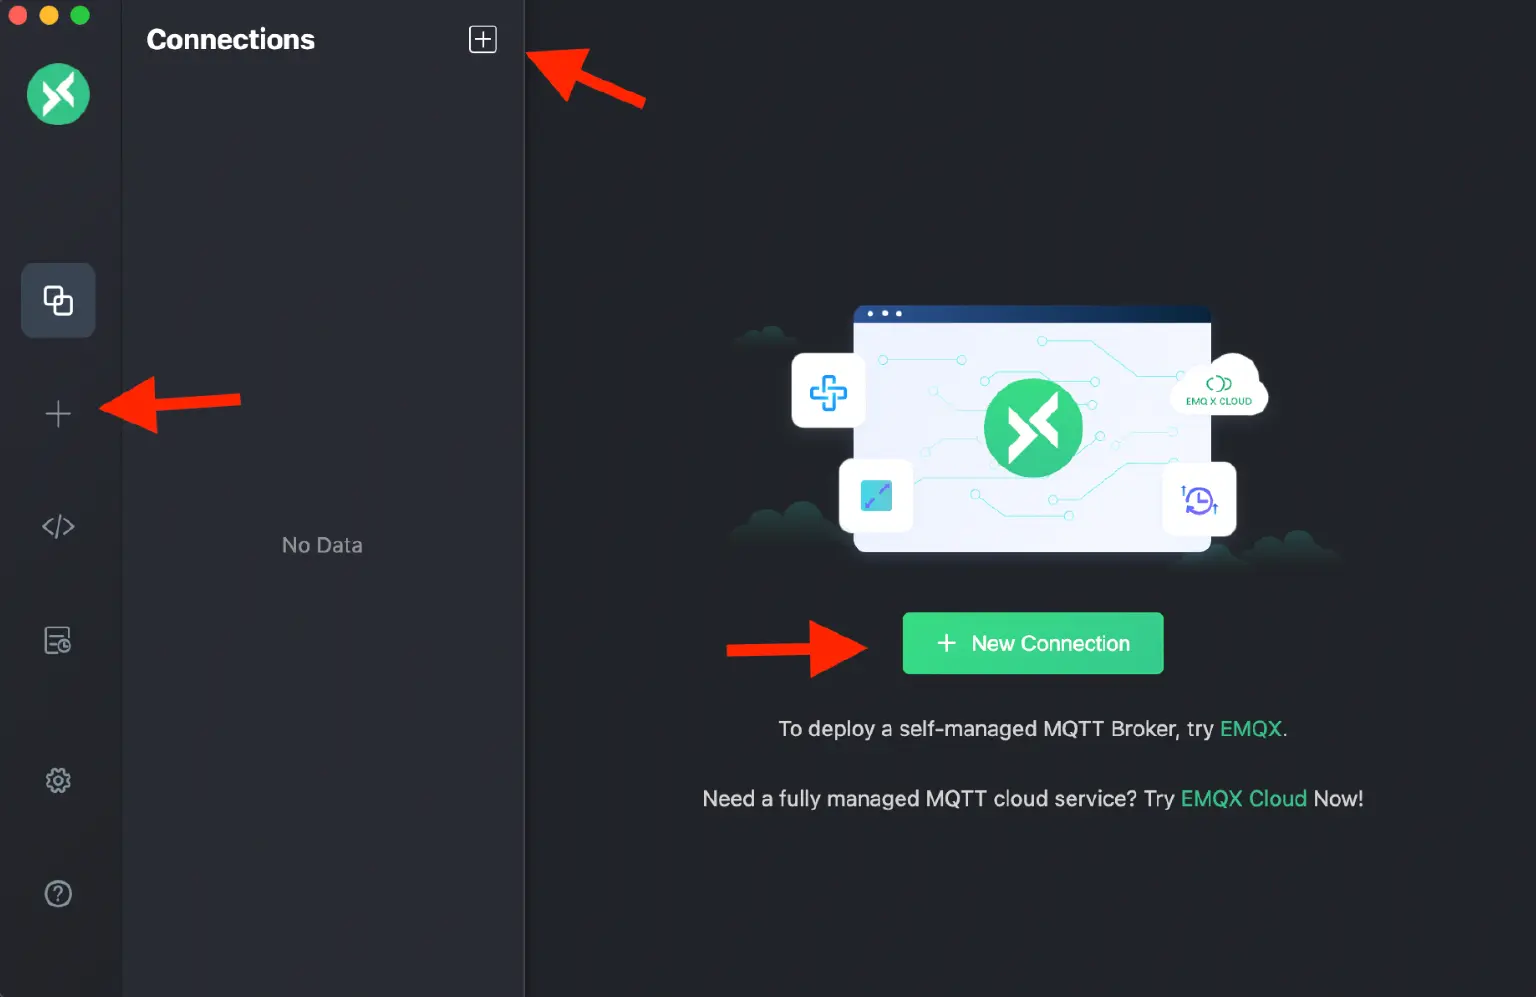
- Fill out the new connection prompt with the proper information and click "Connect".
- Host and Port: since TLS is being used, choose
mqtts://as well as port8883. The port number can be confirmed in the EMQX Cloud console. Do not forget to add the certified subdomain in the address field. - Username and Password: fill out with an existing EMQX Cloud deployment user (see step 1).
- Enable both SSL options.
- Certificate: Choose self signed.
- Certificates:
- CA File:
root.pemmanually created from the Let's Encrypt certificates. - Certificate Client File:
client.crtlocally created previously with openssl. - Client key file:
client.keylocally created previously with openssl.
- Host and Port: since TLS is being used, choose
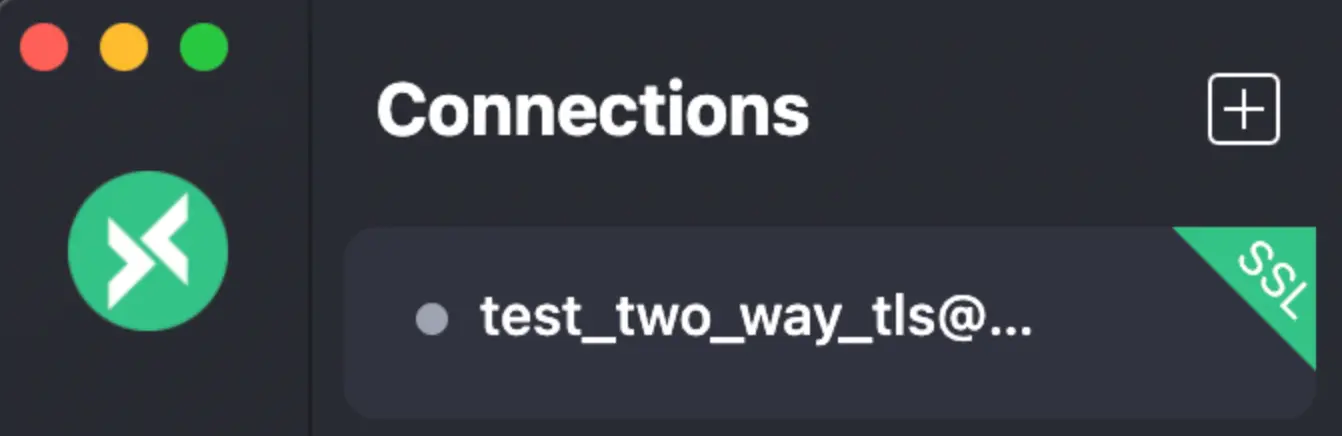
- Once the connection is successful, a green "SSL" sign should appear and the two-way TLS/SSL is fully configured and ready to be used. It can be further tested by subscribing to a topic then sending a message to the same topic.
If you get a "Error: unable to get issuer certificate" message, download the ISRG Root X1 Self-signed certificate and use it in the MQTTX "CA file" field. The error occurs because Let's Encrypt's default root certificate is itself certified with an older CA that recently expired, causing some devices to no longer trust it. More information here.
Next steps
Now we have finished setting up a two-way TLS authentication for an EMQX Cloud with a custom domain from Route 53 certified by Let’s Encrypt, tested with MQTTX. Two-way TLS/SSL can provide an important layer of security for communication over the internet, helping to protect sensitive information and prevent attacks.
Continue exploring what EMQX Cloud has to offer:
- Use Python to connect to EMQX Cloud.
- Persist data and connect to other services with Data Integrations.
- Access EMQX functions via REST API.
For more about EMQX Cloud, please check our documentation, GitHub, Slack channel, and forum! For questions, comments, or suggestions, please contact us at cloud-support@emqx.io.